How to Create a Custom App in Shopify?
Updated 18 February 2026
When you install the Shopify Salesforce Connector, one of the steps is to create a custom app in Shopify.
These steps are crucial for accessing Shopify store data using Shopify APIs. Without it, the connector cannot read or sync your store data.
If you follow along carefully, the setup takes only a few minutes.
Let’s walk through it.
Before You Start
Make sure: You are logged in as the store owner or have full admin access.
Step 1: Enable Custom App Development
Shopify hides custom app creation by default. You must turn it on first.
-
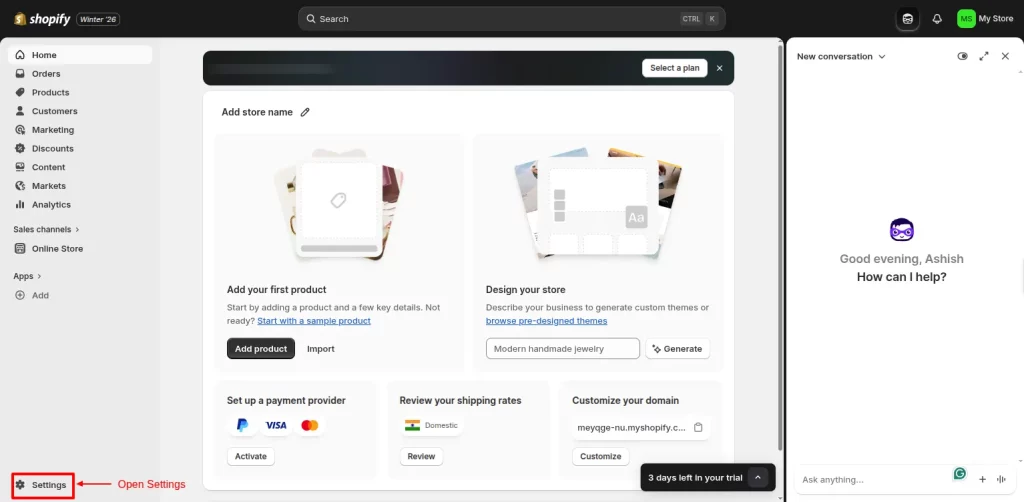
Open your Shopify Admin
-
Click Settings (bottom left corner)
-
Go to Apps
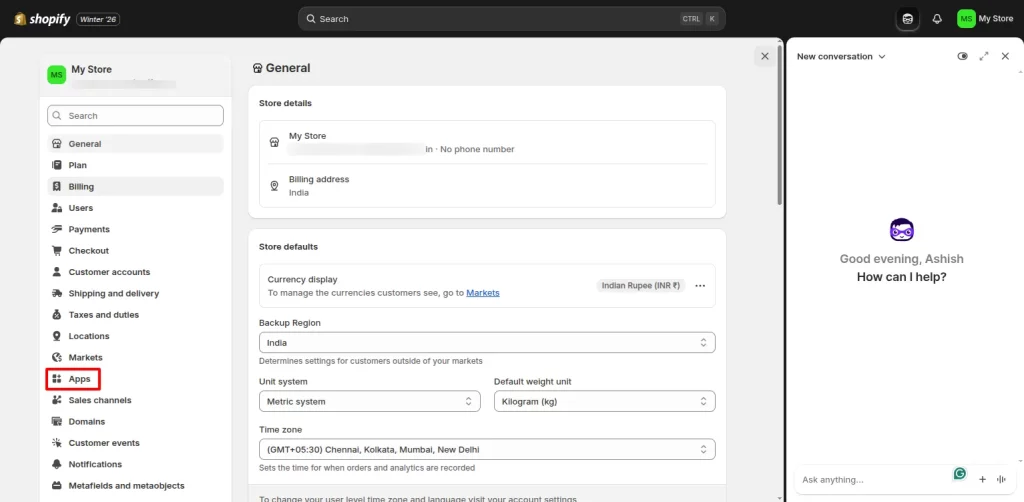
- Further, click on the Develop App button to create a new App.
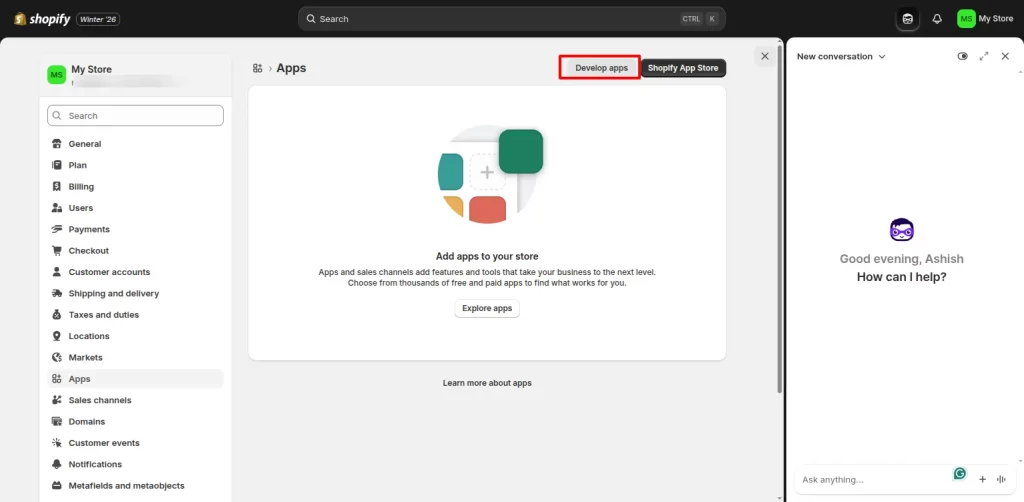
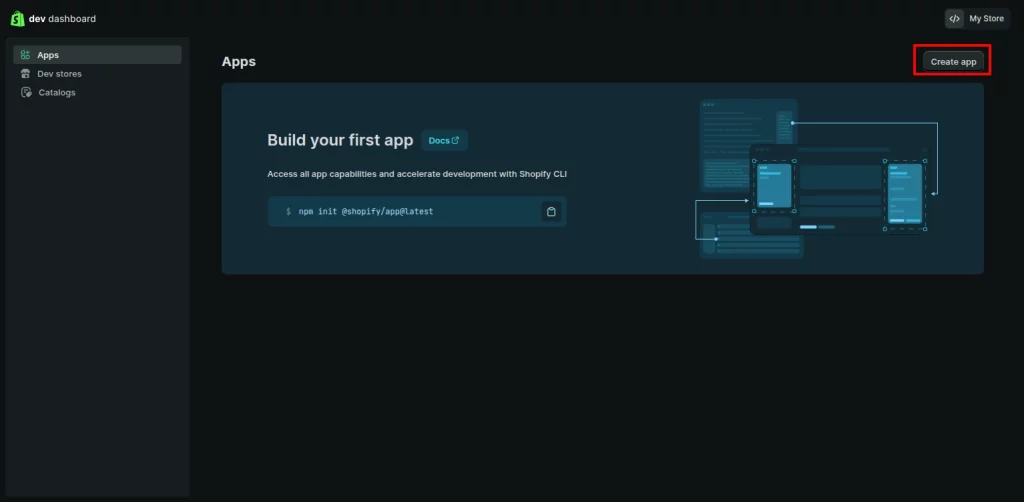
Step 2: Create a Custom App In Shopify
- Click on Build Apps in Dev Dashboard.
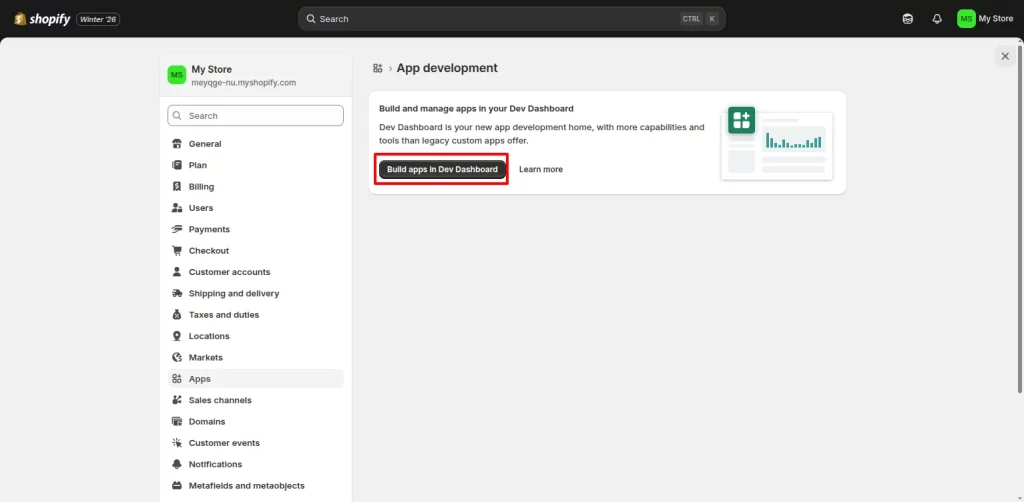
-
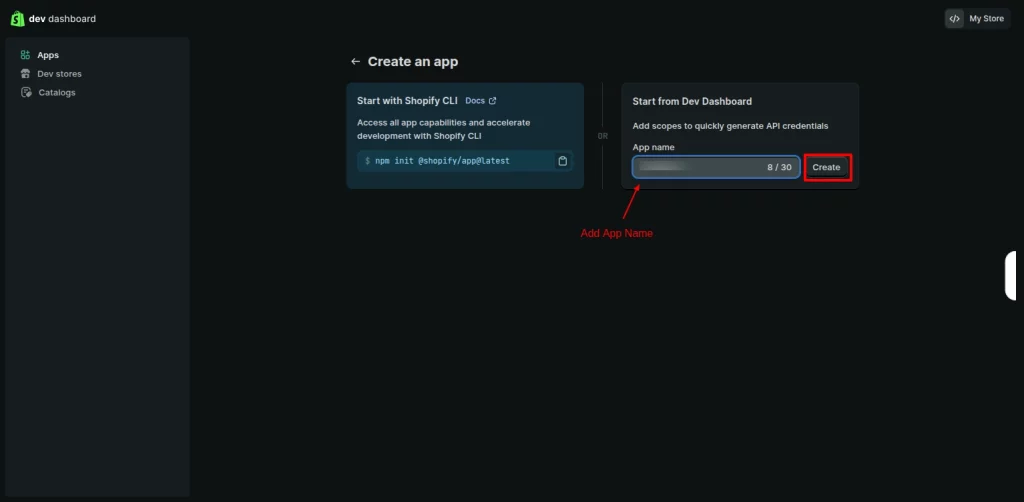
Select Create an app.
-
Enter an app name. Example: eShopSync
- Next, click on the Create button.
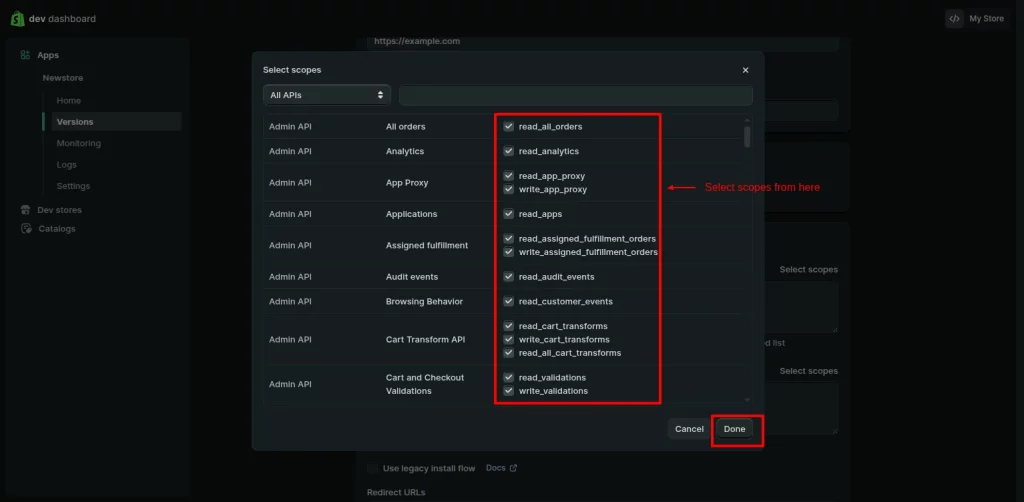
Step 3: Configure Permissions
The connector needs specific access to read and sync Shopify data.
- In this new window, under Access>Select Scope. A pop-up window will open, and then provide the following scope permissions mentioned in the table below.
| Scopes | Write | Read |
|---|---|---|
| Assigned fulfillment orders | write_assigned_fulfillment_orders | read_assigned_fulfillment_orders |
| Custom_fulfillment_services | write_custom_fulfillment_services | read_custom_fulfillment_services |
| Customers | write_customers | read_customers |
| Discounts | write_discounts | read_discounts |
| Draft orders | write_draft_orders | read_draft_orders |
| Fulfillment services | write_fulfillments | read_fulfillments |
| Gift cards | write_gift_cards | read_gift_cards |
| Inventory | write_inventory | read_inventory |
| Locations | write_locations | read_locations |
| Merchant-managed fulfillment orders | write_merchant_managed_ fulfillment_orders |
read_merchant_managed_ fulfillment_orders |
| Order editing | write_order_edits | read_order_edits |
| Orders | write_orders | read_orders |
| Payment terms | write_payment_terms | read_payment_terms |
| Price rules | write_price_rules | read_price_rules |
| Product feeds | write_product_feeds | read_product_feeds |
| Product listings | write_product_listings | read_product_listings |
| Products | write_products | read_products |
| Purchase options | write_purchase_options | read_purchase_options |
| Returns | write_returns | read_returns |
| Shipping | write_shipping | read_shipping |
| Shop locales | write_locales | read_locales |
| Third-party fulfillment orders | write_third_party_fulfillment_orders | read_third_party_fulfillment_orders |
- Give permissions according to your requirements. After that, click on the Done button.
- Furthermore, in the same window, you will find the APP URL and the Redirect URL options.
- You will get these details while setting up the connector on the Salesforce end.
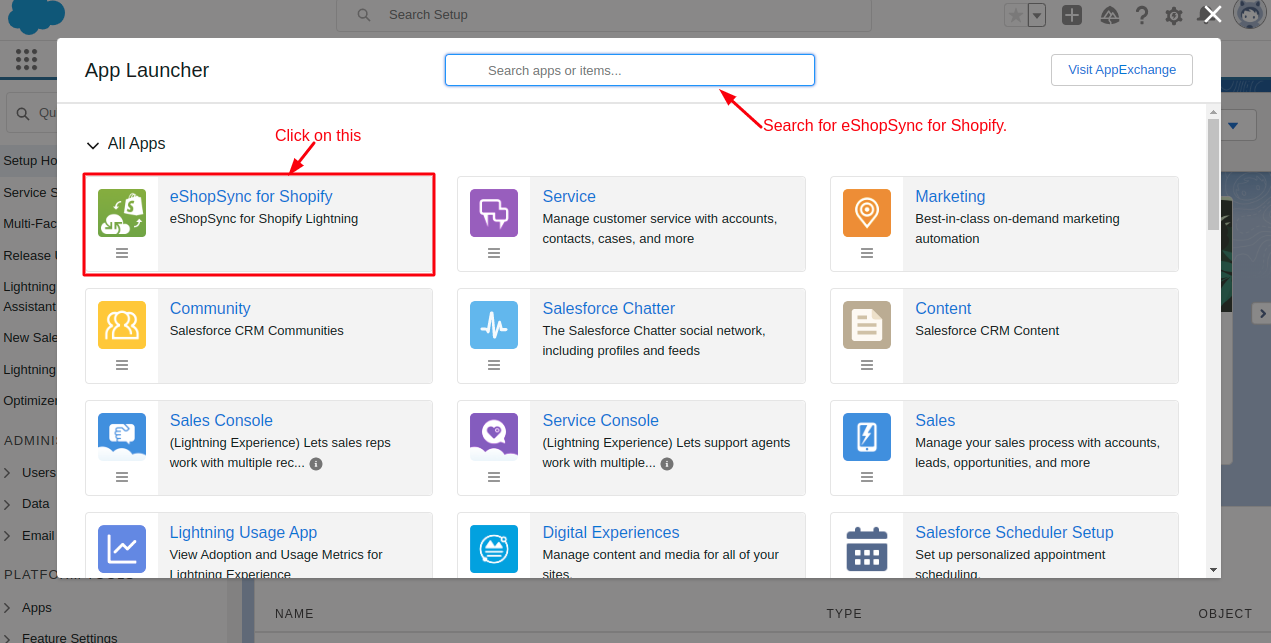
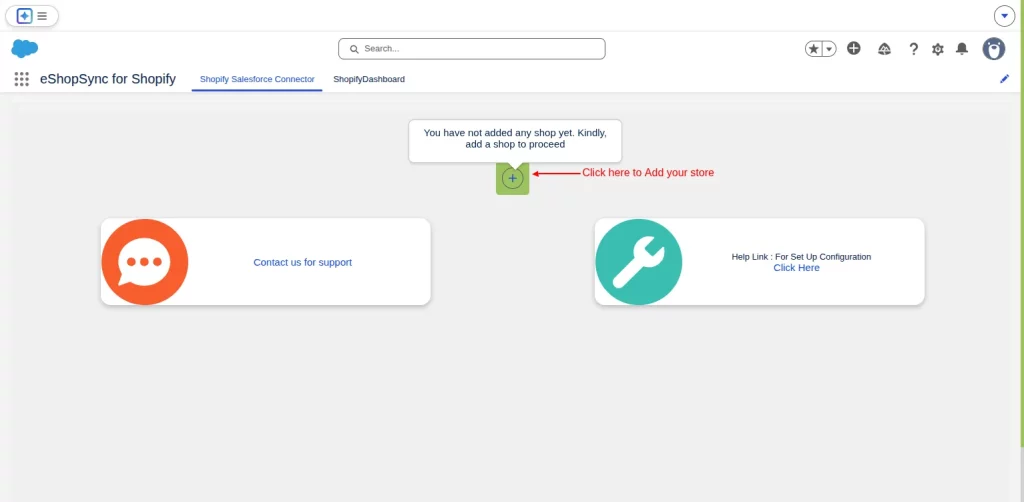
- For that, open your Salesforce Org, and go to the App menu, search for eShopSync for Shopify, and click on it to open.
- After that, add your Shopify store. Click on the Add button.
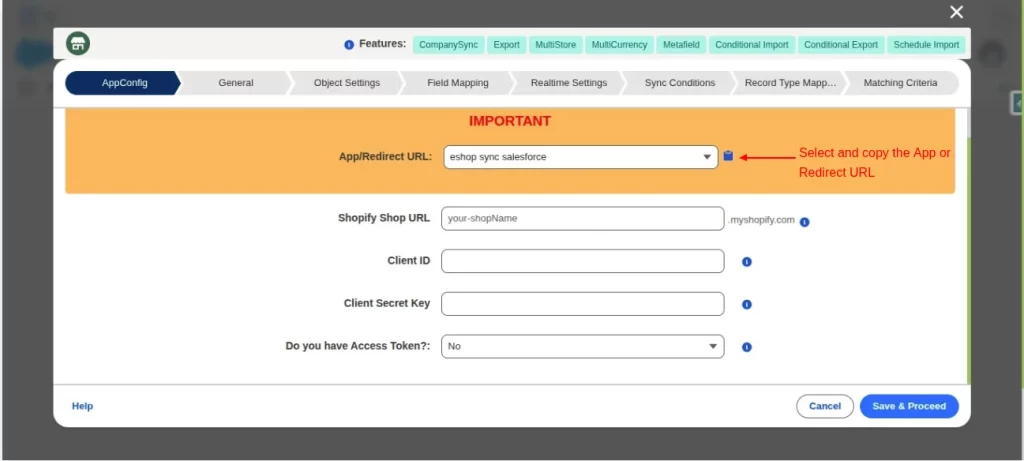
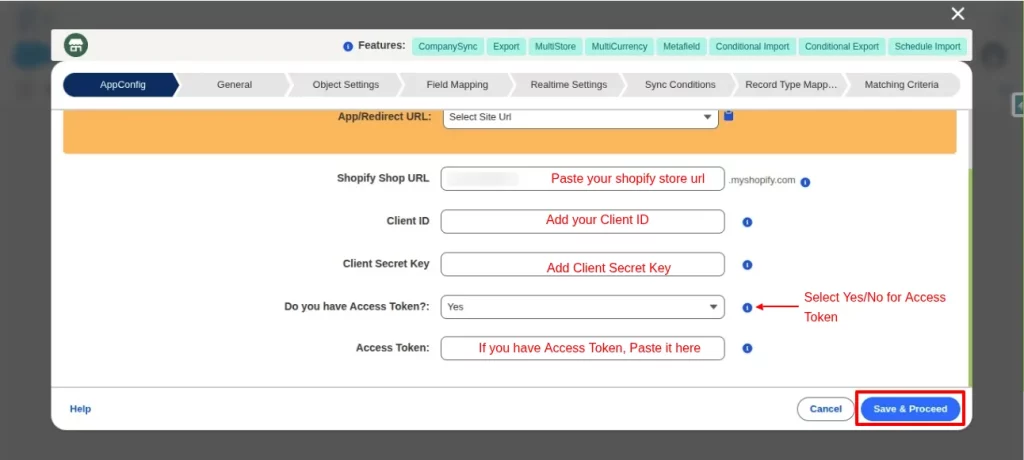
- Next, in the AppConfig window. Select and copy the App URL/Redirect URL. Remember, the rest of the options will be filled in the further steps.
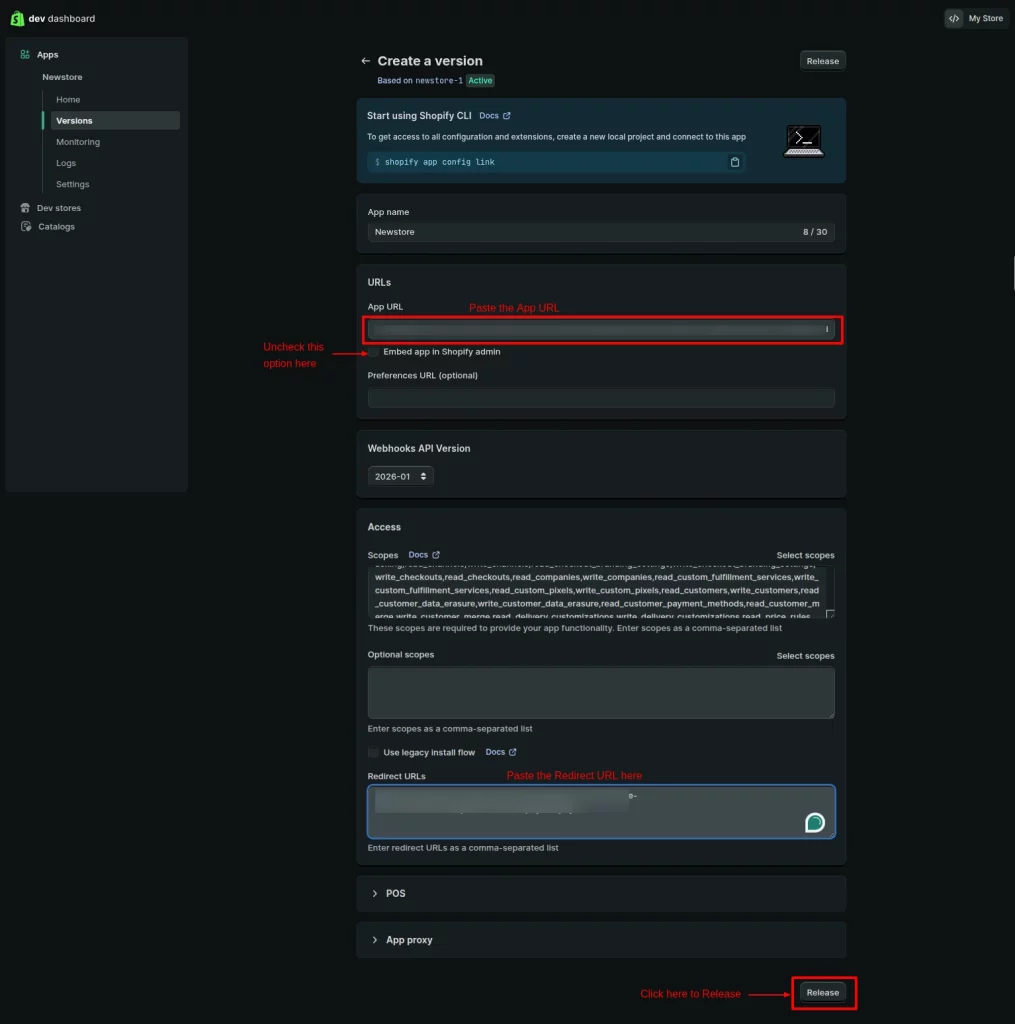
- Paste these copied URLs into the Shopify Custom App configuration. Uncheck the ‘Embed app in Shopify admin’ option below, then click on the Restore button.
Step 4: Copy Credentials
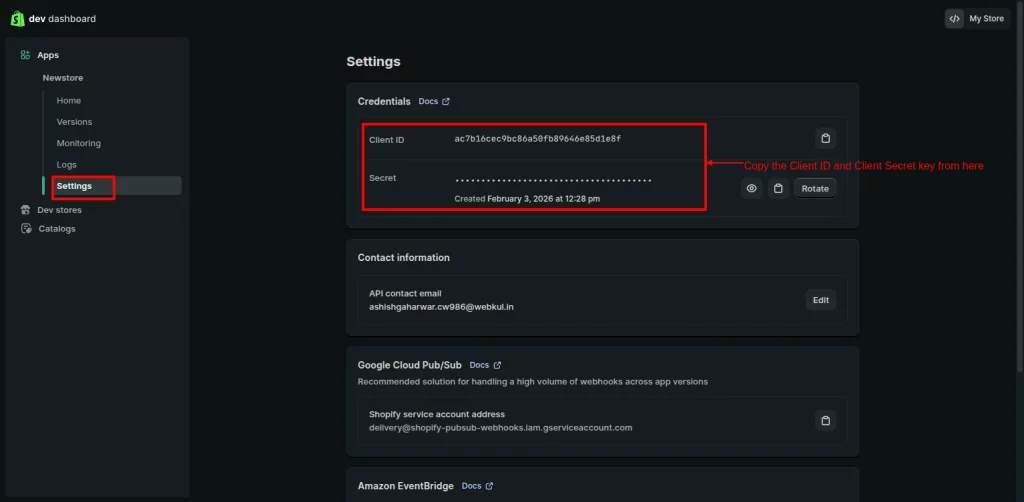
- After that, go to the Settings option in the same window to get the Client Id and Client Secret Key details.
- Copy these details to your clipboard.
- Now, paste these details into your connector’s AppConfig window, then Save & Proceed. If you don’t have an access token, you can leave the field empty. It will automatically fetch the details once you complete the configuration process.
- After setting up the AppConfig, resume the setup in the Shopify custom app configuration. Go to the Home option and click on the Install App.
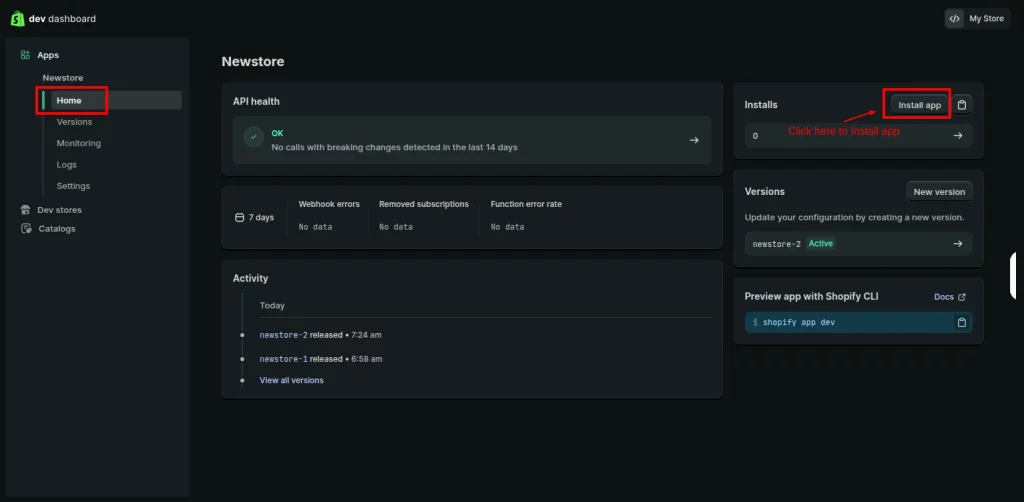
- It will open a new window. Here, click on your store link.

Lastly, it will redirect you automatically to the Eshopsync for Shopify app, indicating a successful setup. Then you could further continue with configuring the Shopify Salesforce Connector.
Support
If you run into trouble at any step, raise a ticket so the eShopSync support team can help you.

Be the first to comment.