Salesforce Marketing Cloud WooCommerce Connector Installation and Setup
Updated 14 October 2025
The Salesforce Marketing Cloud WooCommerce Connector is an extension that connects Salesforce Marketing Cloud with WordPress WooCommerce.
In this blog, we will cover the application’s installation and setup.
Some pre-requisites need to be taken care of, at the Salesforce Marketing Cloud end before installation of the add-on:
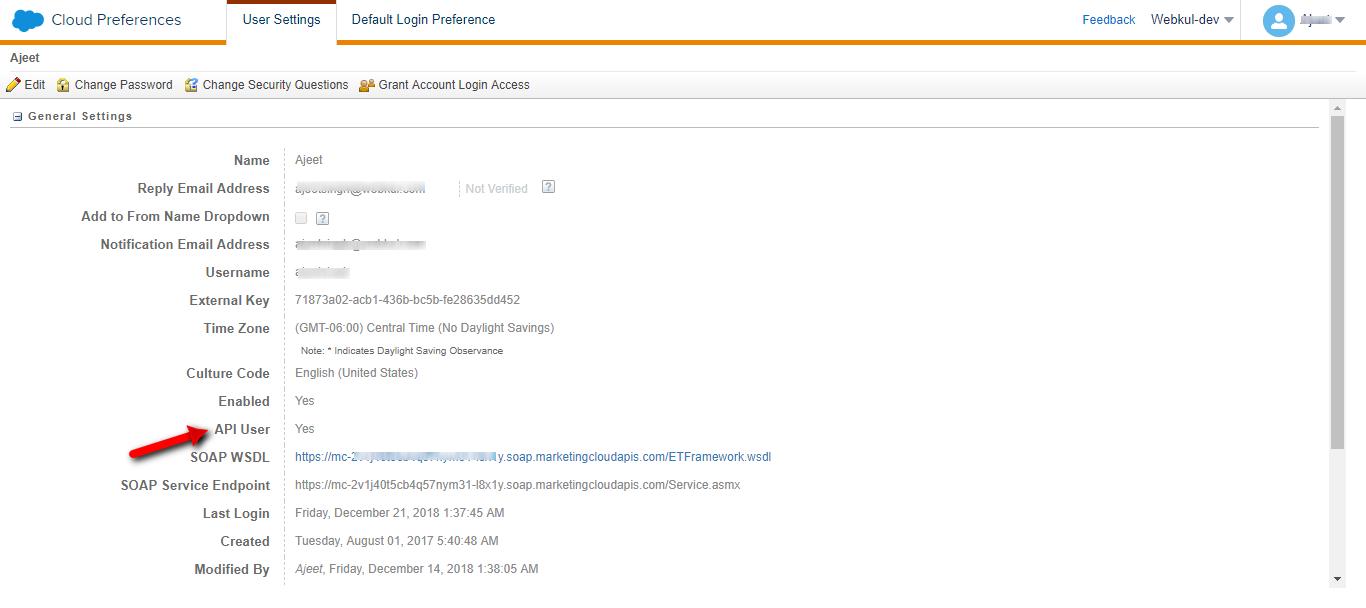
1. You need to have API User enabled in the “user” section.
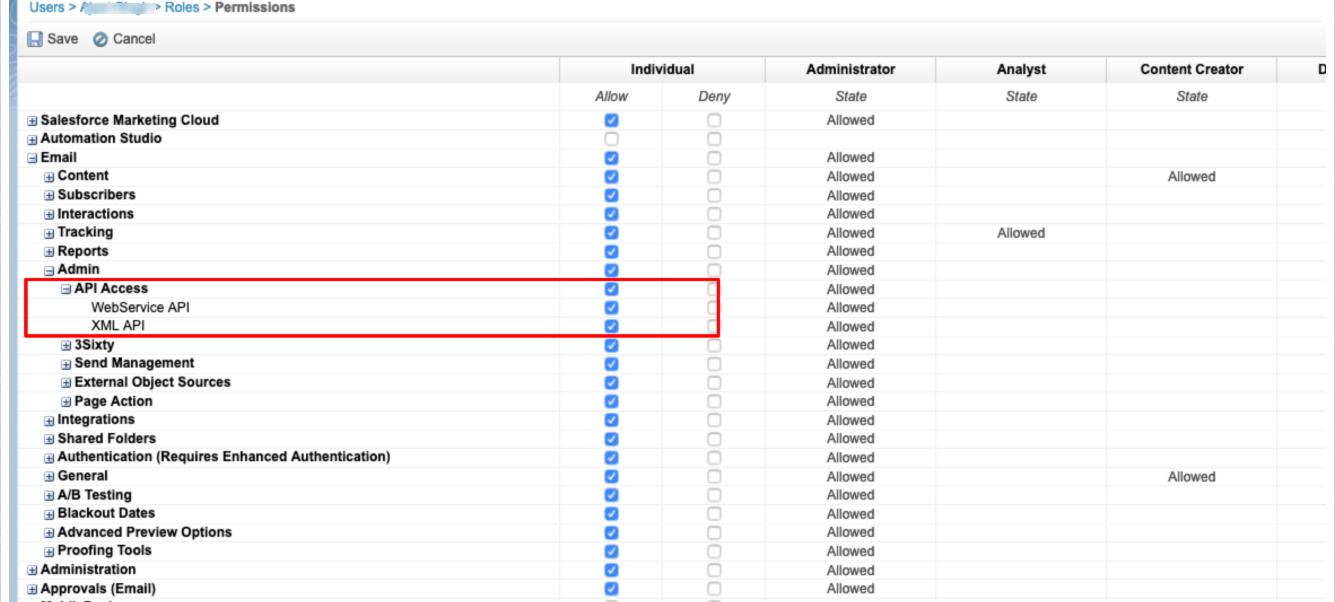
2. Now, you have to set the Grant The User Access To The WebService role for the user.
- Now at the WordPress WooCommerce end, you need to do the following setup:
-
Visit eShopsync For WordPress Woocommerce Extension
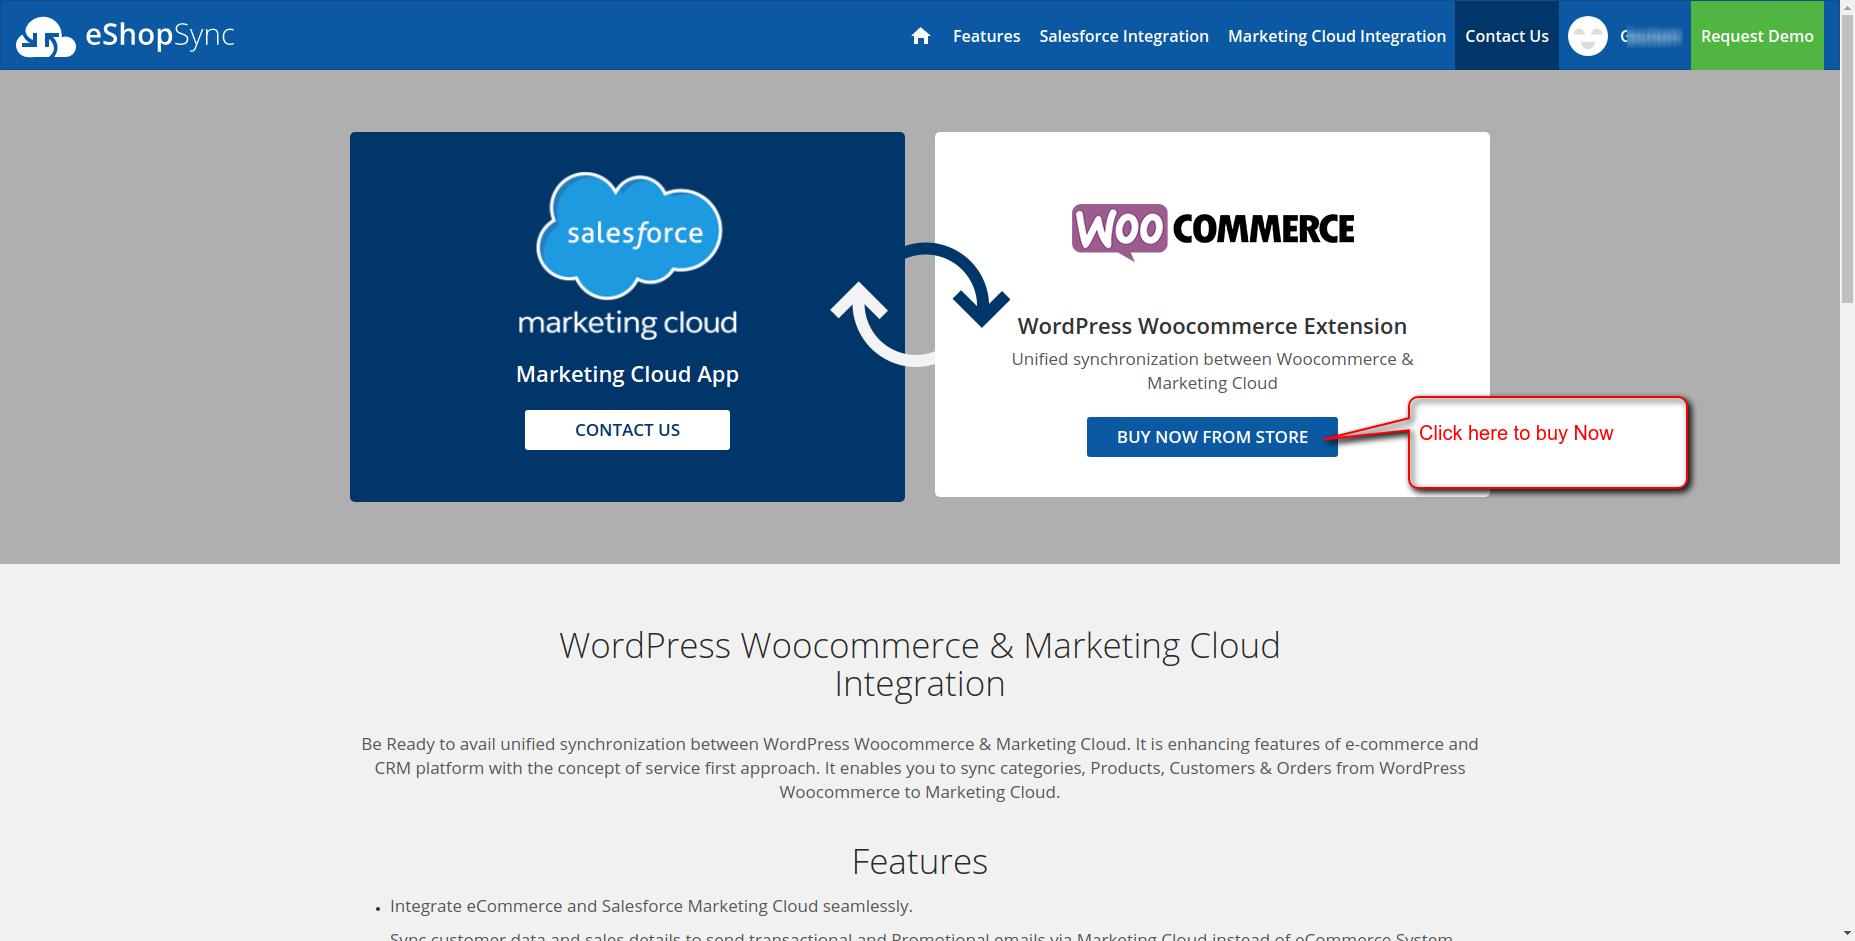
OR
Visit Our Online Store for WordPress Woocommerce connector

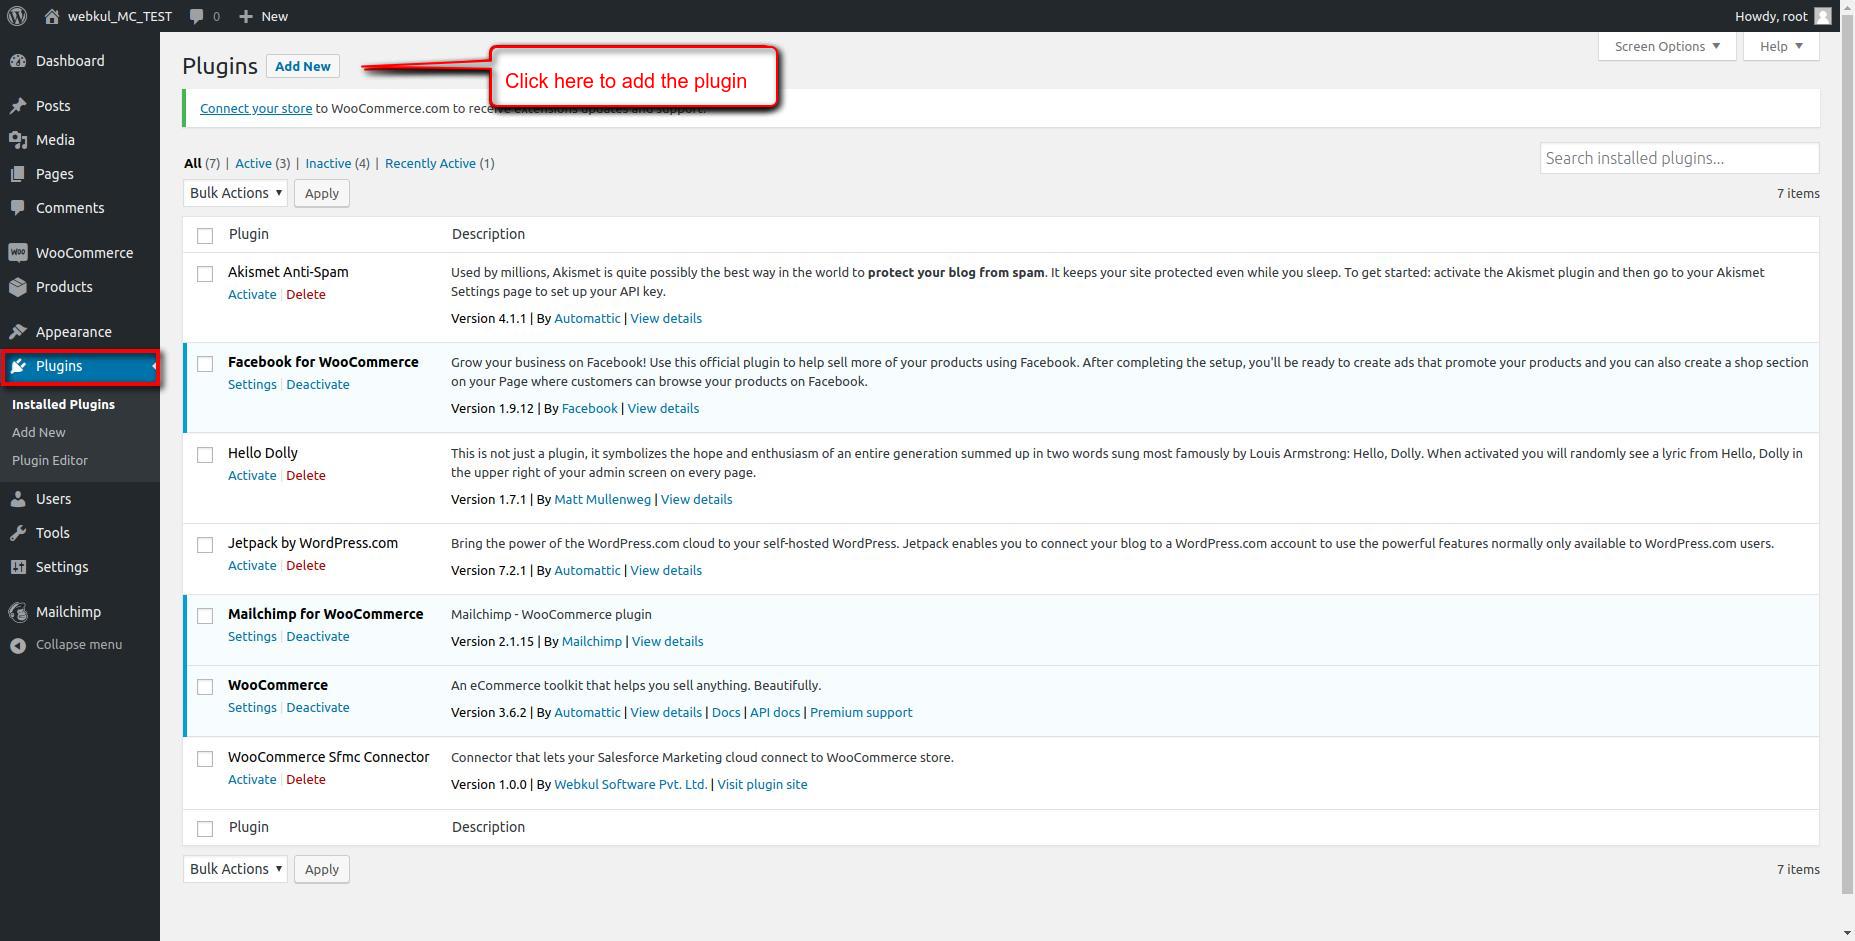
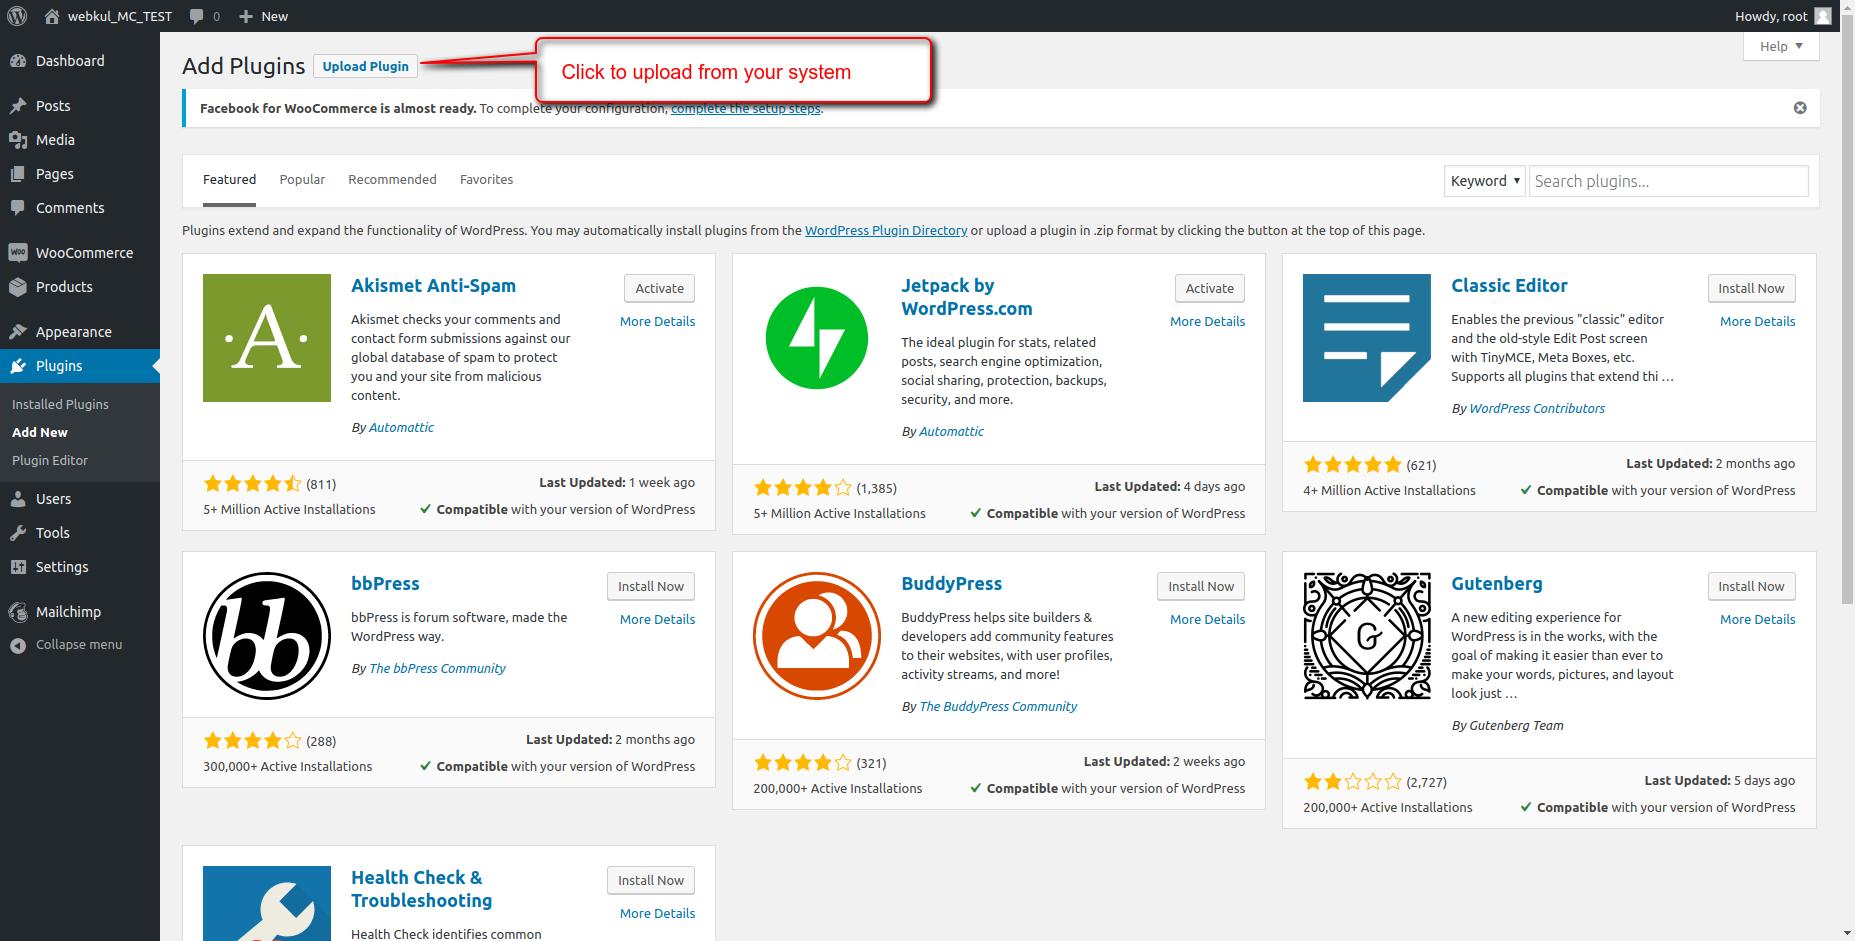
- Now, After purchasing the zip file, you have to upload the zip file on your WordPress WooCommerce site and follow the steps for the add-on installation.
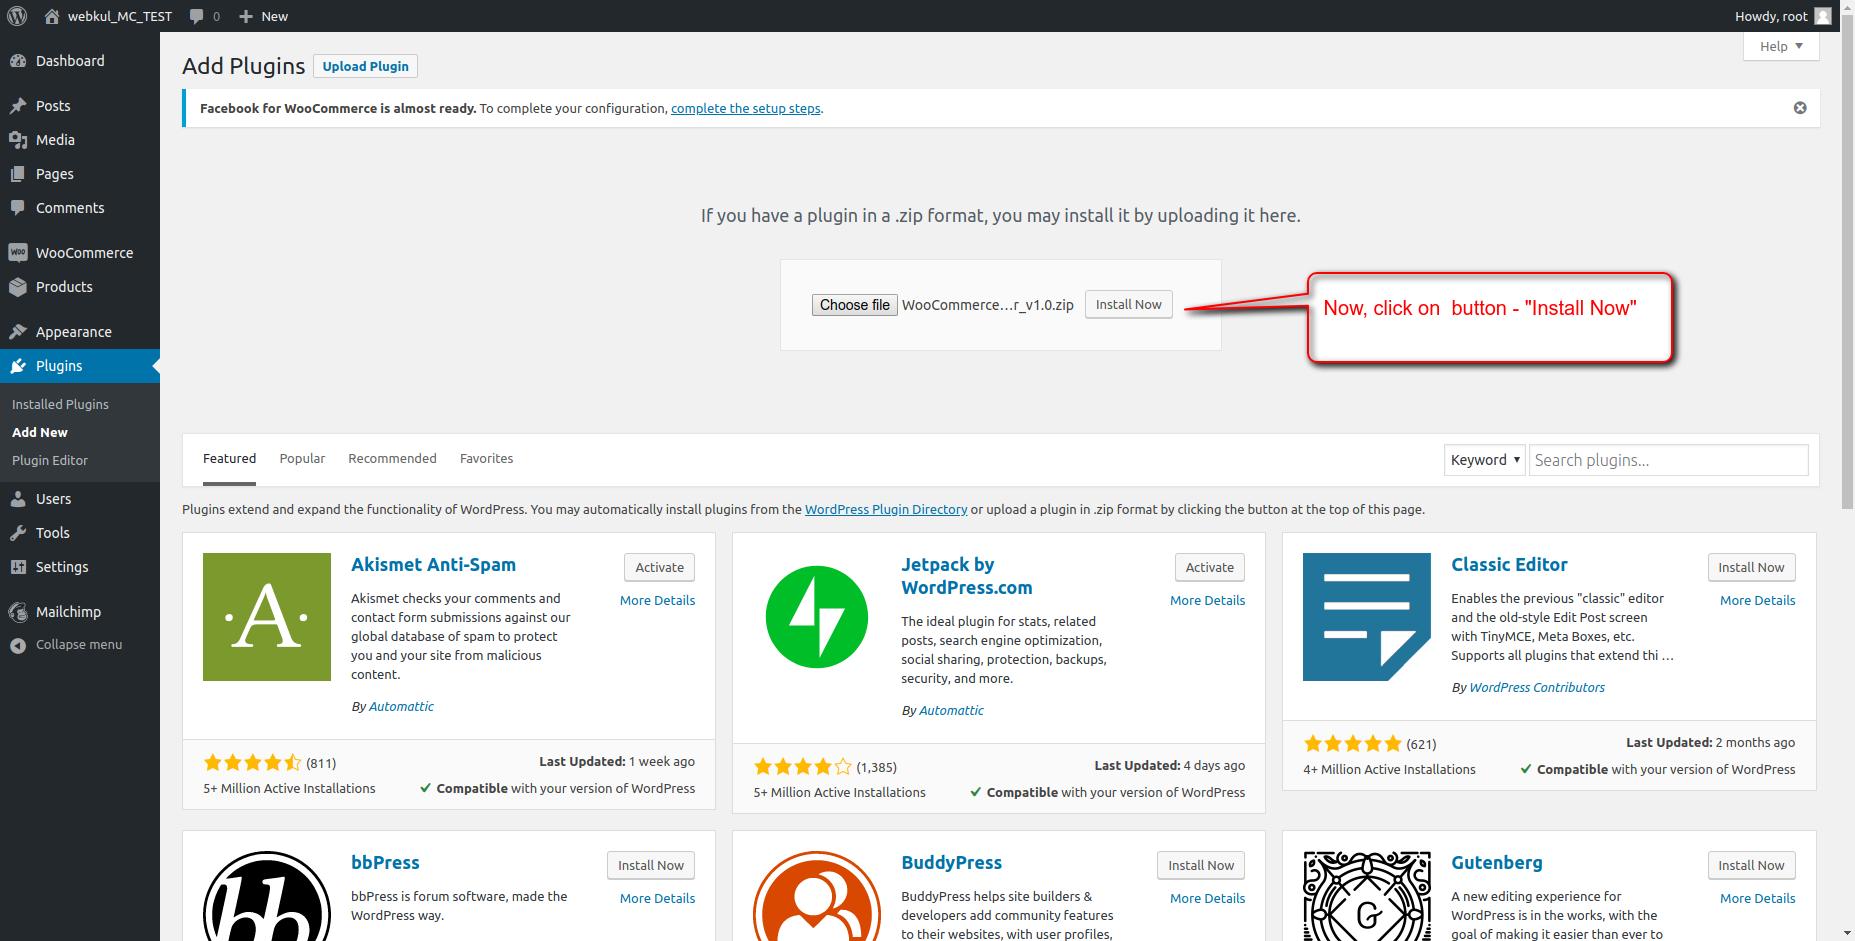

- Here you can see the application is installed successfully.
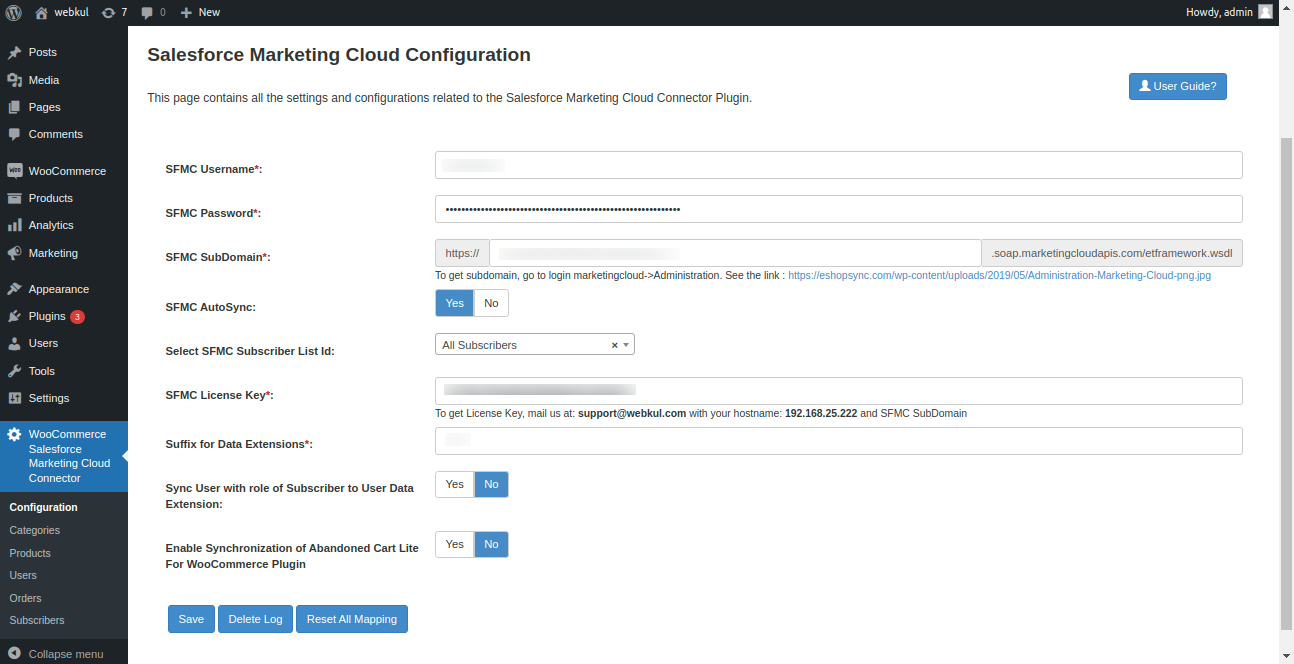
- In the configuration of the application you have to insert the SFMC Username, Password, and you have to specify the SFMC Mode and SubDomain. You also have the option to switch on the AutoSync and select SFMC list ID.
Synced Data View on SFMC end –

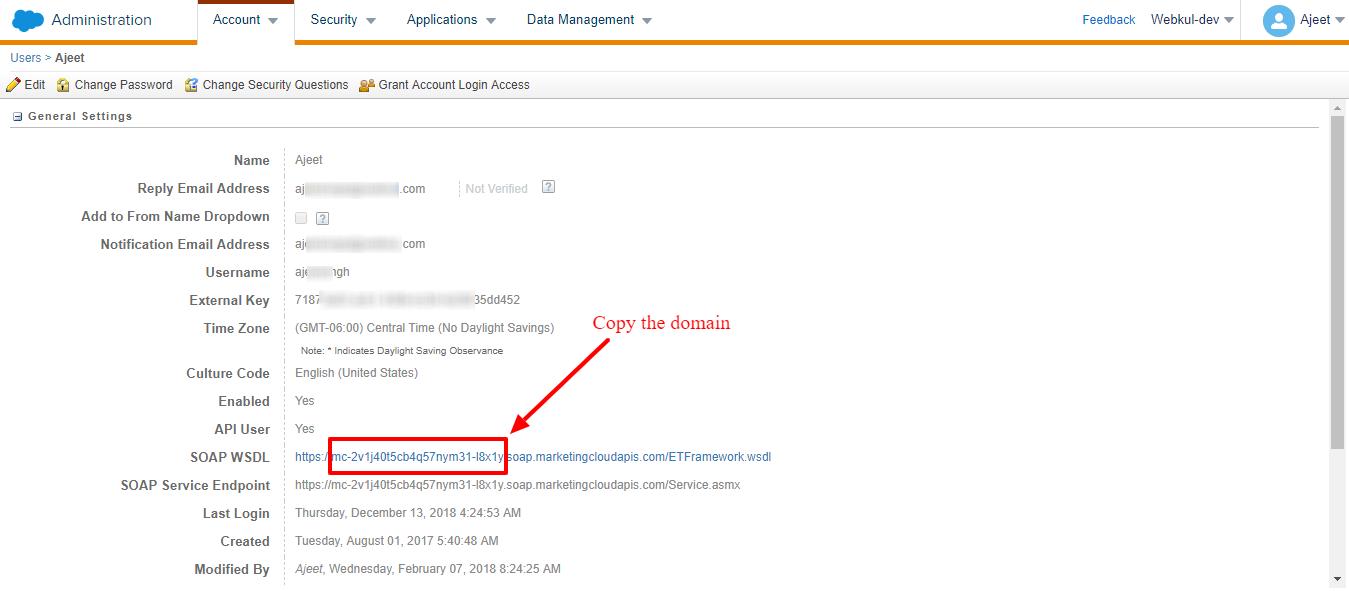
- To get the subdomain, go to Administrator-> Account -> Users -> Click on the username -> In the SOAP WSDL field just select and copy the domain and paste it into the SFMC Subdomain field.
-
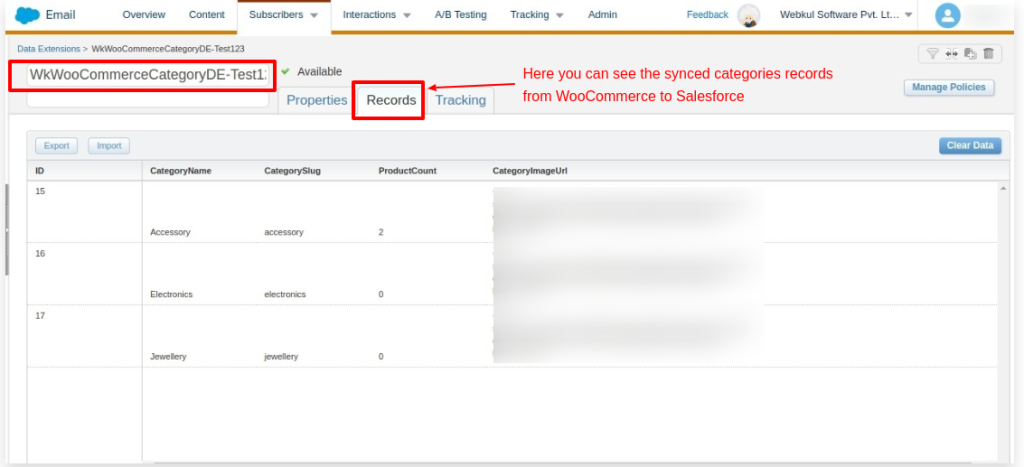
Sample presentation of how this connector works. Here let’s consider Category sync from your WordPress WooCommerce store to your Salesforce Marketing Cloud Org

-
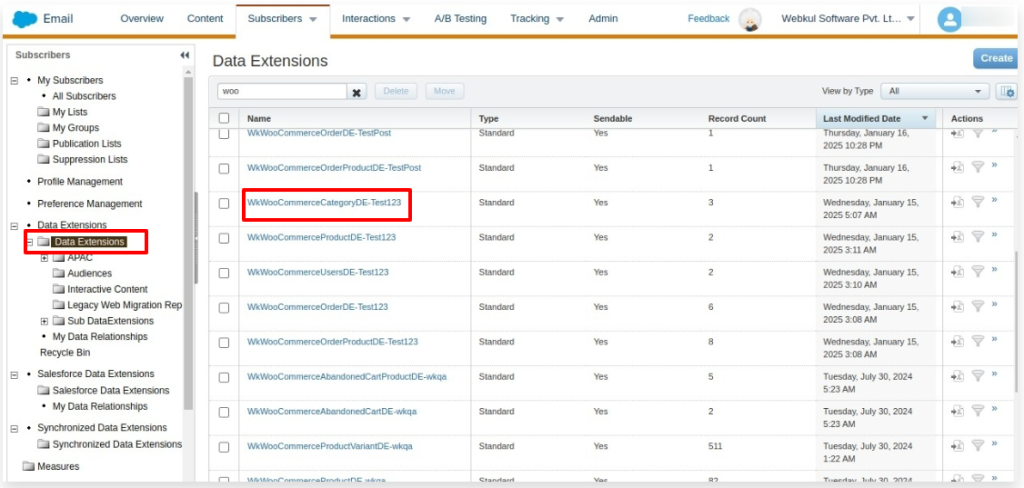
Now, please go to your Salesforce Marketing Cloud Org and “Subscribers”>>”Data Extensions”>> “WkWooCommerceCategoryDE” and then you will get the required data.
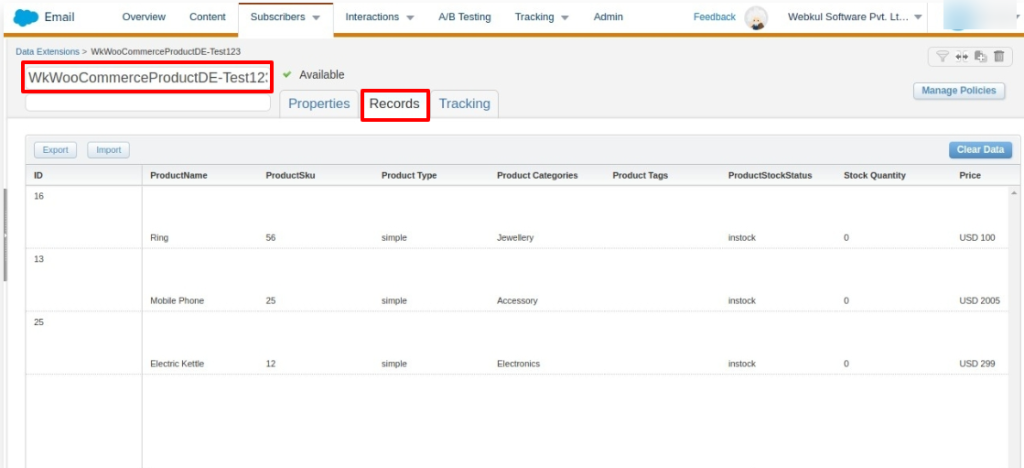
- Similarly, sync products from the WooCommerce Store to Salesforce Commerce Cloud.
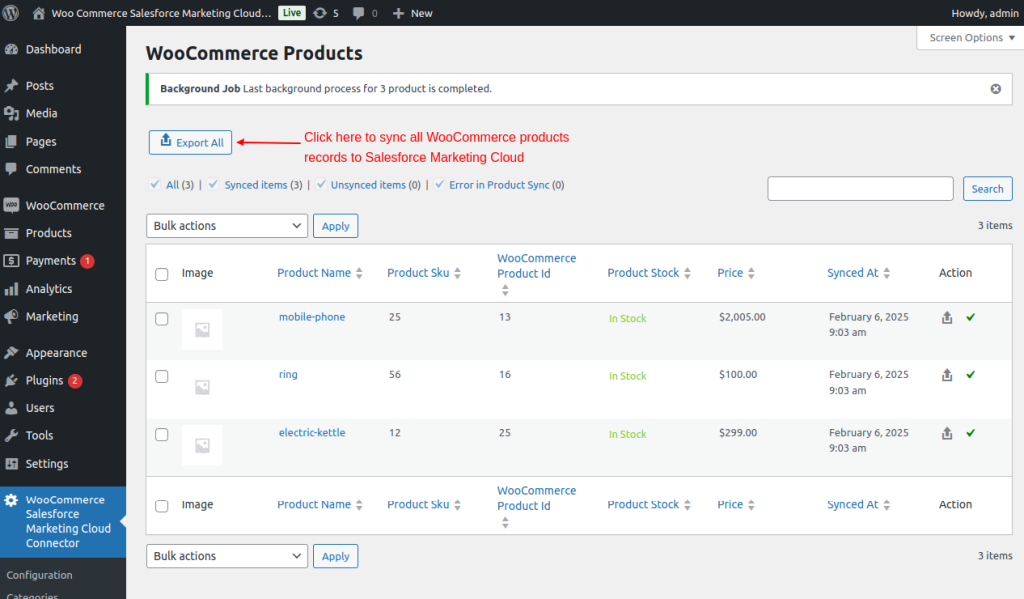
- Further to see your synced records, go to Salesforce Marketing Cloud Org and “Subscribers”>>” Data Extensions”>> “WkWooCommerceProductDE”
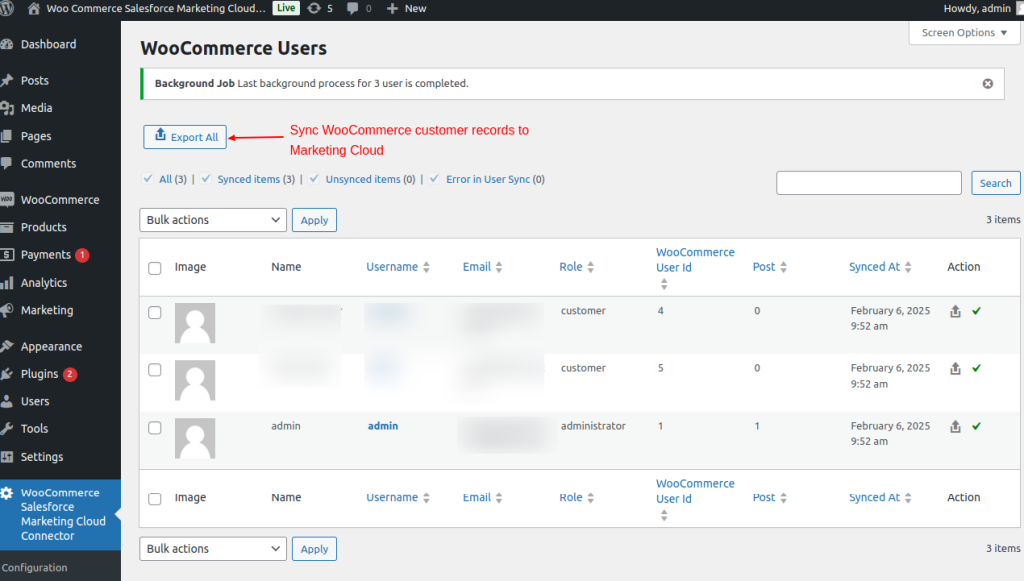
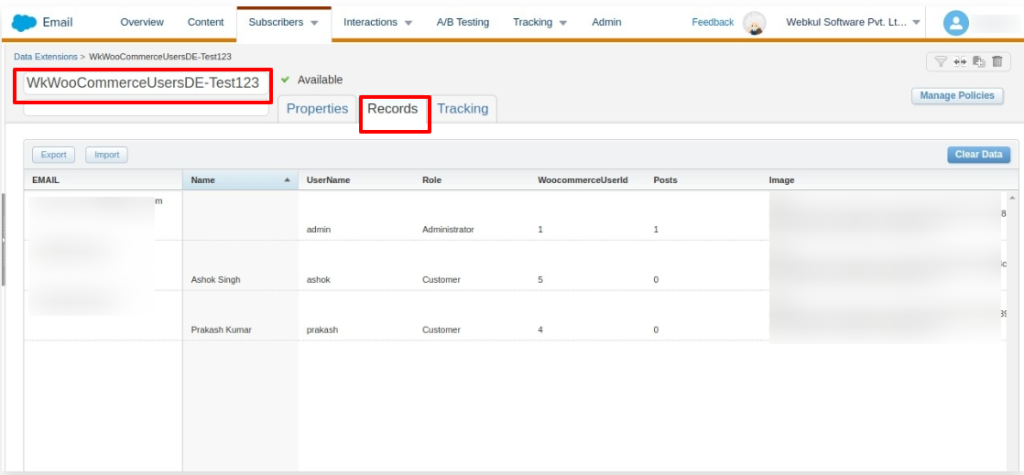
- Sync User records from WooCommerce to Marketing Cloud.
- Repeat the process to see your WooCommerce customer details in the Marketing Cloud. Under “Data Extensions,” select “WkWooCommerceUserDE.”
- For any further query, Click To Create Ticket
- To view all our applications in AppExchange, go to Webkul AppExchange Apps
Read More: Plans & Pricing For WooCommerce Salesforce Connector

Be the first to comment.