The Salesforce Marketing Cloud Magento2 Connector is an extension that connects Salesforce Marketing Cloud with Magento2.
Features of Salesforce Marketing Cloud Connector for Magento 2
- Seamlessly sync customer and sales data, allowing you to send marketing emails directly from Marketing Cloud instead of managing them through your eCommerce platform.
- With real-time updates, stay informed about customer activities, subscriber interactions, and order details, helping you improve engagement through personalized email campaigns, including:
- For a great first impression, send welcome emails to new users and thank-you emails after a purchase.
- To boost sales, provide smart recommendations for upselling, cross-selling, and product bundles based on order history.
- To enhance personalization, automate product suggestions tailored to each customer’s journey.
- To increase customer loyalty, send reward emails and exclusive promotional offers.
- To maximize conversions, deliver targeted discount and coupon emails, ensuring the right customers receive the right offers at the perfect time.
- Moreover, setting up automated marketing campaigns in Journey Builder becomes effortless with real-time data from your Magento 2 store, seamlessly synced with Salesforce Marketing Cloud.
- Behind the scenes, the background process runs smoothly using AutoSync and Export All features, leveraging Magento’s Native MySQL Message Queue mechanism for optimal performance.
In this blog, we will cover the application’s installation and setup.
How to Connect :
Some pre-requisites need to be taken care of, at the Salesforce Marketing Cloud end before installation of the add-on:
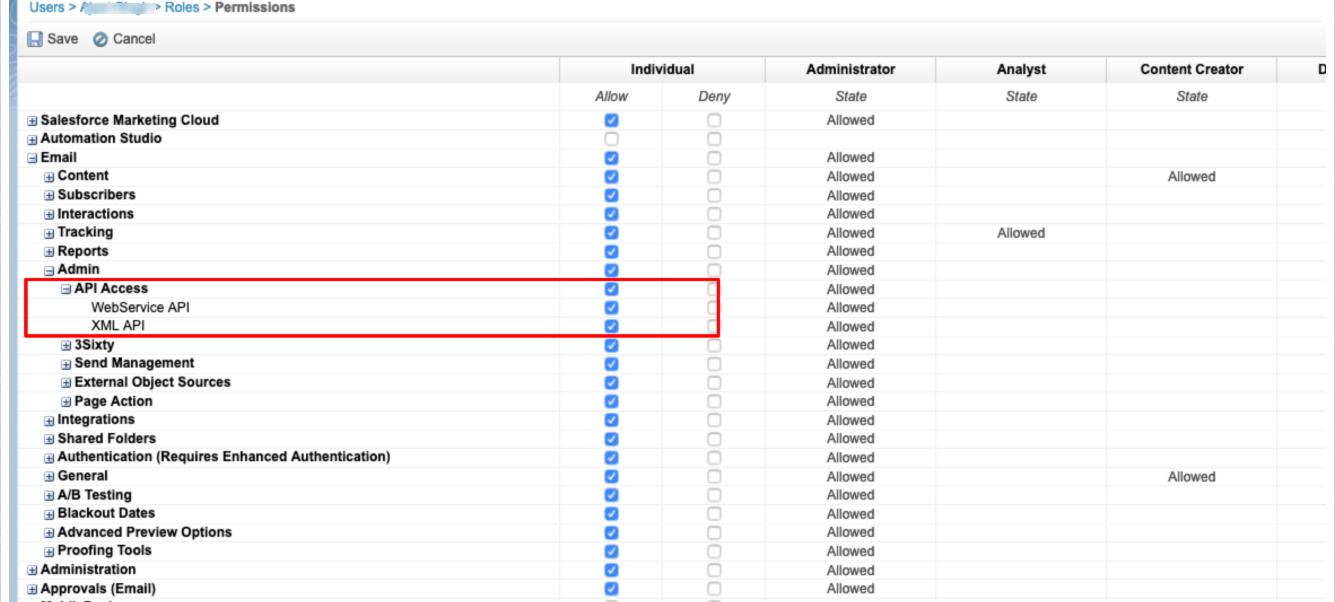
You need to have API User enabled in the “user” section.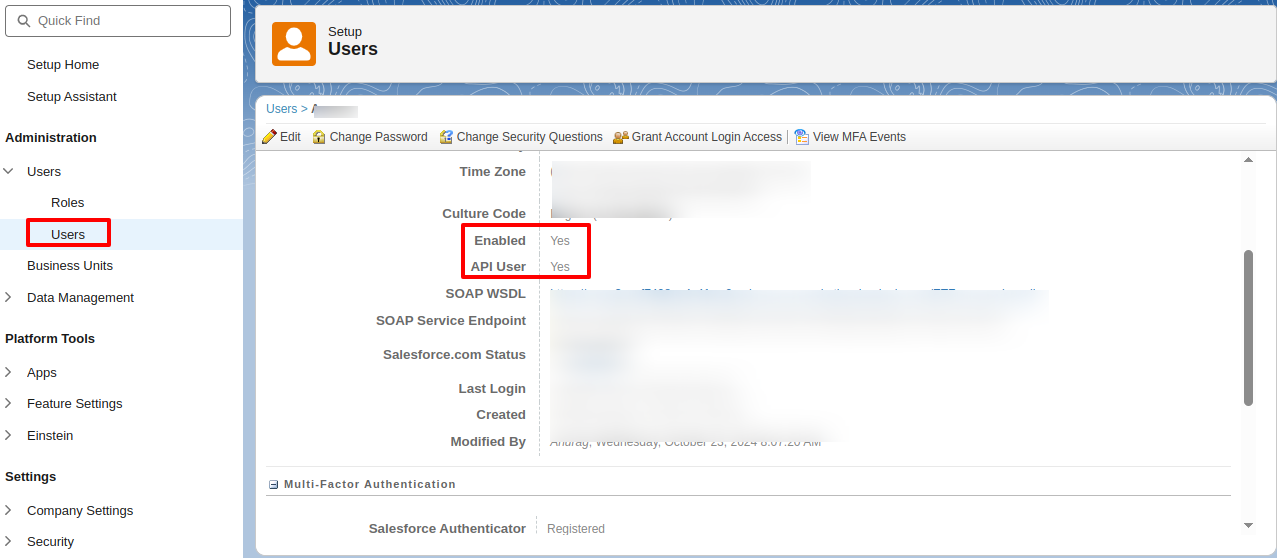 Now, you have to set the Grant The User Access To The WebService role for the user.
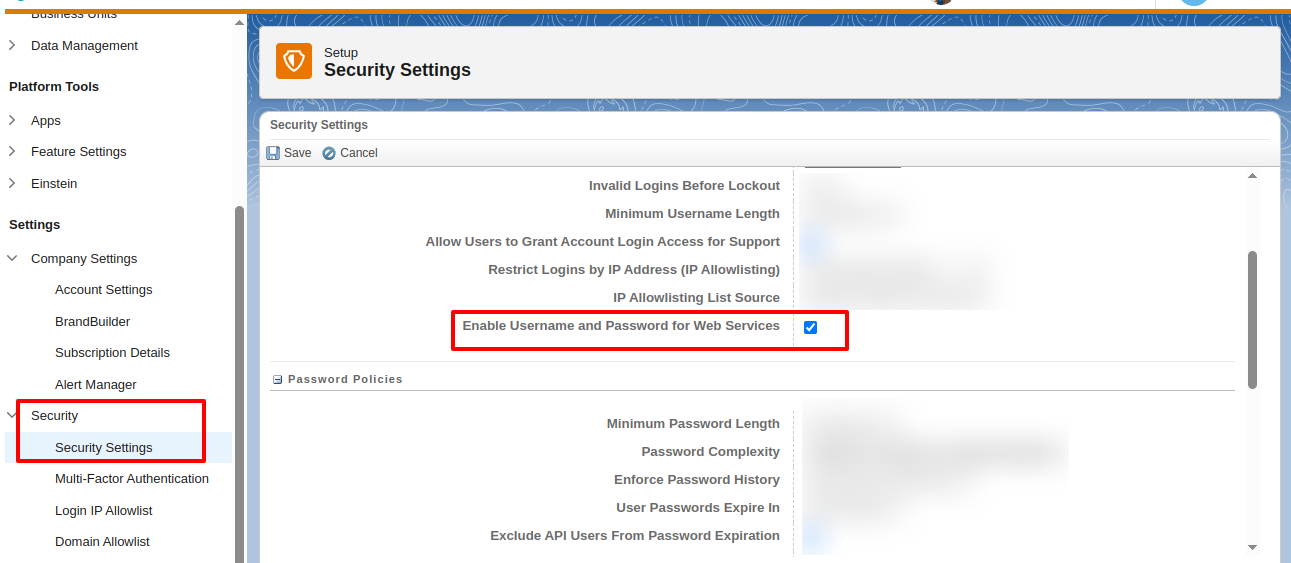
Go to your Security Settings and enable the Username and Password for Web Services.
Now at Magento2 end, you need to do the following setup:
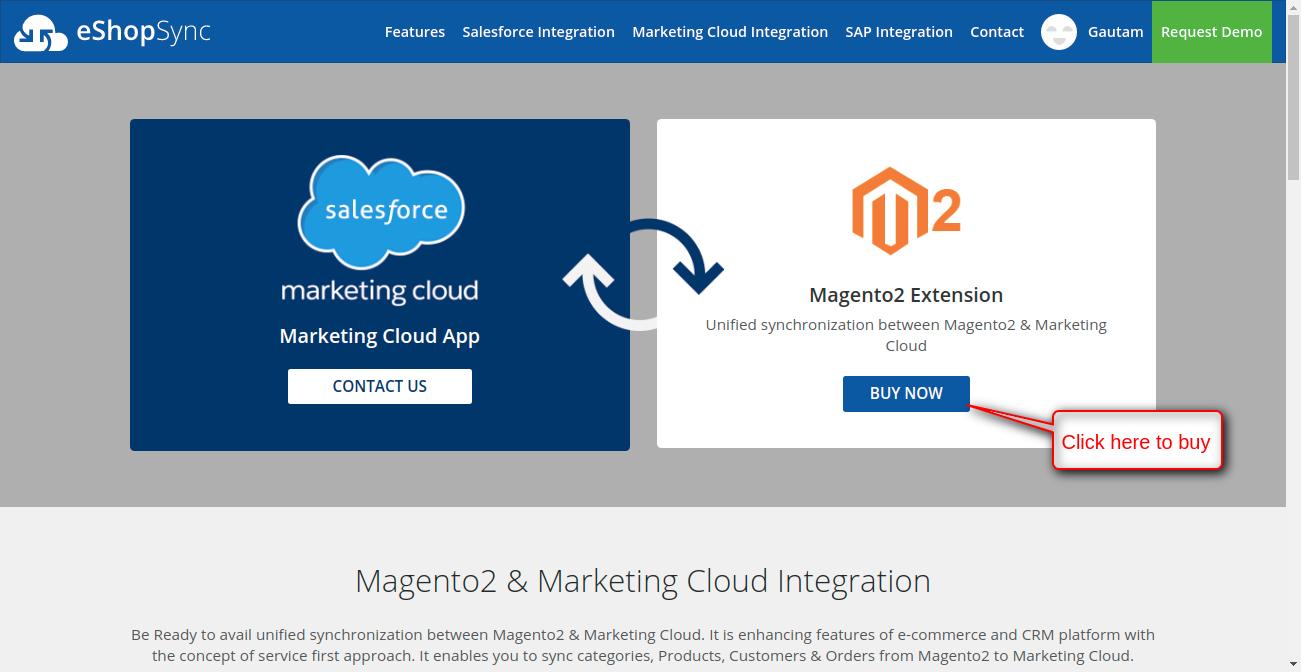
OR
- Visit: Magento2 & Marketing Cloud Connector
- After purchasing the zip file, you need to upload it to your Magento2 site and then follow the steps for installing the add-on.
- Once the customers receive the zip folder, they must extract it on their system. Inside the extracted folder, you will find an
srcfolder, and within that, theappfolder.
Finally, transfer this app folder to the Magento2 root directory on your server, as shown below. After the successful installation, you have to run these commands in the Magento2 root directory.
- First command- php bin/magento setup:upgrade
 Second Command – php bin/magento setup:di:compile
 Third Command – php bin/magento setup:static-content:deploy
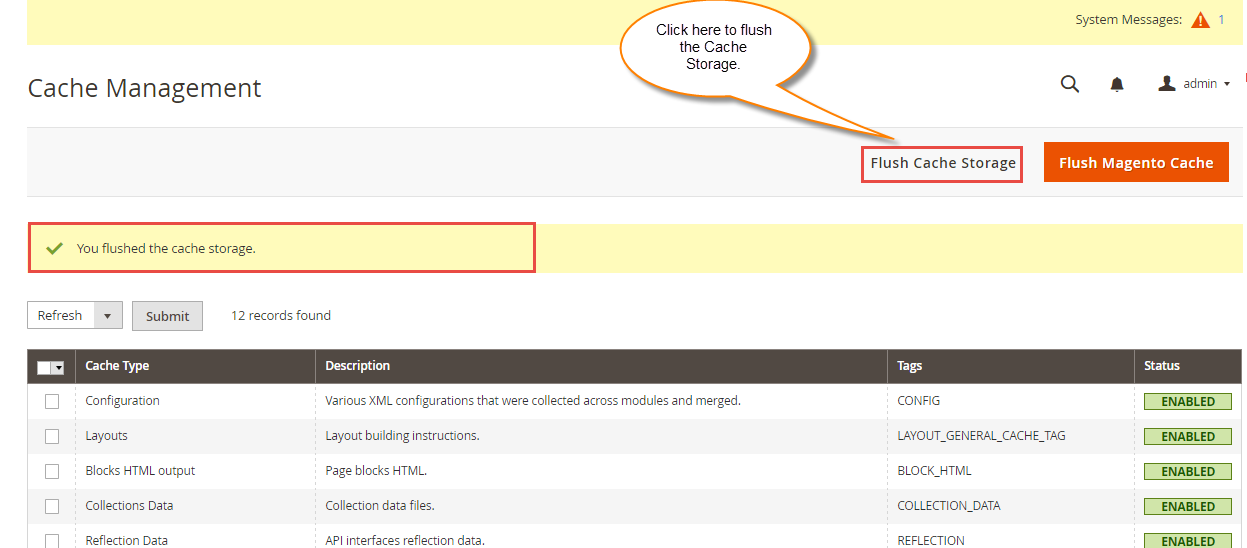
After running the commands, you have to flush the cache from Magento admin panel by navigating through->System->Cache management as shown below.
- Now, as a store admin please login to your store backend and now you can see the Salesforce Marketing Cloud Magento2 Connector has been installed.
- Now you have to do the connector setup to establish a connection among the Magento2 store and Marketing Cloud Org.
Configuration: Please enter the details of your Salesforce Marketing Cloud organization into the configuration settings to establish the connection.
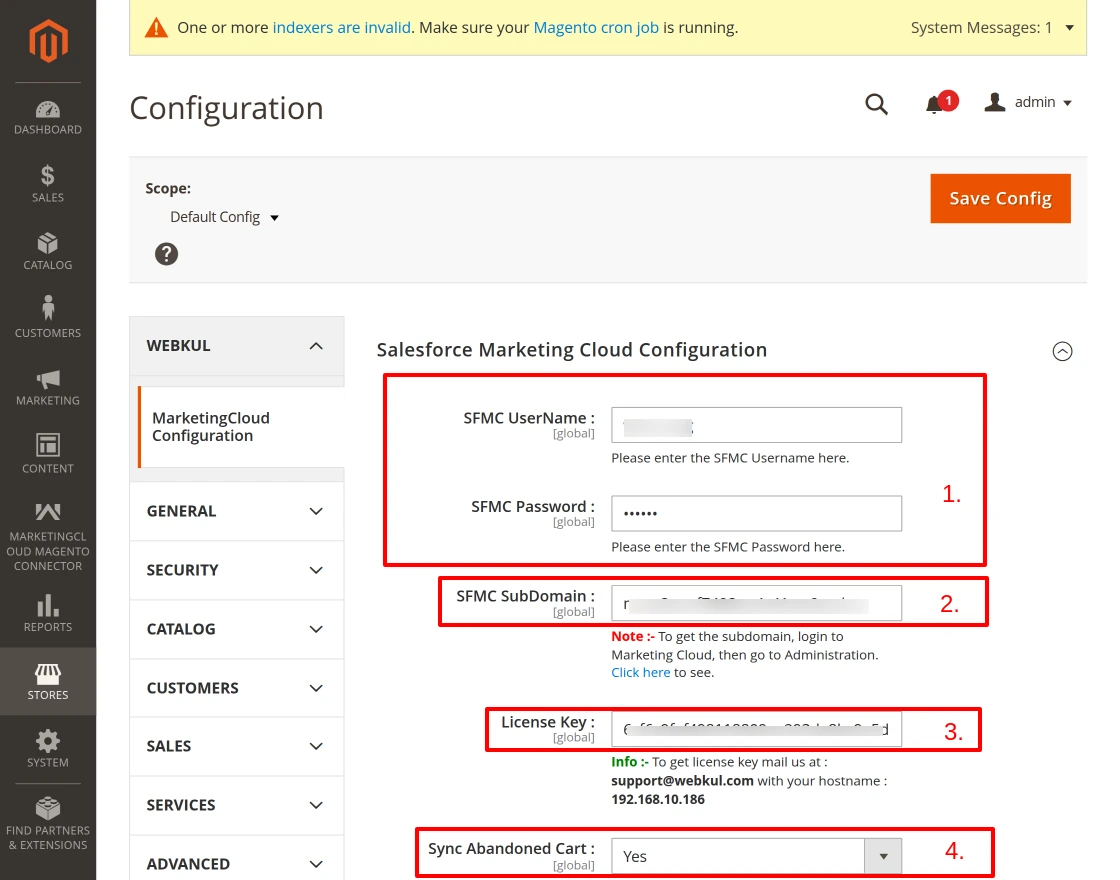
Explanation of the screenshot below :-
- 1. First, share the Marketing Cloud org credentials.
- 2. Additionally, mention the subdomain of the Marketing Cloud org credentials.
- 3. Then, enter the License key.
- 4. Lastly, selecting ‘Yes’ will sync the Abandoned Cart to SFMC.
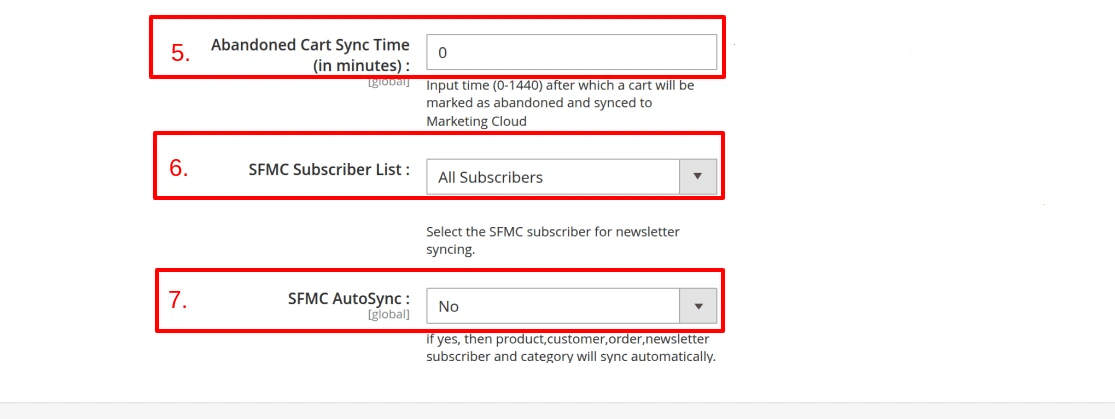
- 5. Enter the time (0-1440 mins) after which a cart will be marked as abandoned and synced to Marketing Cloud.
- 6. Next, select the SFMC subscriber for the newsletter sync.
7. Finally, choose Yes or No to enable auto sync.
Products and Categories: Export all products at once or only selected ones. Similarly, you can export all categories and add products in one go.

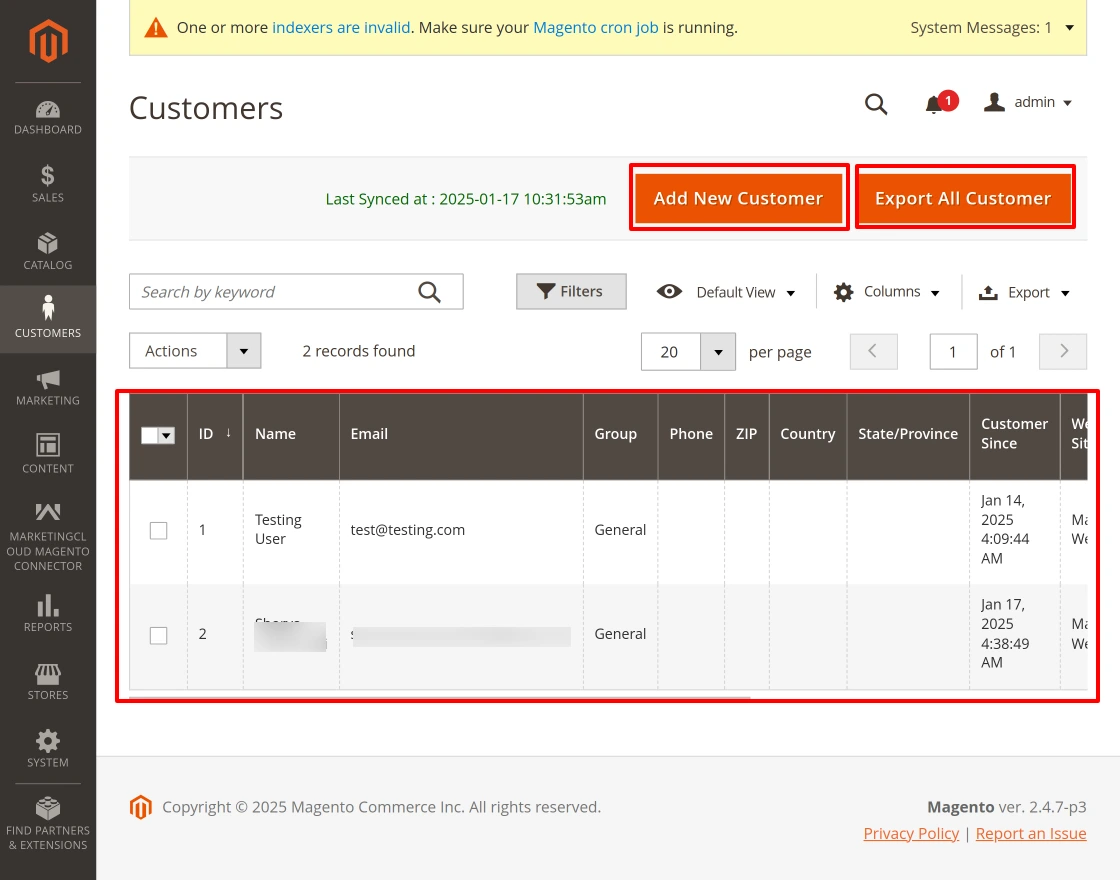
- Customers: As mentioned above, you can also export your Magento2 customers and order to your Salesforce Marketing Cloud organisation.
 You can now see that the same product has been successfully exported. To verify, log in to your Marketing Cloud account and go to Email Studio >> Email >> Subscribers >> Data Extensions.


Order -The Orders section provides a comprehensive list of customer orders, including details such as order ID, purchase date, billing and shipping names, total amount, and status.
Moreover, users can create new orders, export all orders, or access individual order details effortlessly.
Furthermore, the integration with Marketing Cloud ensures seamless synchronization, thereby enhancing marketing activities.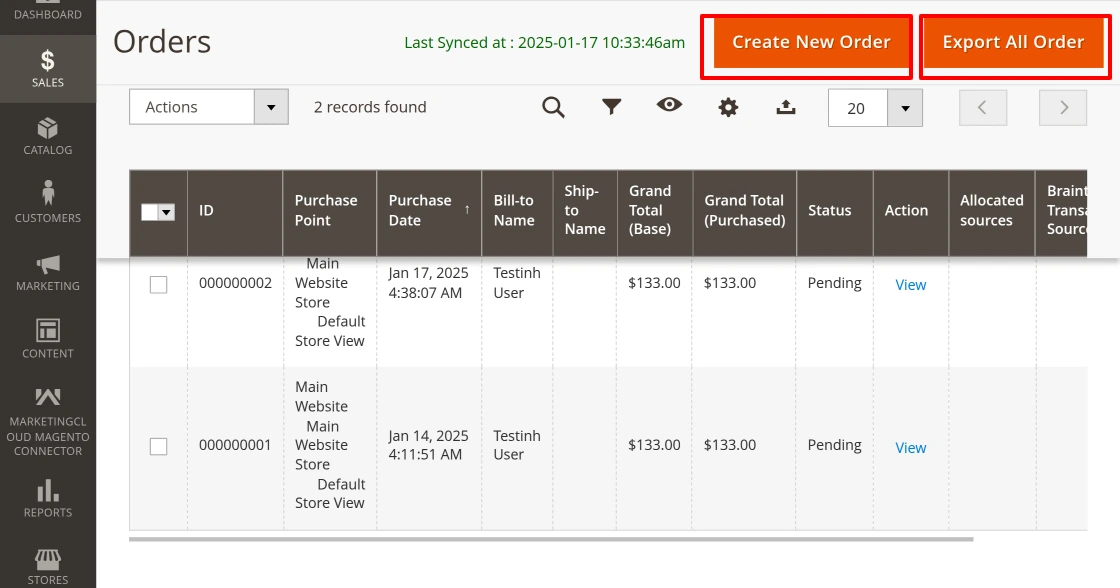
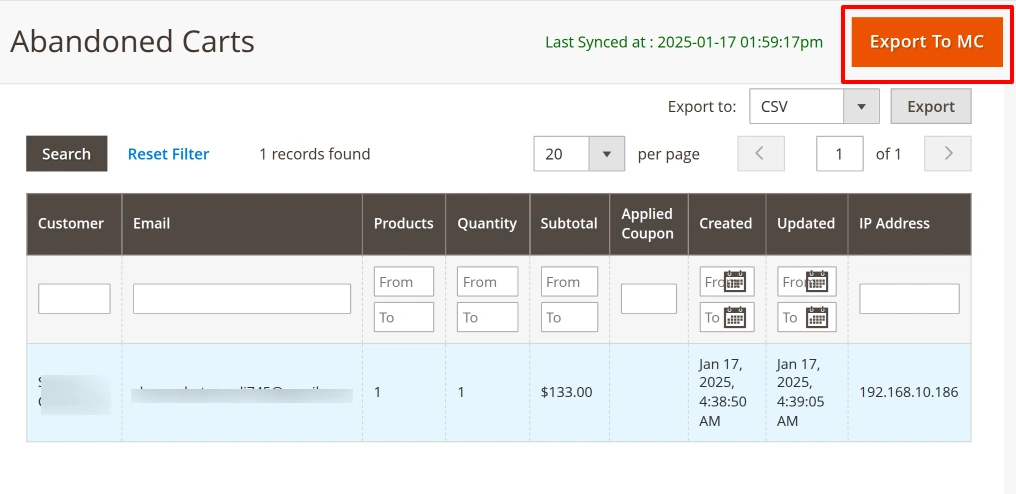
Abandoned Carts – Abandoned Carts section displays a list of incomplete carts left by customers, including details, customer name, email, products, total cart value, and creation date.
- ‘Export to MC’ button to synchronize this data with Marketing Cloud for retargeting purposes.
- Additionally, filters and export options enable tailored data management for better actions.
We hope you find this guide helpful! We value your feedback, so please share your thoughts in the comments section.
- For any query, you can submit a ticket on the UV Desk
- Reach out to us via our Support Mail- [email protected]
- Additionally, view all our applications in AppExchange, go to Webkul AppExchange Apps
Read More: How to do Magento2 Salesforce Integration with e-Commerce platform


Leave a Comment
Comments (2)
Rhodri Davies
3 years ago
I can see this module supports
– Categories
– Customers
– Orders
– Products
Does this module also pass through Newsletter Subscriber entities from Magento 2 to Salesforce Marketing Cloud?
Amarpreet
1 year ago
Hello Rhodri Davies
Yes, it also syncs News letter subscribers from Magento 2 to Salesforce Marketing Cloud.
For more detail discussion please generate a ticket at [email protected]
Thank You.