Image Slider for Salesforce Commerce Cloud
Updated 13 October 2025

Are you tired of static store images? Want to wow your customers with dynamic, beautiful images? Create gorgeous image sliders that stop and grab attention.
Our Image Slider for Salesforce Commerce Cloud creates amazing image sliders that will upgrade your SFRA store and drive engagement.
Upgrade your SFRA store today with our Image Slider tool!
Features of Image Slider for Salesforce Commerce Cloud:
- Quick Setup: Add the image slider to your SFRA store in no time.
- Customizable Size: Set the image size to fit your store layout.
- Add Multiple Images: Add multiple images to show in the slider.
- Responsive: Looks great on all devices, from desktop to mobile.
- Smooth Transitions: Seamless transitions between slides.
- Autoplay with custom intervals: Auto cycle through images.
- Image Caching: Caching images to improve load times and reduce server load.
- Pagination: Easy navigation through multiple slides.
- Centralized Image Management: Upload and manage images within your catalogue.
- Flexible Placement: Place the slider anywhere on your homepage template.
Note: Keep your customers engaged with your storefront by giving them real-time weather information. Learn more about our innovative product, Multi Weather for Salesforce Commerce Cloud.
Pre-requisites
Node version 12. x.x is required to install the application successfully.
Installation Process of Image Slider
- Deploy Cartridge to Salesforce Commerce Cloud
- Site Import for Meta Data
Deploy Cartridge to Salesforce Commerce Cloud
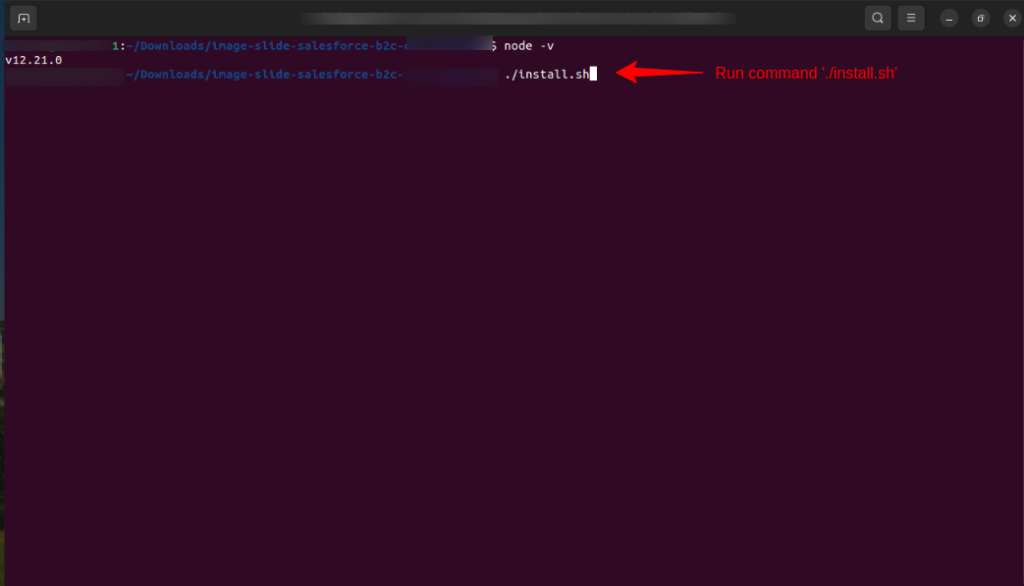
Go to the root directory of the project.
Run the ./install.sh command to install all the dependencies.
Enter all the details and upload the cartridge to the instance.
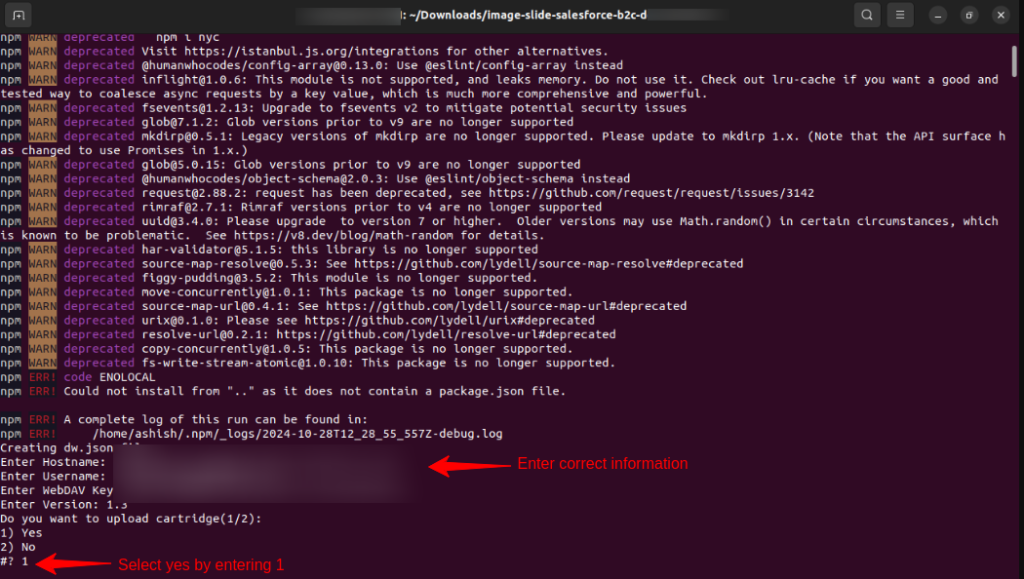
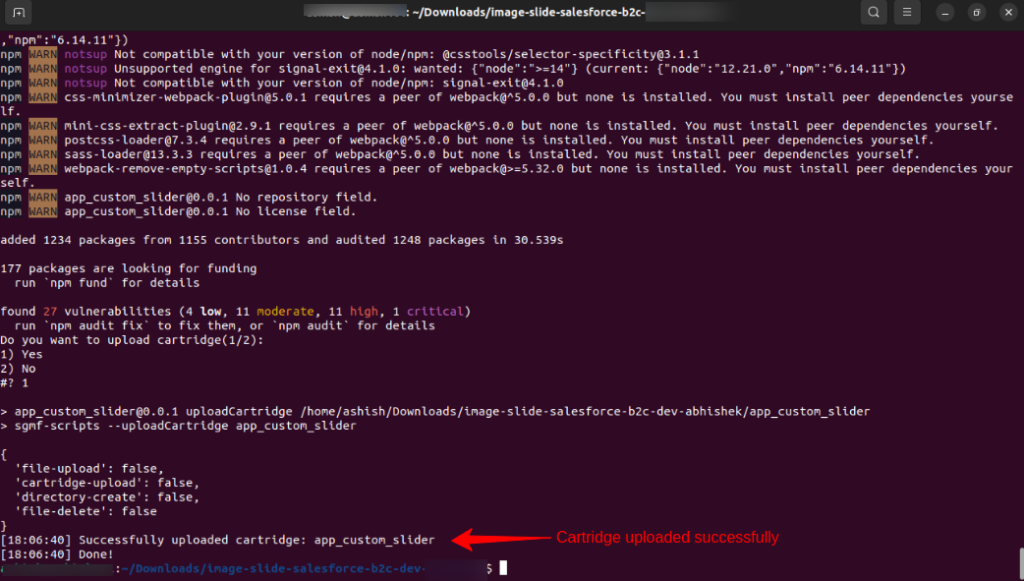
A successful cartridge message will be shown in the terminal.
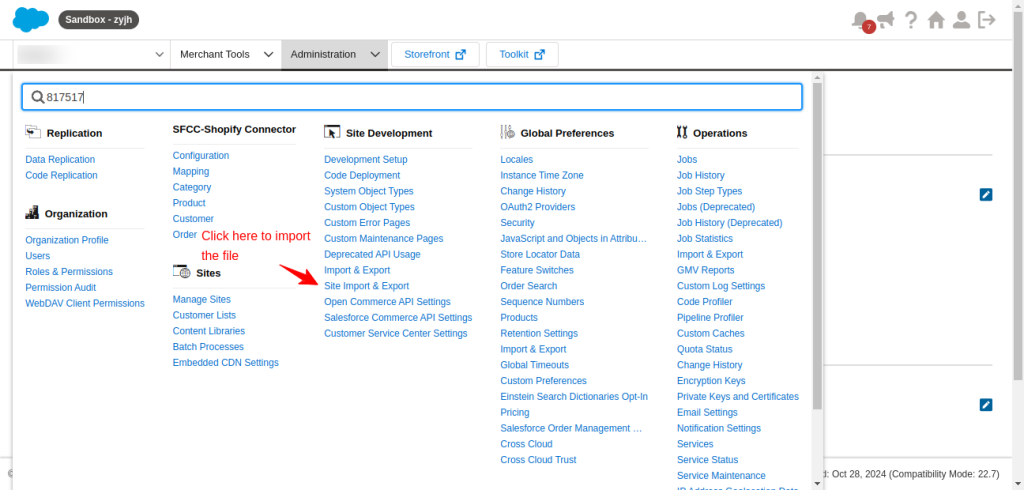
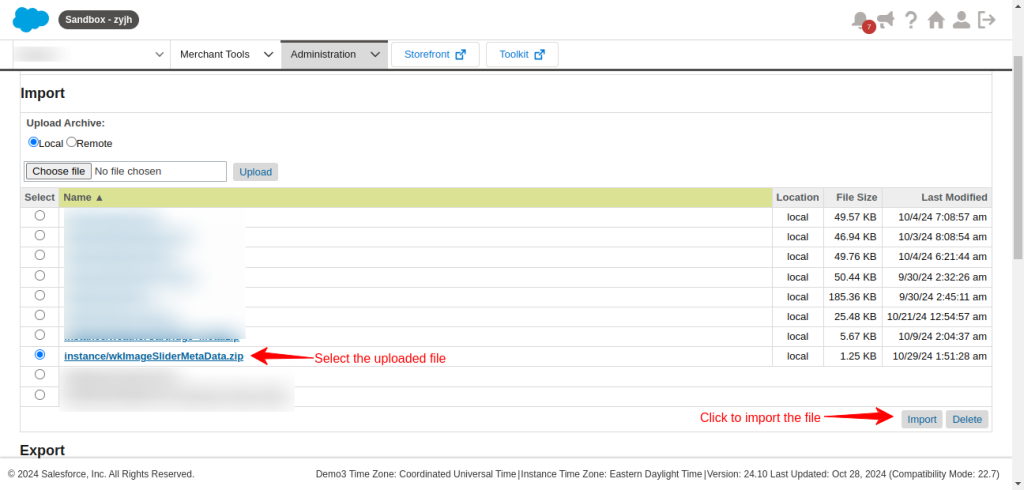
Site Import for Meta Data
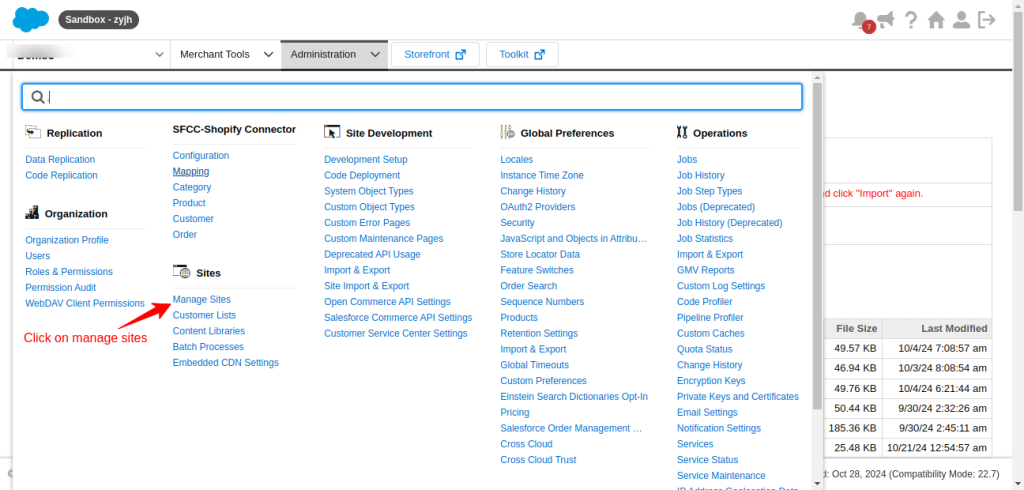
Click on Administration> Under site section> Click on Manage Sites.
Select the wkImageSliderMetaData.zip file and click on the upload button.

Select the Image Slider file and click on the import button.
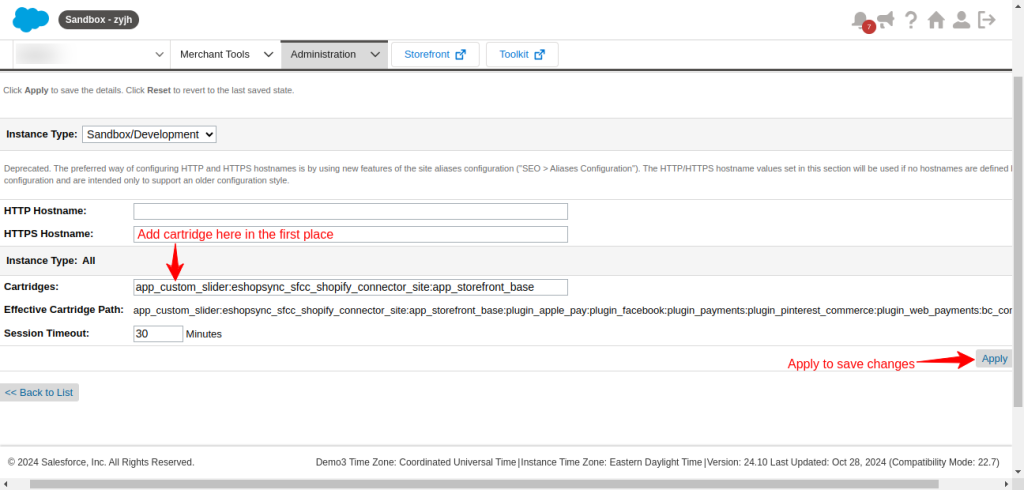
Add the cartridge to the cartridge path
Go to Administration> Under Sites> Click on Manage Sites.
Select the preferred site in which you want to upload the cartridge.

In this window, Shift to the settings tab.

In this window Add the cartridge ‘app_custom_slider’ in the first place. Click on the apply button to save changes.
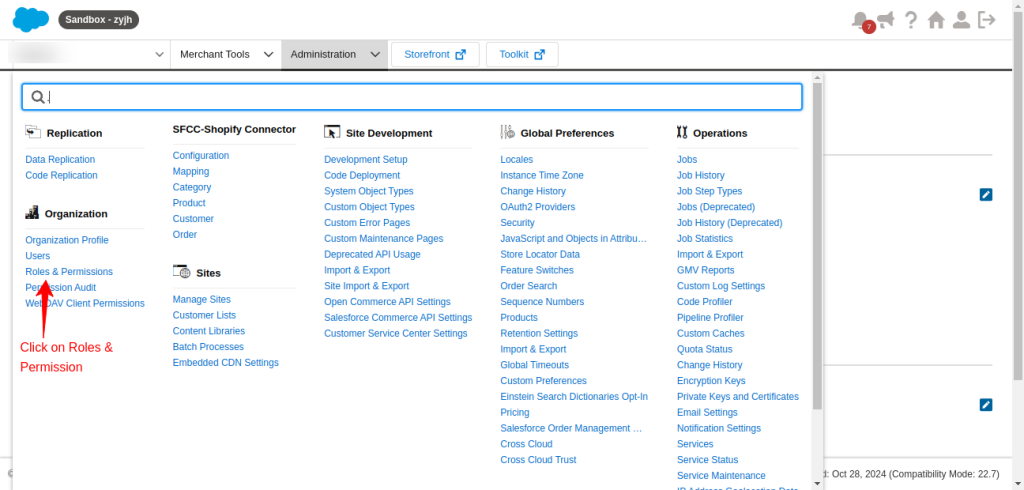
Make the Image Slider Visible to the Business Manager
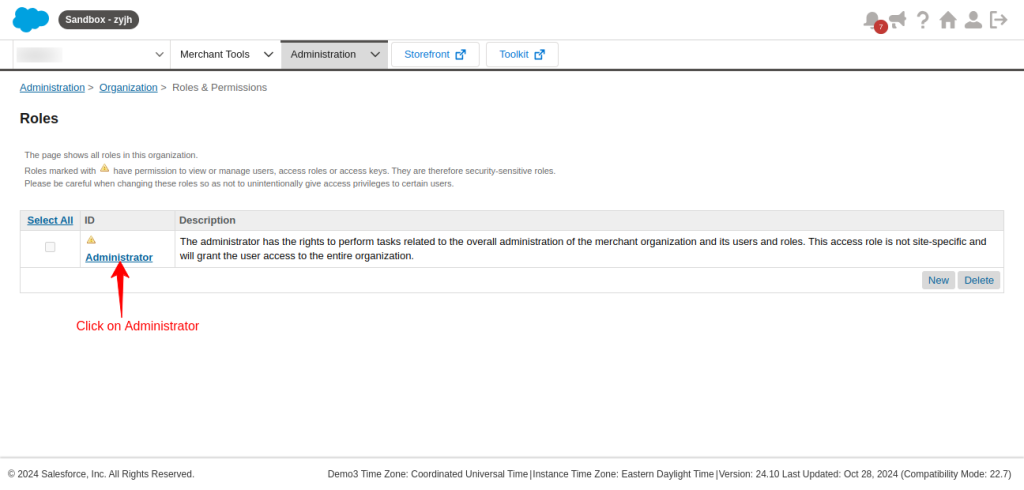
Go to the Administration> Under Organization section> Select Roles and Permissions.
Open Administrator.
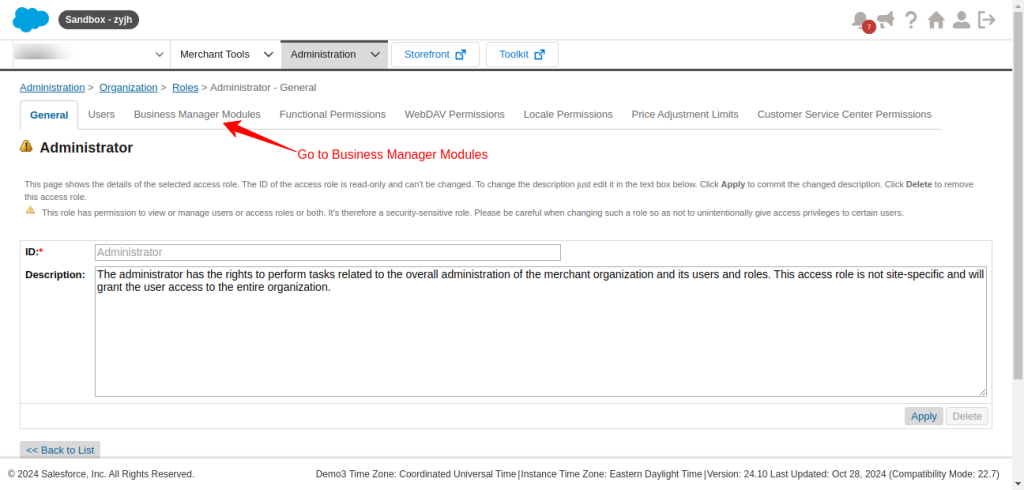
Afterwards, go to the Business Manager Modules.
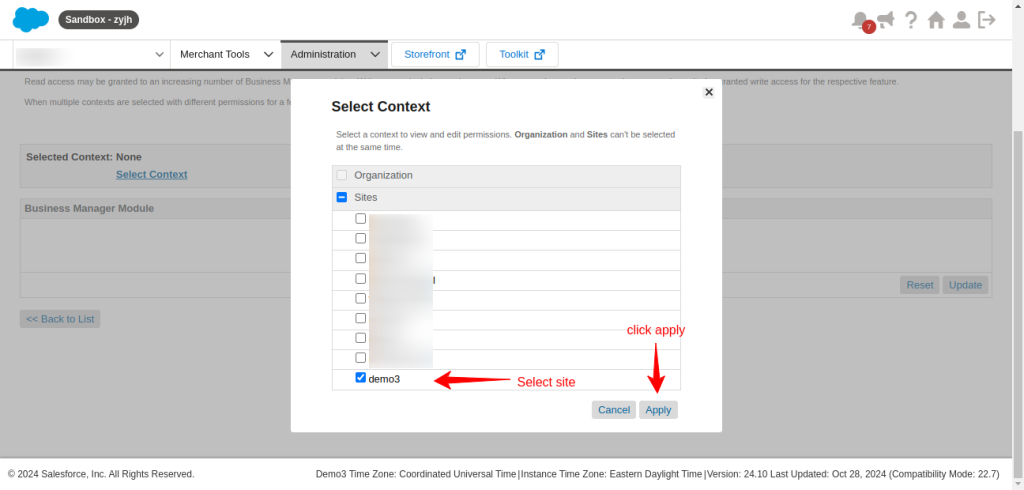
Select your preferred site and click on the apply button.
In this window, check the checkboxes in front of Slider Setup. Scroll down to the bottom and click on the update button to save changes.
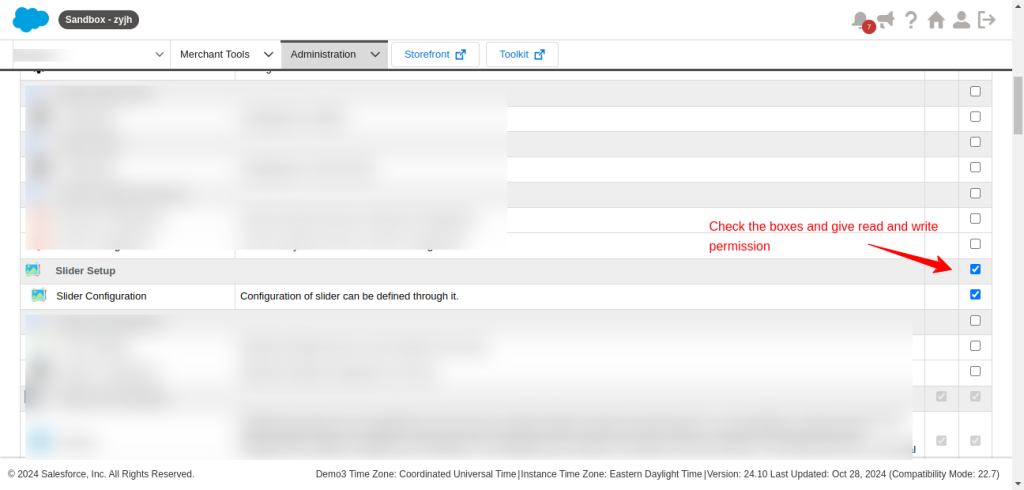
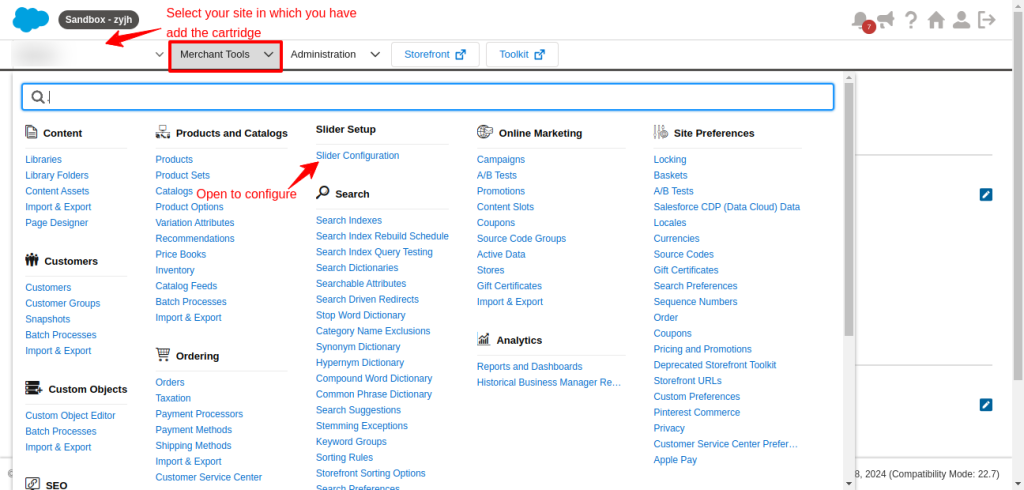
Finally, you can see the Image Slider is visible in merchant tools.

Configure Image Slider for Salesforce Commerce Cloud
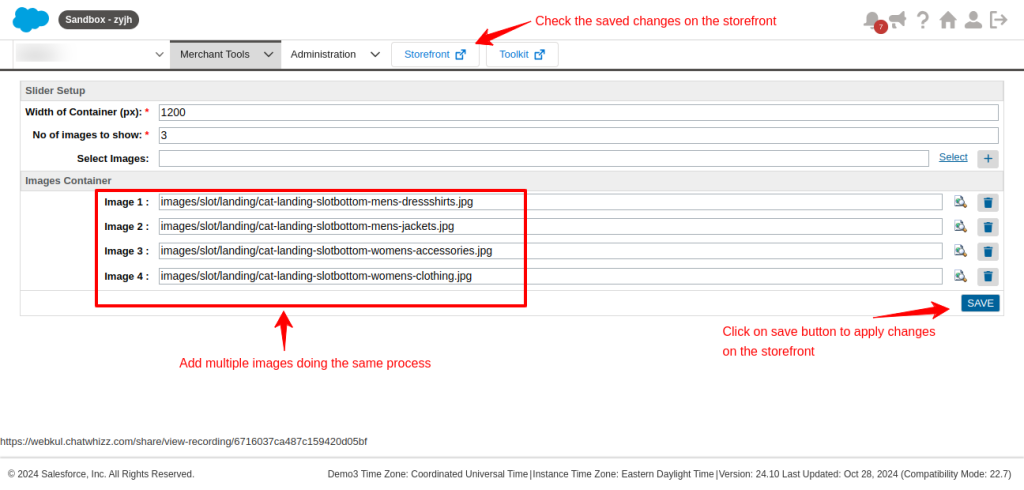
After the successful installation, the image slider can be configured. To do so, Go to Merchant Tools> Under Slider Setup> Click on Slider Configuration.
In this new window, set the width of the image container, the number of images shown, and the images to be selected.
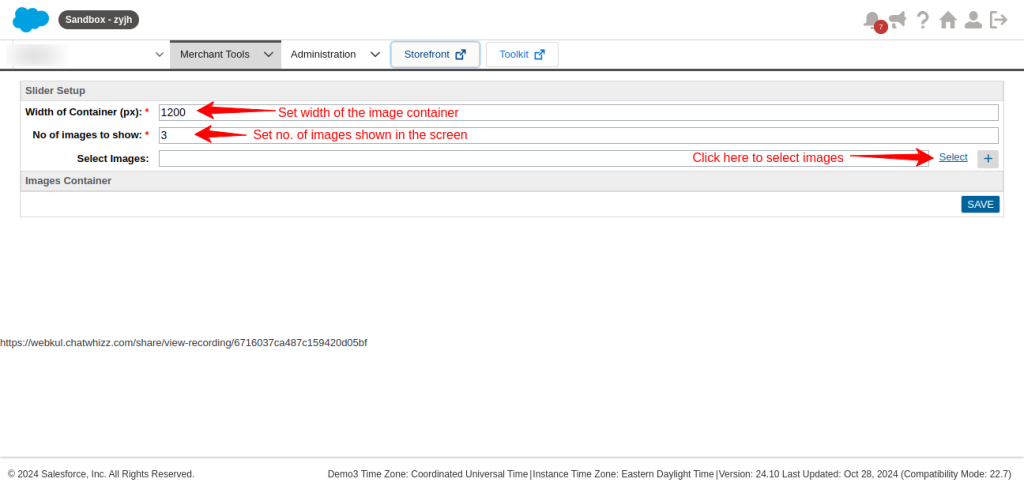
When you click on the select button a new window opens where you can select images from your storefront catalogue and your computer.
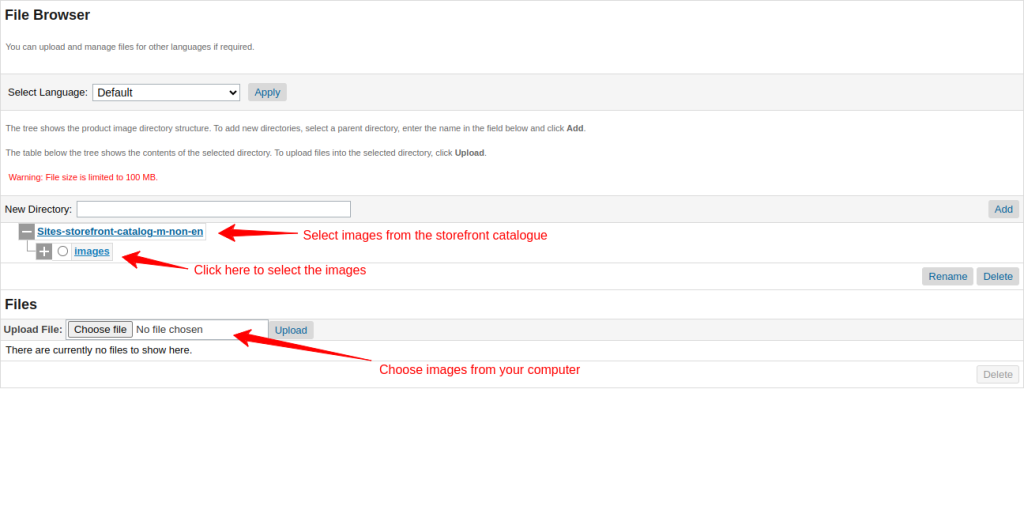
Upload images from your preferred place and click on the image to select them.

After selecting the image, click on the button to add the selected image.
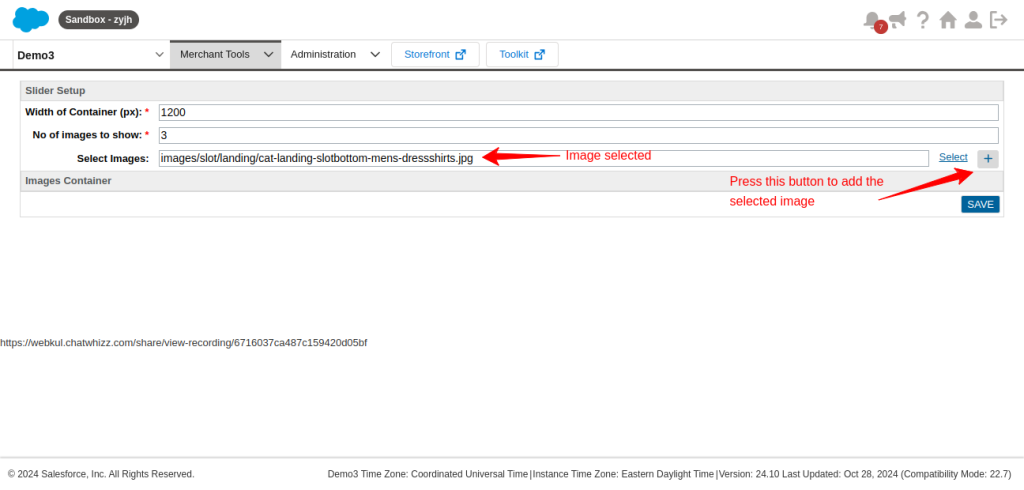
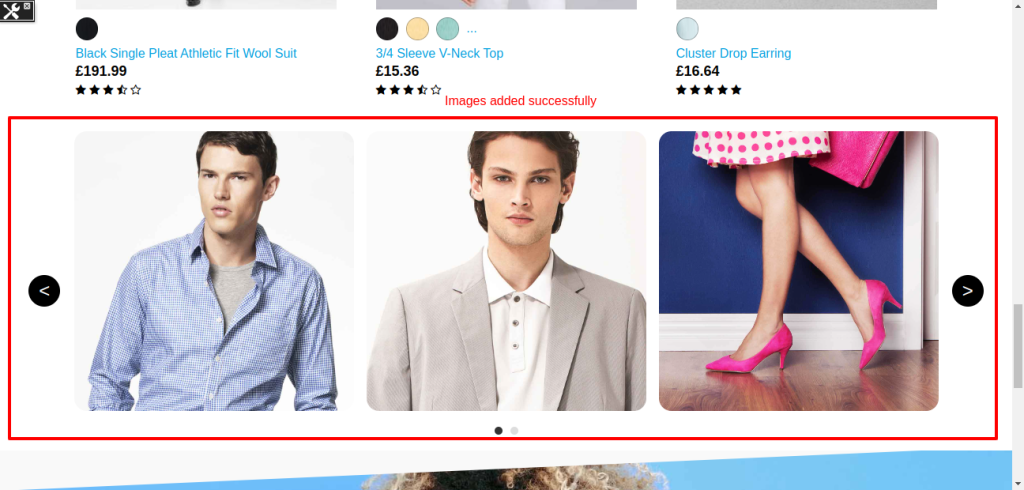
Using the same process, add multiple images for your slider and click the save button to save changes. You can check the saved changes on your storefront by clicking on the storefront.
Finally, you can see the images added to the image slider for the Salesforce commerce cloud.
Support
- For customized, affordable, quick solutions get the Salesforce PDO Services now.
- For any further queries, Click To Create a Ticket.

Be the first to comment.