Loyalty Program For Salesforce Commerce Cloud
Updated 13 October 2025
Welcome to our loyalty program for Salesforce Commerce Cloud!
Integrating this cartridge into the Salesforce Commerce Cloud will enable you to build customer loyalty and retention through reward points.
These reward points can be used for discounts on future purchases. This will enhance customer loyalty, increase repeat purchases, and boost the store’s revenue.
It has a user-friendly interface where you can set up the loyalty program rules easily. With this loyalty program, customers can earn points by performing specific activities based on custom events.
The latest version of this loyalty program is 1.0.0.
Features of Loyalty Program For Salesforce Commerce Cloud
- Earn points on purchases for every dollar spent on your order value, exclusively at the store.
- Receive points as a birthday gift.
- Get points for promotion on social media platforms like Facebook and X (formerly Twitter).
- Subscribe to the newsletter to earn points.
- Receive an email notification regarding your reward points balance and their expiry dates.
- Easily generate coupons from your rewards points balance and use them during checkout.
- Incentivize your faithful clients through customer tiers and foster long-term relationships with them.
- Set up loyalty points expiration timeframe.
- Create a multi-tier loyalty program and set loyalty rules based on price rules.
Pre-requisites
There are some requirements before installing the application. Make sure you fulfill the requirements given below.
- Node version 12 is required to install the application successfully.
- Keep the “app_storefront_base” cartridge in the project root directory.
Note: If you have any queries about installing the Loyalty program, you can get instant solutions from our Salesforce Commerce Cloud Services.
Installation of Loyalty Program For Salesforce Commerce Cloud
The installation can be carried out by following three steps:
-
- Deployment of Cartridge to SFCC
- OCAPI Permissions
- Site Import for metadata.
- Add the Cartridge path and enable the module for the site in Business Manager.
1. Deployment of Cartridge to SFCC
- Go to the root directory of the project.
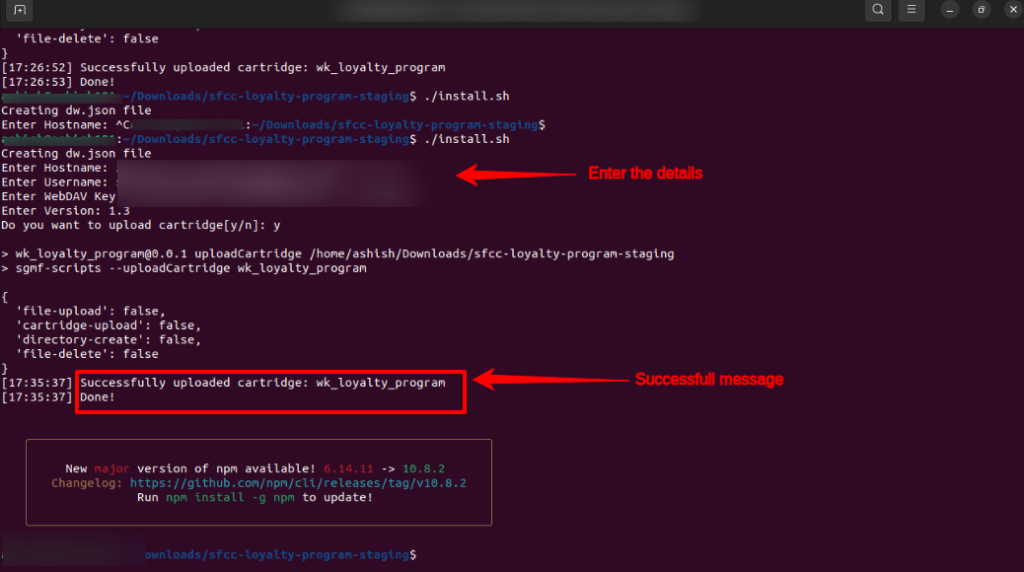
- Then, run the “./install.sh” command to install all the dependencies and upload the cartridges to the instance.
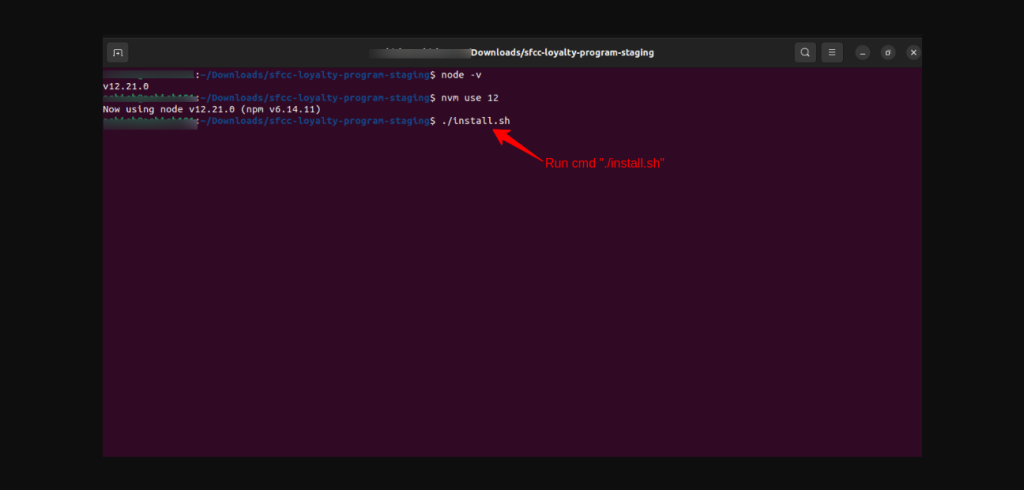
- Further, the Success message will be shown in the terminal.
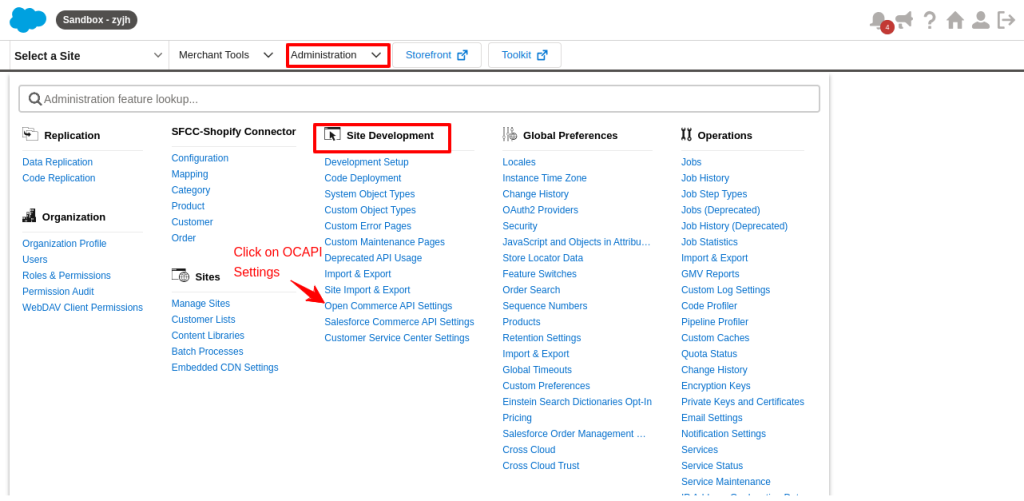
2. OCAPI Permission
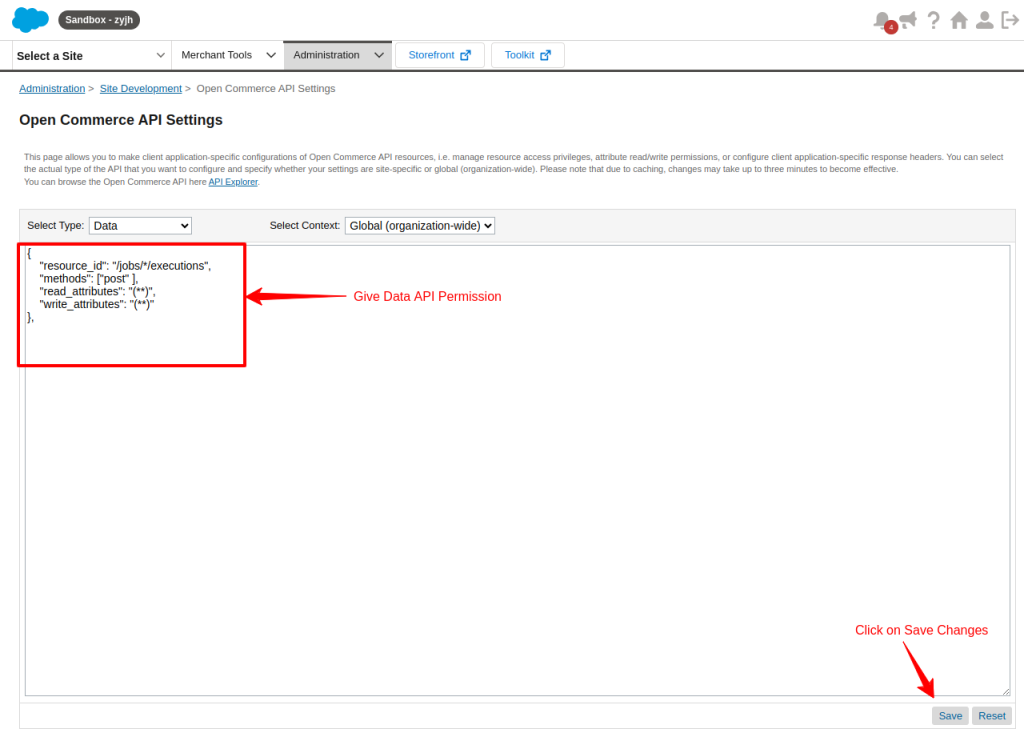
To give OCAPI permission, go to the Administration tab> site development> click on Open Commerce API settings.
Add the belowOCAPI permission, these are required by the connector to be functional.
Give Data API Permissions
{ “resource_id”: “/jobs/*/executions”,
“methods”: [“post” ],
“read_attributes”: “(**)”,
“write_attributes”: “(**)” },
And then, click on Save changes
3. Site Import for Metadata
Go to Administration > Site Development > Site Import & Export
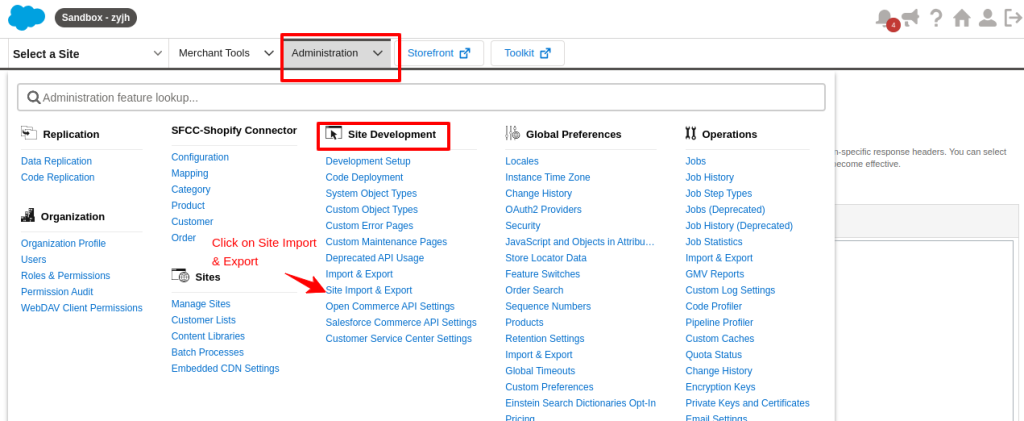
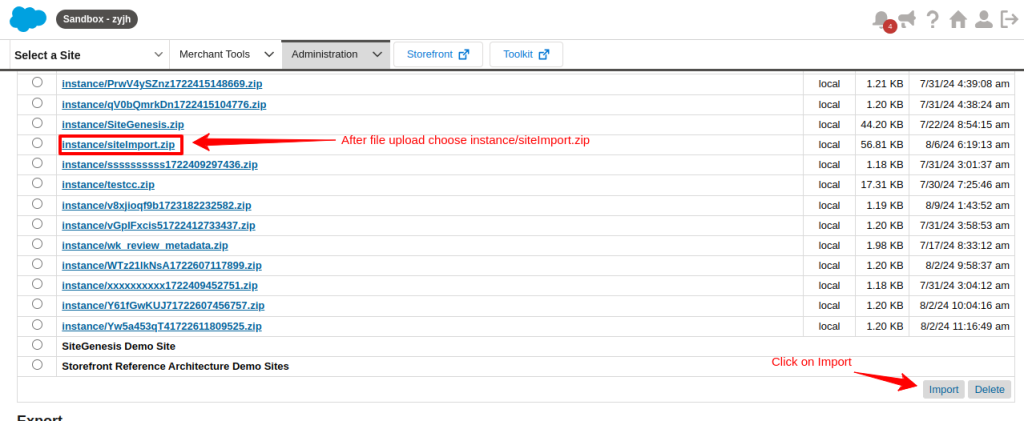
Next, upload the “siteImport.zip” file and then import it.

After the file upload, choose “instance/siteImport.zip” and then import it.
4. Add Cartridge Path and Enable Module for Business Manager
Now, add the “wk_loyalty_program” cartridge to the cartridge path of the respective site.
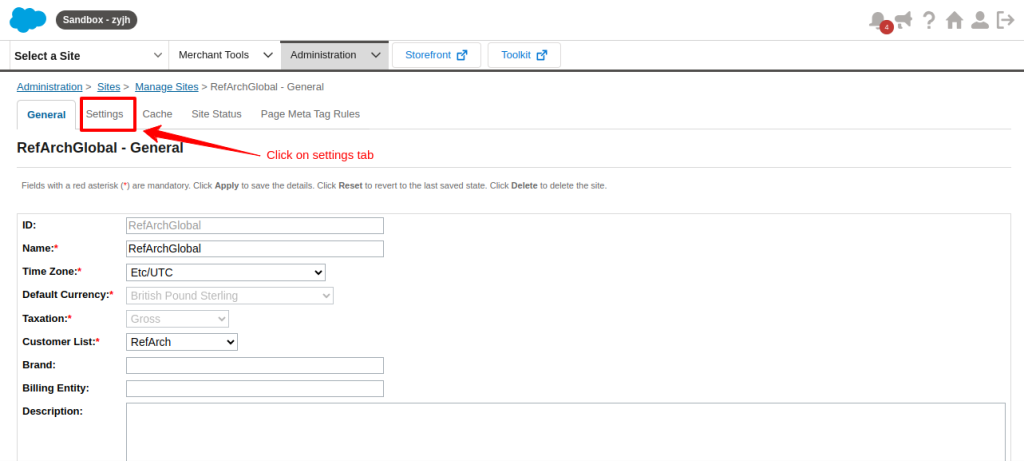
Go to the Administration tab > Sites > click on Manage Sites

Then, select the storefront given below
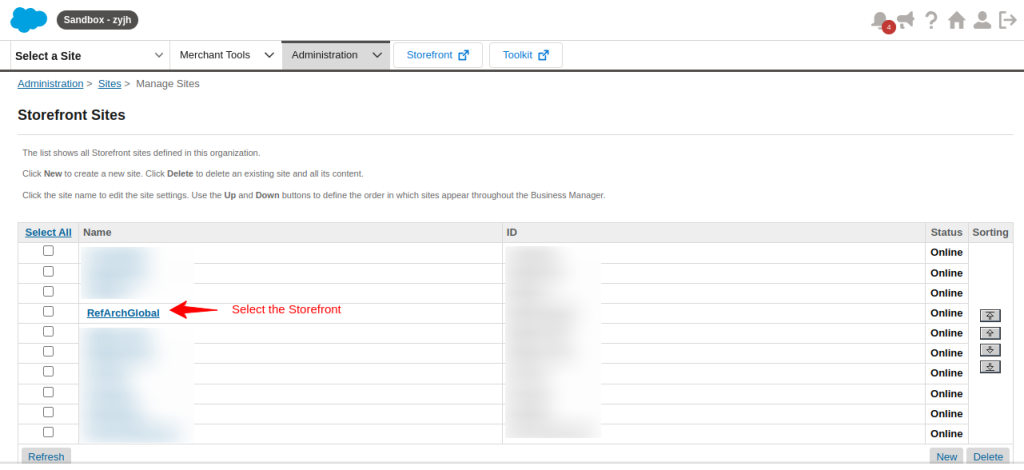
Further, click on the ‘Settings’ tab
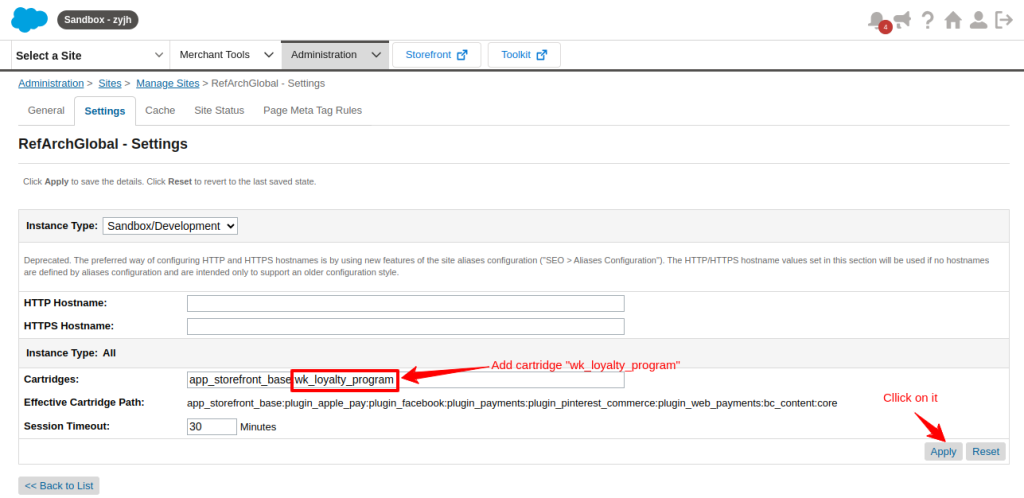
Add “wk_loyalty_program” Cartridge and click ‘Apply’
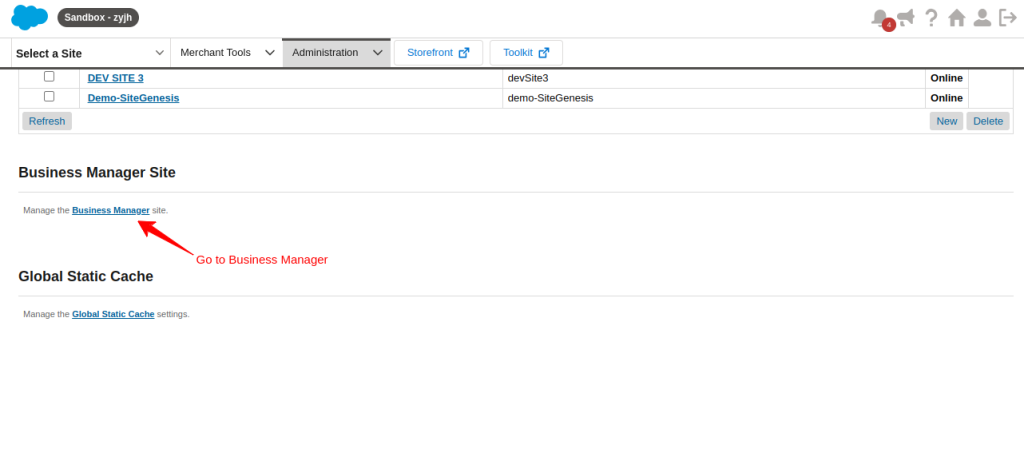
Add “wk_loyalty_program” cartridge to the cartridge path in Business Manager Settings.
To do that, go to Administration > Sites > Click on ‘Manage Sites’
Go to ‘Business manager’, under the ‘Settings’ tab
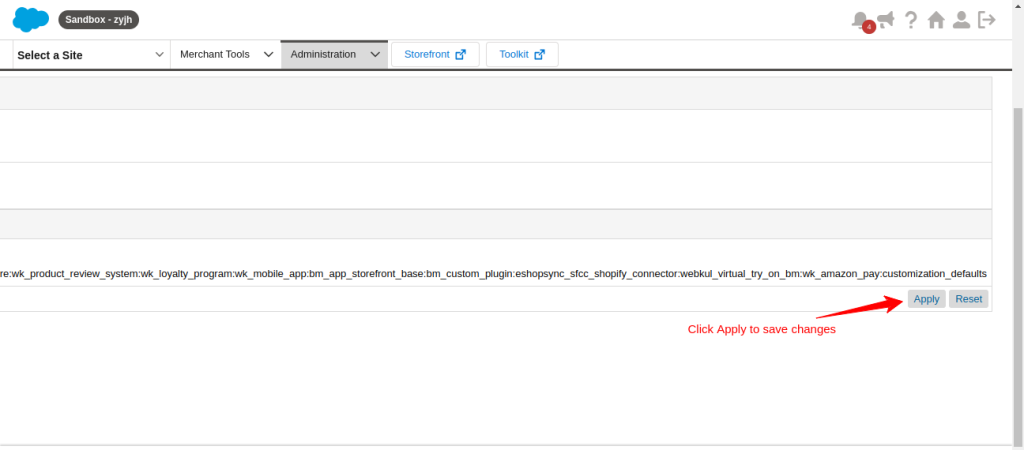
Next, add “wk_loyalty_program” to the cartridge path
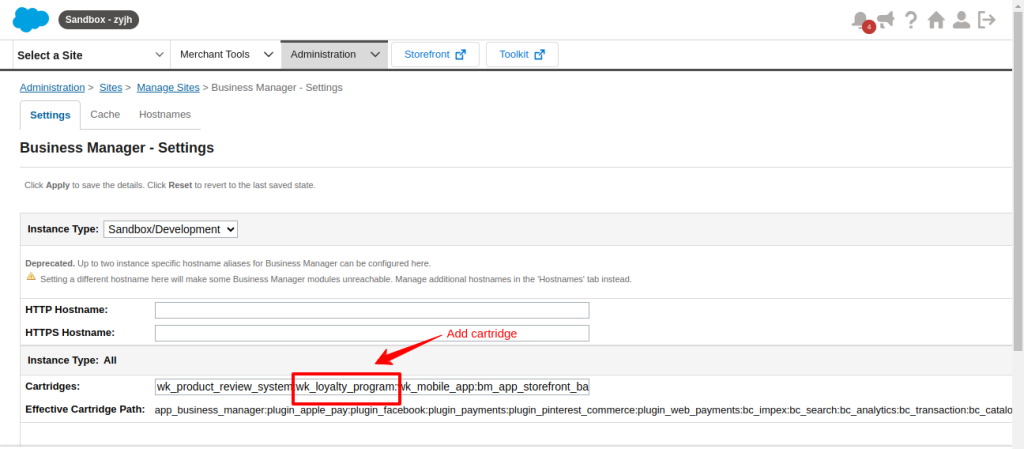
Finally, click on Apply to save changes.
Modify the Business Manager Modules permission to make the connector visible in Business Manager.
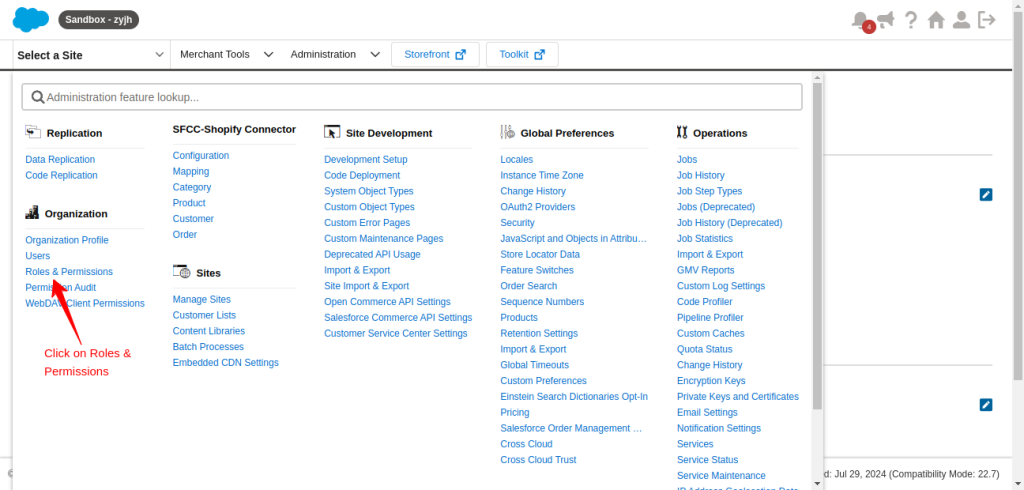
Go to Administration > Organization > Roles & Permissions
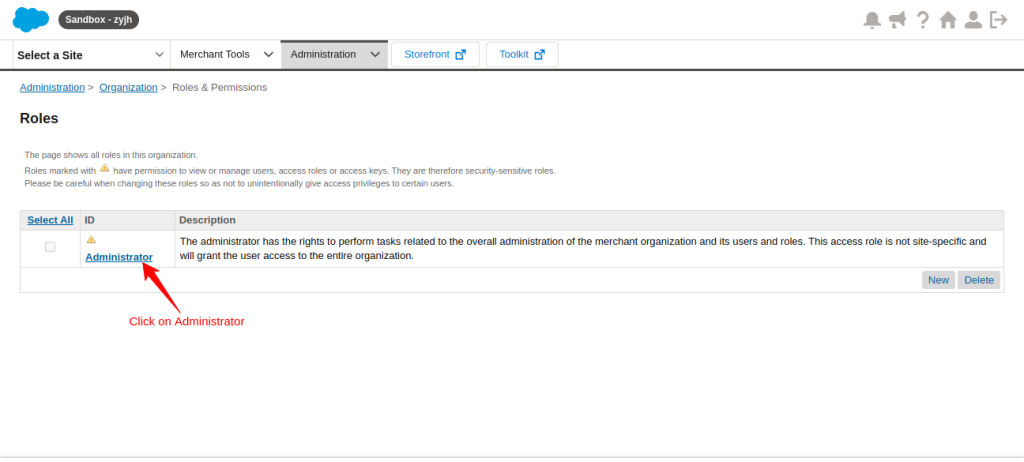
Click on the ‘Administrator’
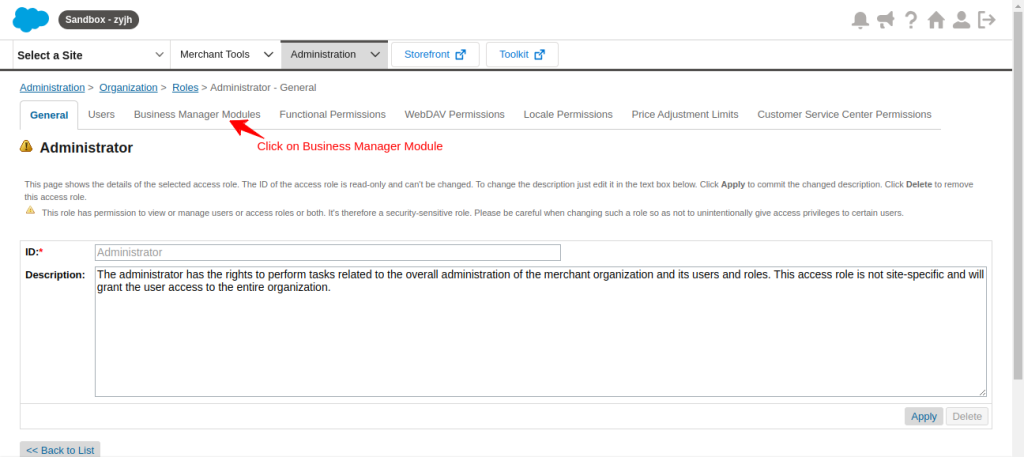
Switch to the Business Manager Module tab
Select Site from the dropdown options
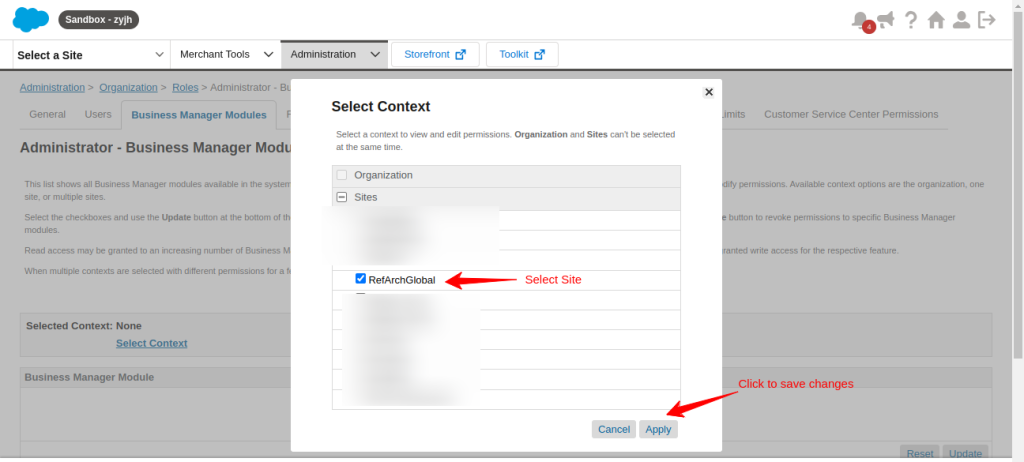
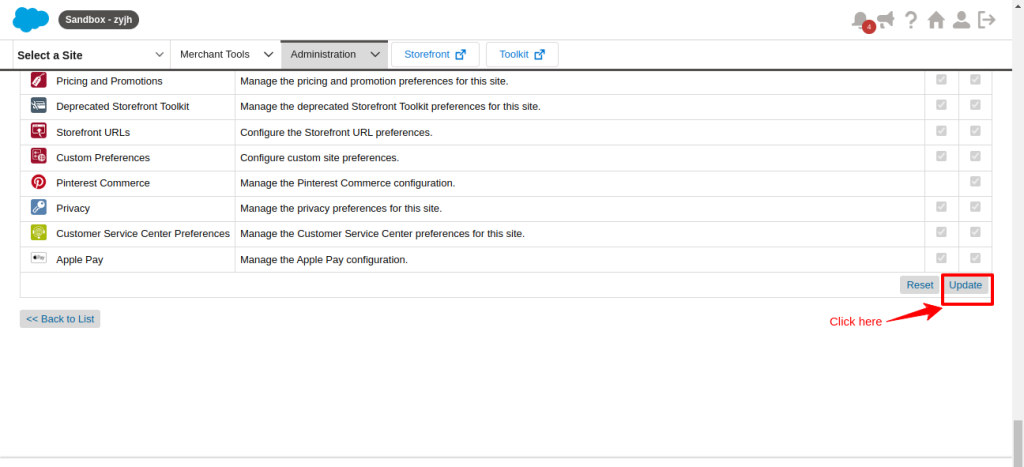
At this point, select all the checkboxes for the Webkul Loyalty Program for Salesforce Commerce Cloud and grant Read/Write permission.
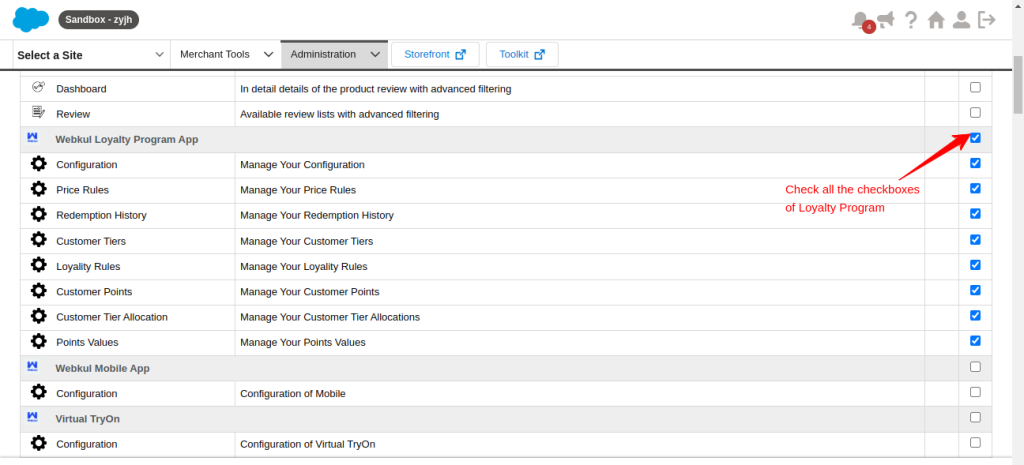
Then, scroll down and update it.
Configure Loyalty Program For Salesforce Commerce Cloud
-
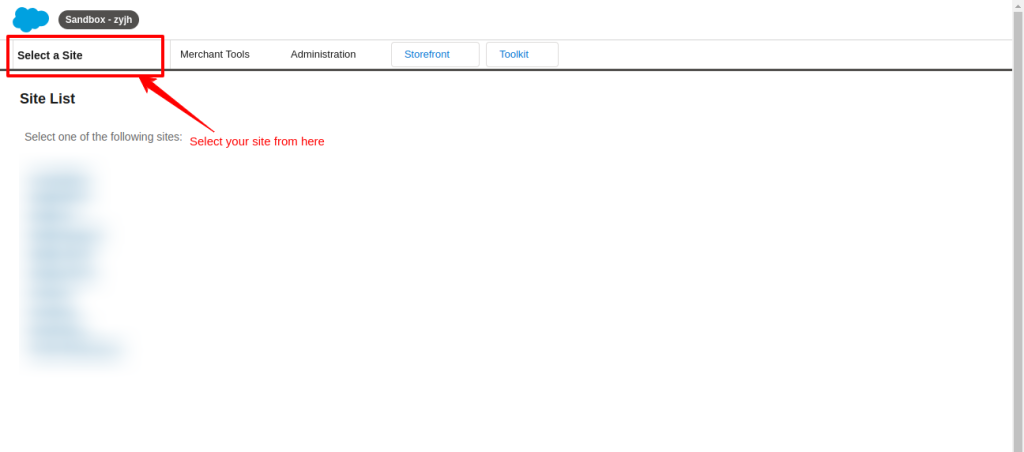
At first, select your site from the left side of your dashboard.
-
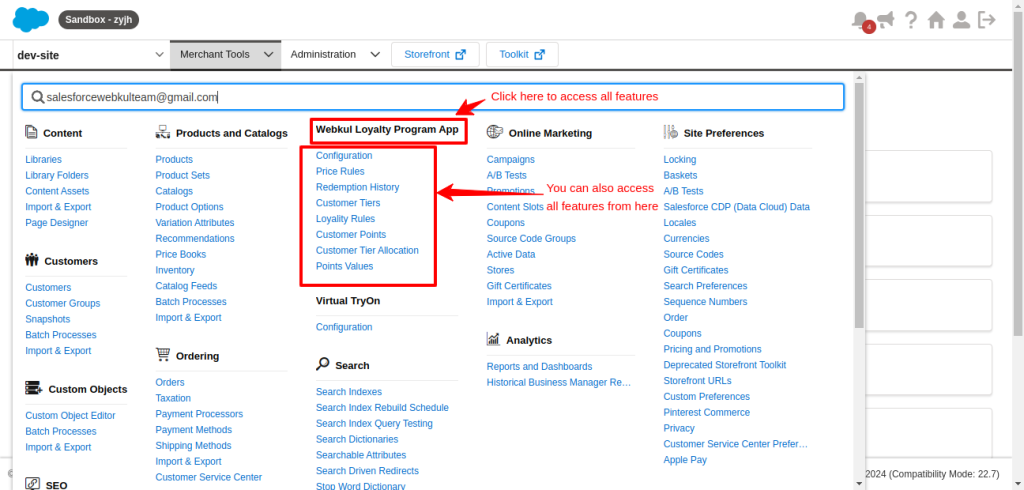
Then, go to the Merchant tools dropdown, and you will see Loyalty Program there
-
Next, simply click on the Loyalty program to access all features.
-
You can also access all the features from the dropdown section.
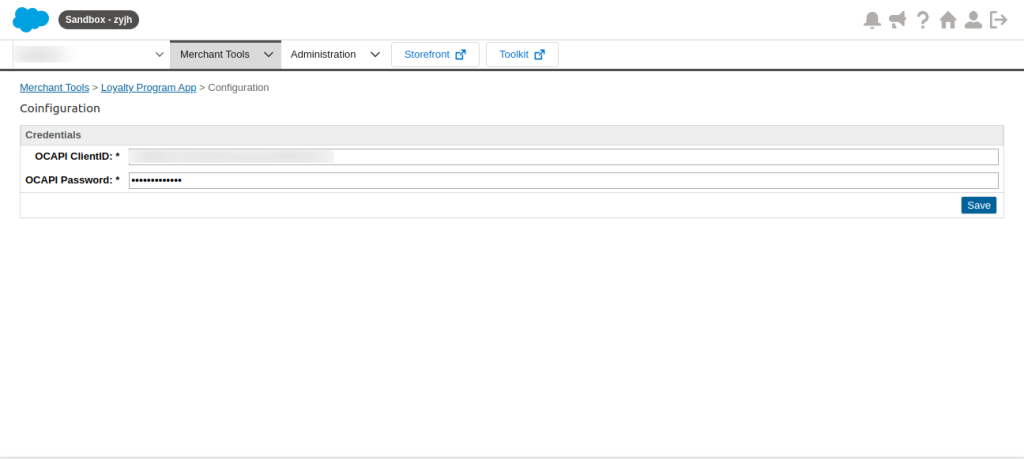
Afterwards, go to the configuration and open it.
You have to write down the OCAPI Client ID and OCAPI Password
Now under the ‘Price Rule’ section
Set the expiry of the different events
You can also add new events and set their price rule.
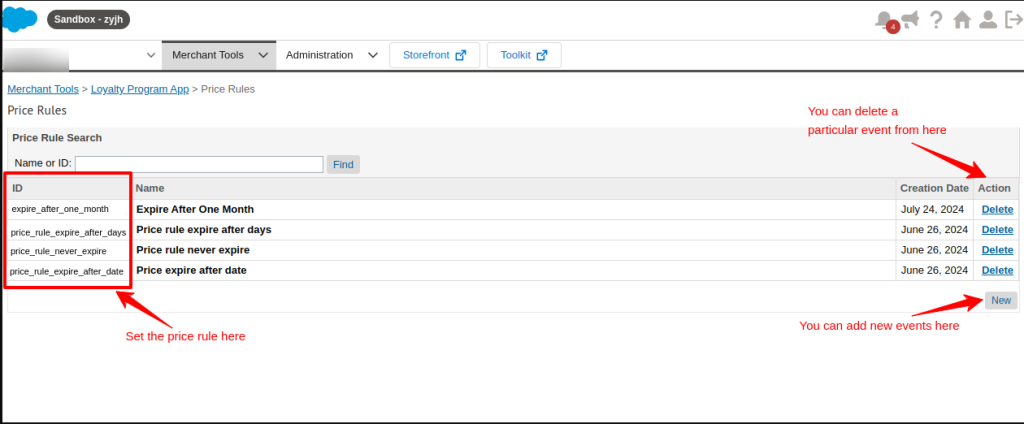
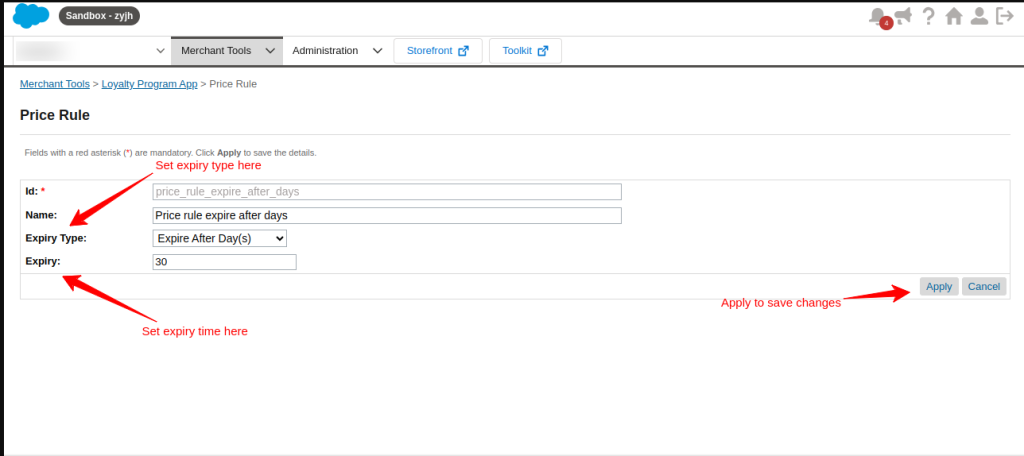
Set the Price rule based on a particular event.
You can also set the expiry type and expiry time.
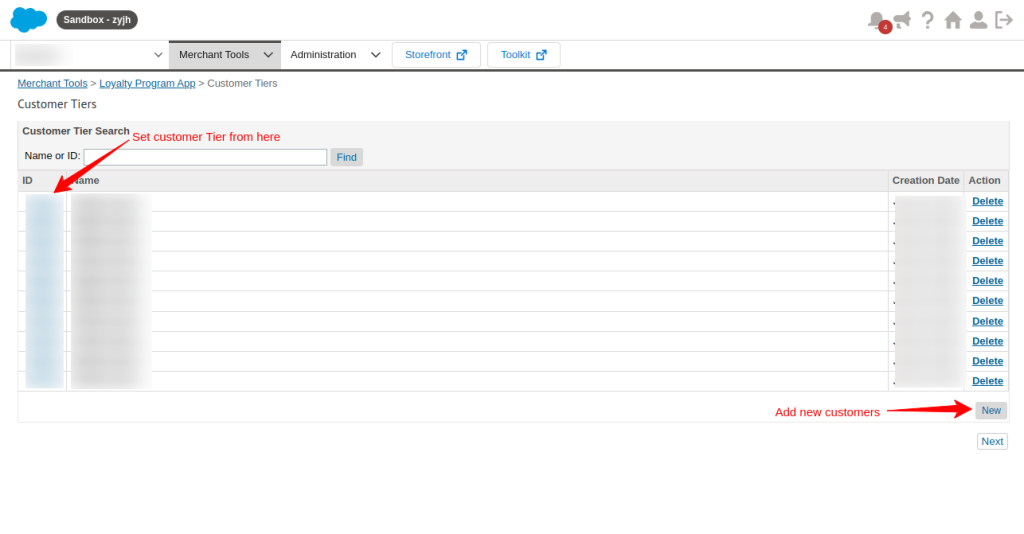
Open Customer Tier in the Merchant tools dropdown section
Set customer tier here
Now select Loyalty Rules from the Merchant Tools dropdown section
You can see the names of the events and their IDs
You can also add new events here
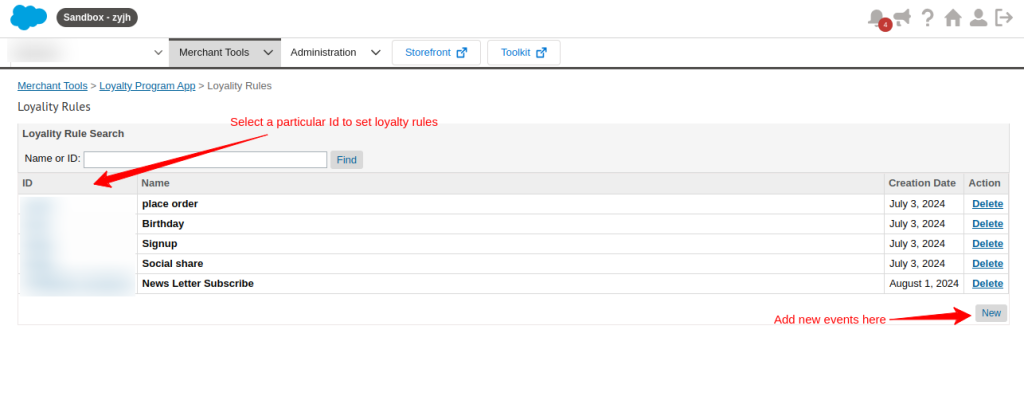
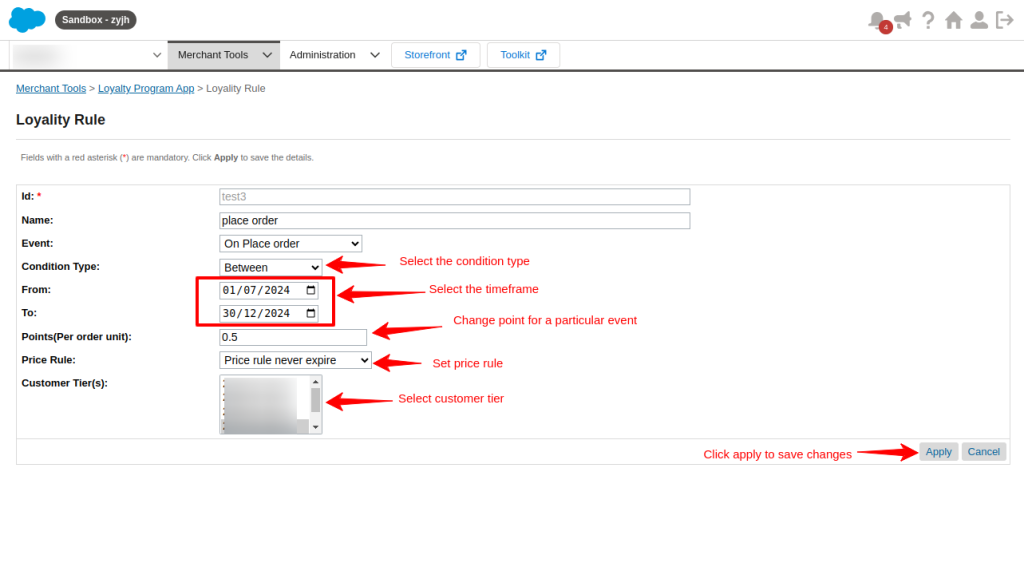
Suppose I select an ID and open it
Now I have access to the loyalty rules of a particular ID
Here I can set the Condition Type, Points Earn, Customer Tier Price Rule, and more.
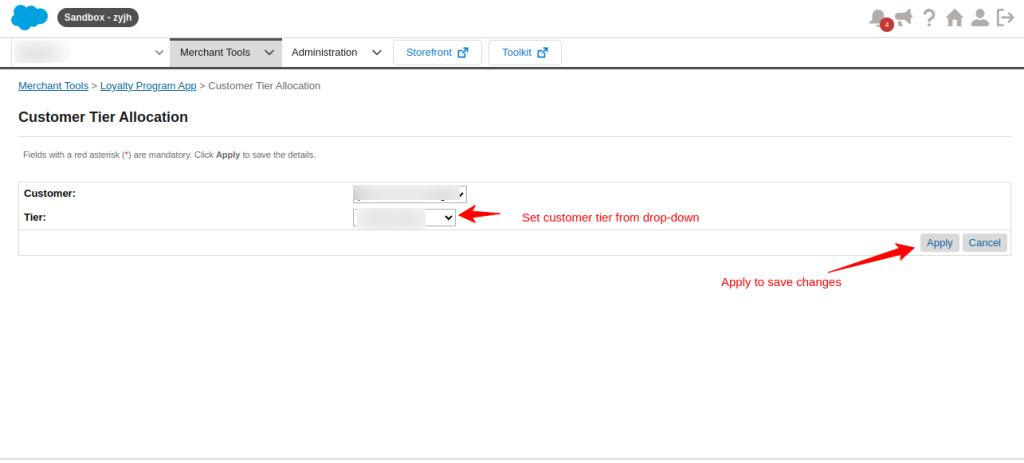
In the Customer Tier allocation feature in the Merchant tool dropdown section
You can select the Customer ID and allocate it to the Tier.
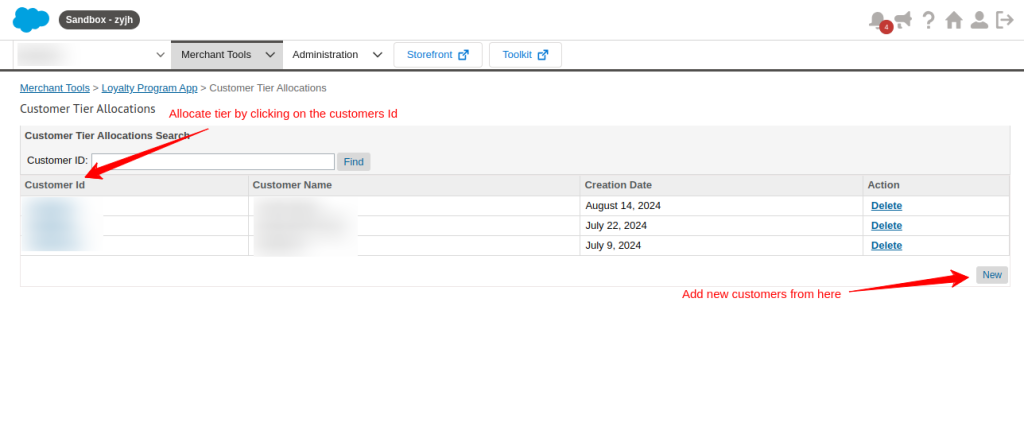
Click on Customer ID for the tier allocation for that particular customer
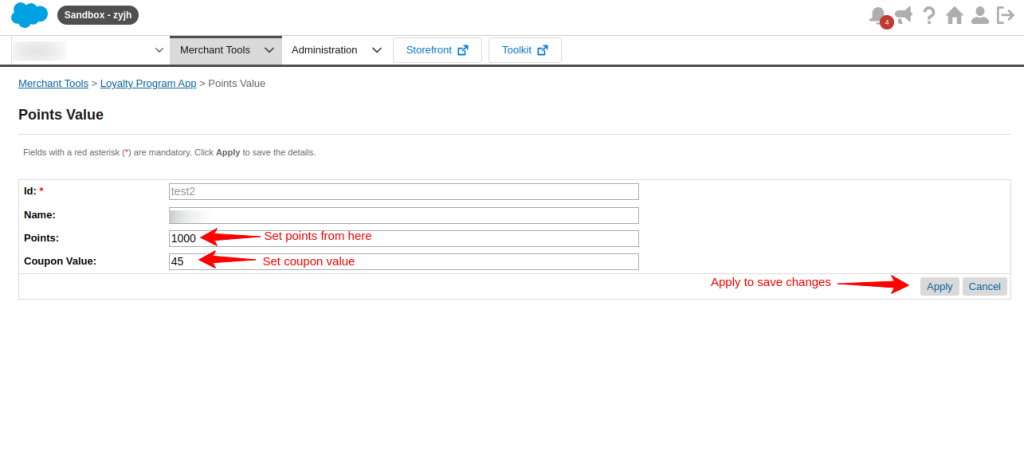
Set Points Value from the dropdown section of Merchant Tools
Add New and Select ID to set point value.

Here you can set points and their coupon values
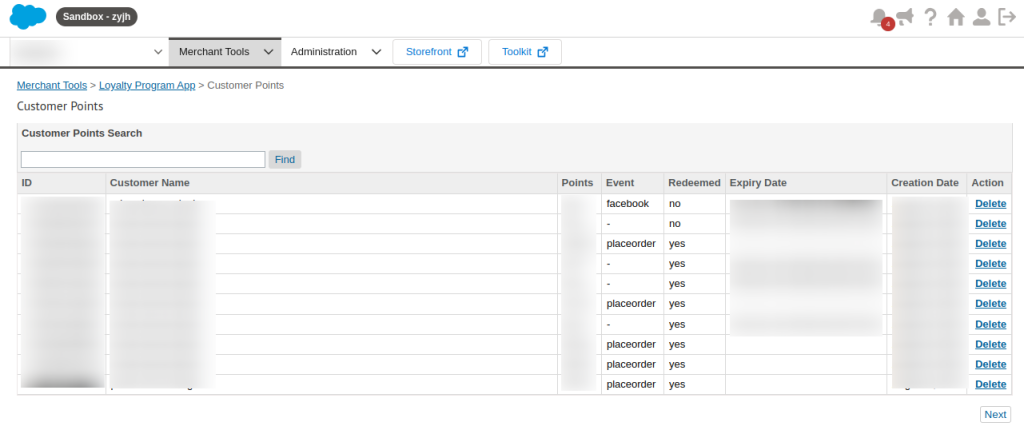
Under the Customer Points section
You will have the details of points, events, the expiry date of points, and the creation date
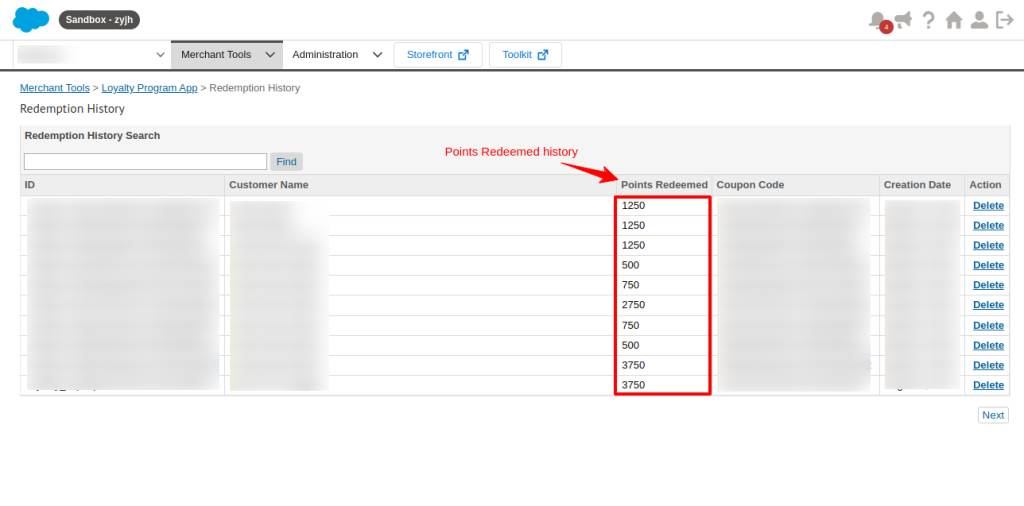
Open the Redemption History option under Merchant tools
Here you can see the customer’s name and their history of points redeemed.
How Does It Work?
Customers can access the features for loyalty program for salesforce commerce cloud by simply, completing different tasks on the storefront set by you. Now, Let’s check them out.
First, customers have to sign up for an account on the storefront.
After signing up, customers can check their points by clicking on their Profile>“Loyalty Program” section.
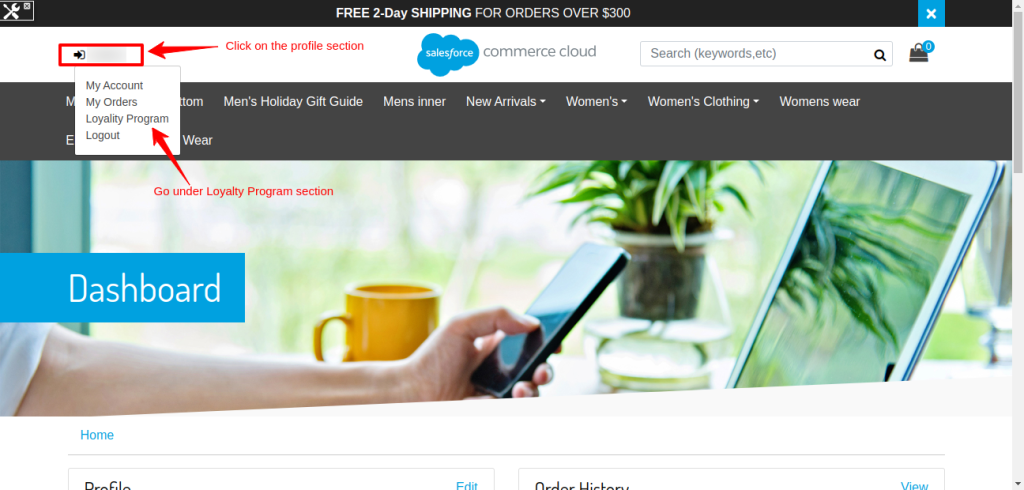
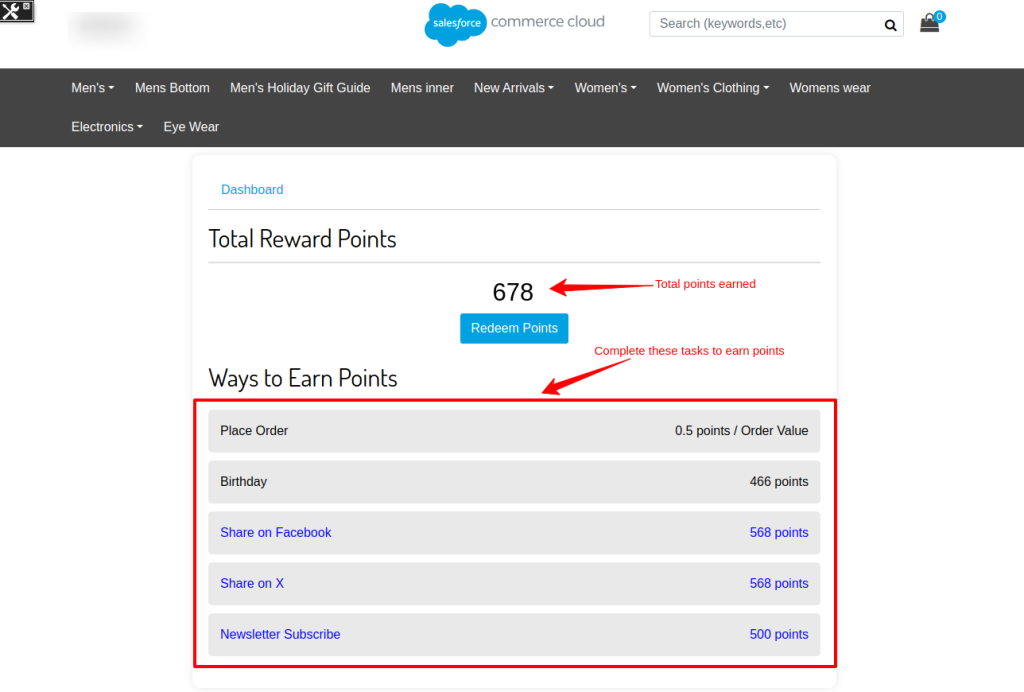
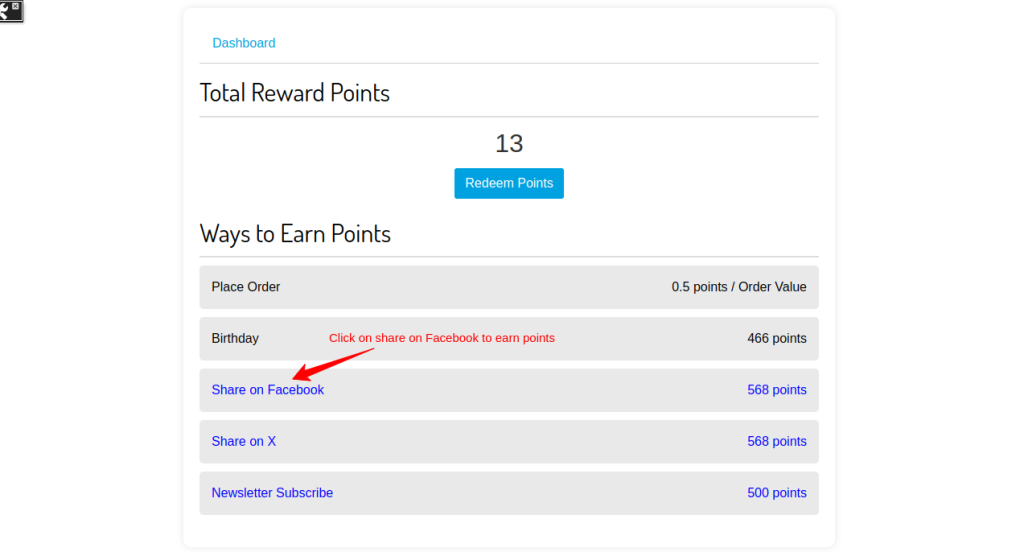
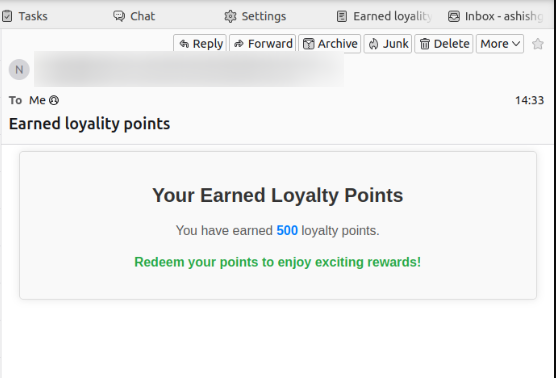
In the Loyalty Points section, your customer will be able to see their earned points and also, know about different ways to earn more points.
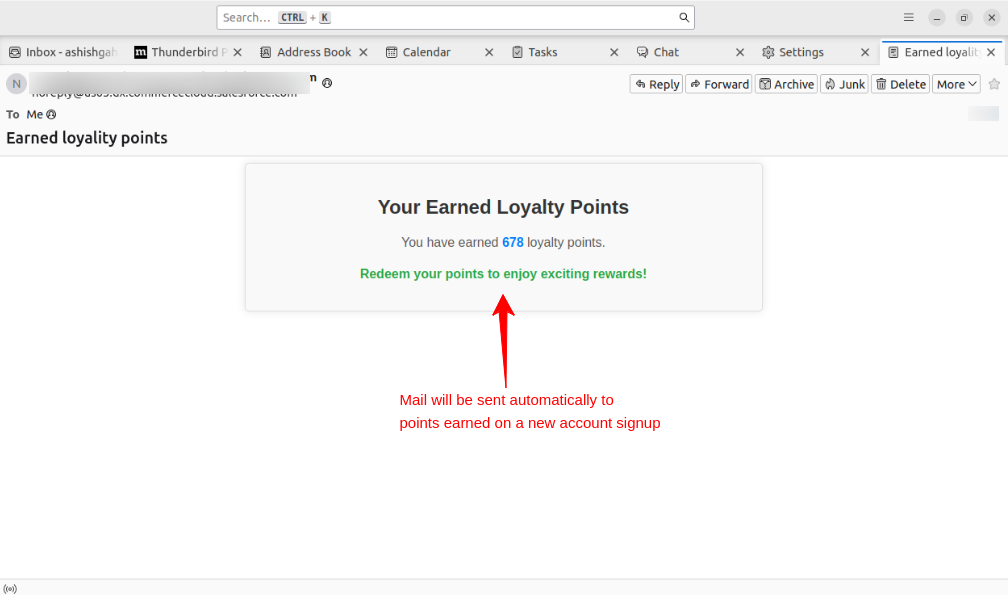
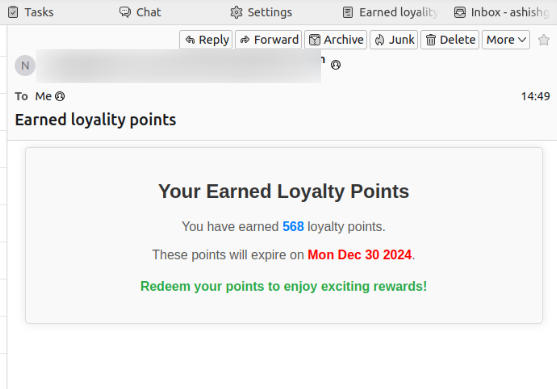
After completing the tasks, the earned points information is automatically sent to the customers via email.
In this case, information about points earned on a successful signup is sent to the customer’s email.
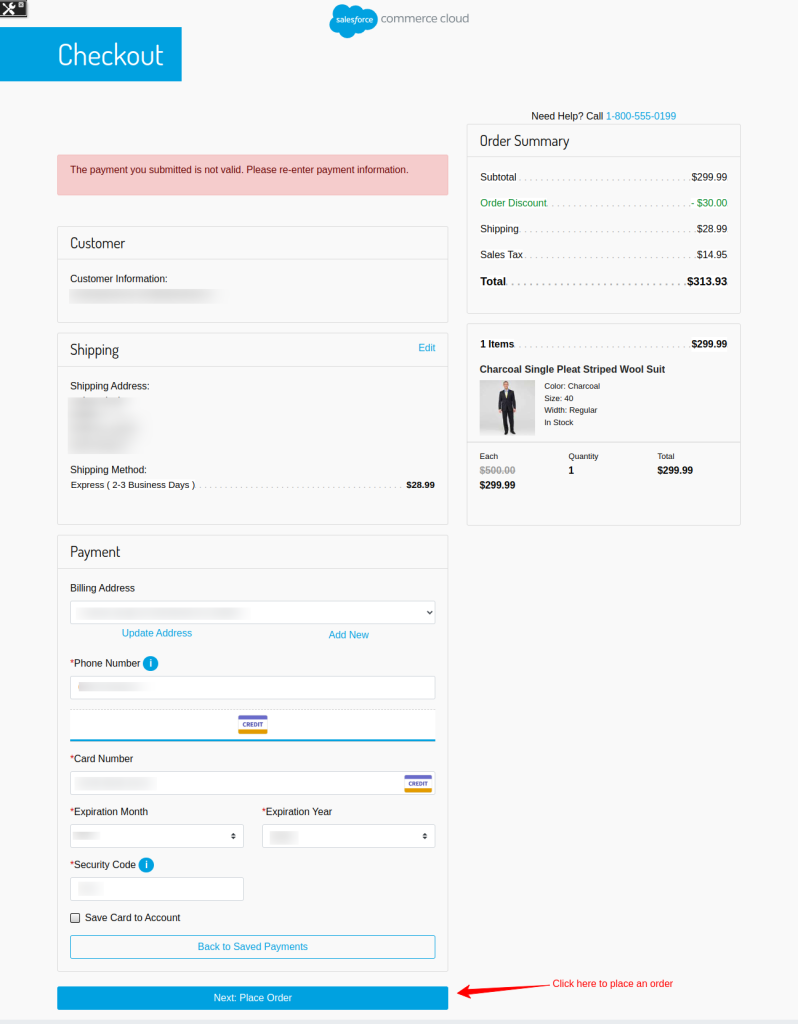
Earn points by placing a new order.
Select a product and click on add to cart.
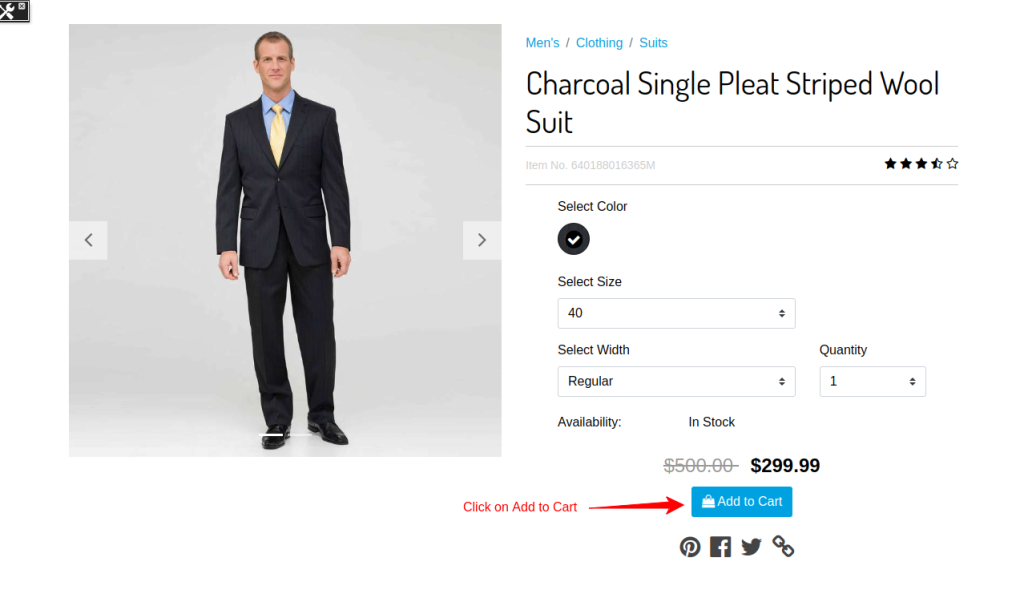
Now fill in the checkout details and Place the order to get points. Your earned points information will be sent to your mail ID and automatically updated on your dashboard.
Earn points on your birthday
You can schedule the job to allocate the points to the customers on their birthdays.
In this way, all the customers will receive the reward points on their birthdays. This will help you build a strong relationship with all your customers.
Let’s find out how you can earn more points by sharing the storefront on your social.
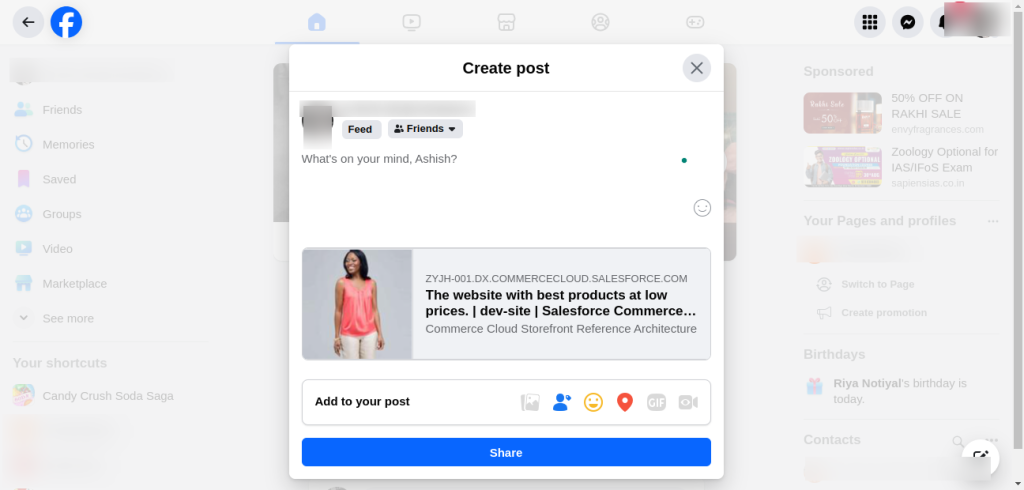
Click on Share on “Facebook”
Fill up your details to share on Facebook. After logging in, you will now be able to share the store in your Facebook profile.
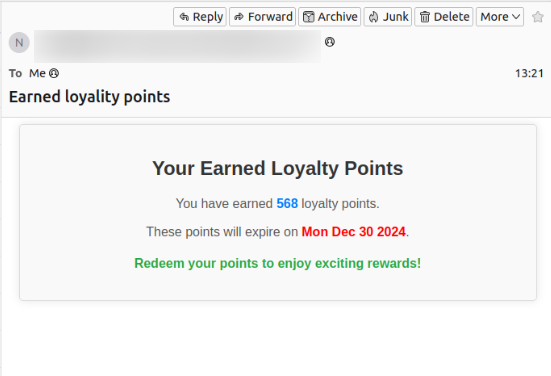
Finally, information on points earned automatically is received by customers via mail.
Share it on X and earn points.
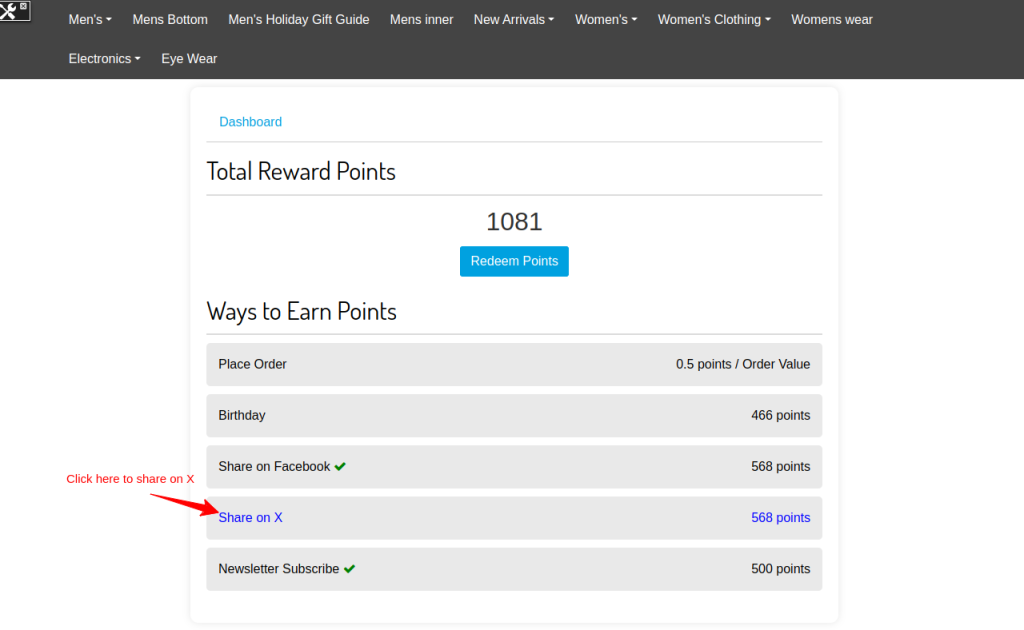
Afterwards, filling in all the details, share the storefront in your Twitter profile. You will be able to share the store.

On successful sharing, your customers will receive the earned points information via mail.
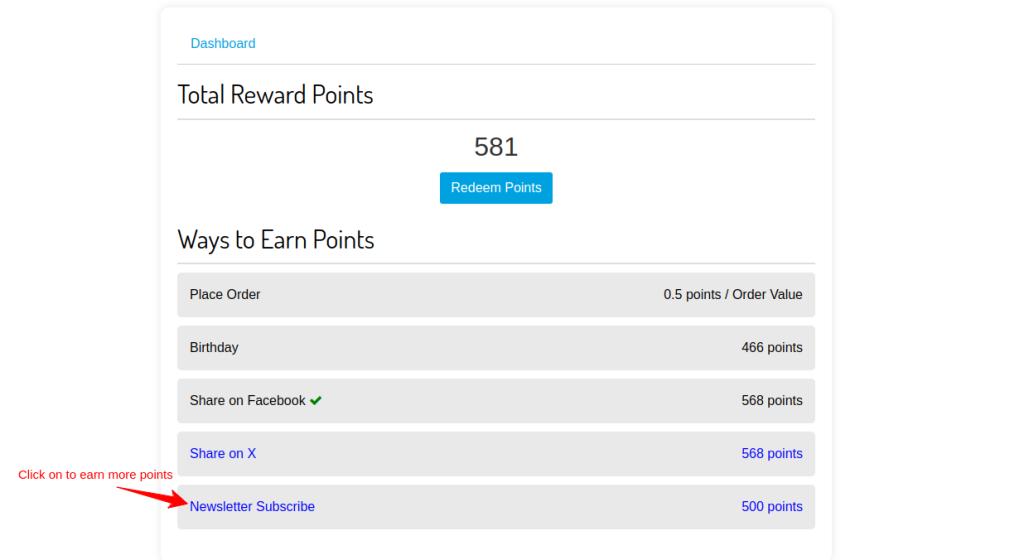
Earn more points by subscribing newsletter. Click on the newsletter subscription.
Scroll down to the bottom and fill up your email ID in the left-hand corner.
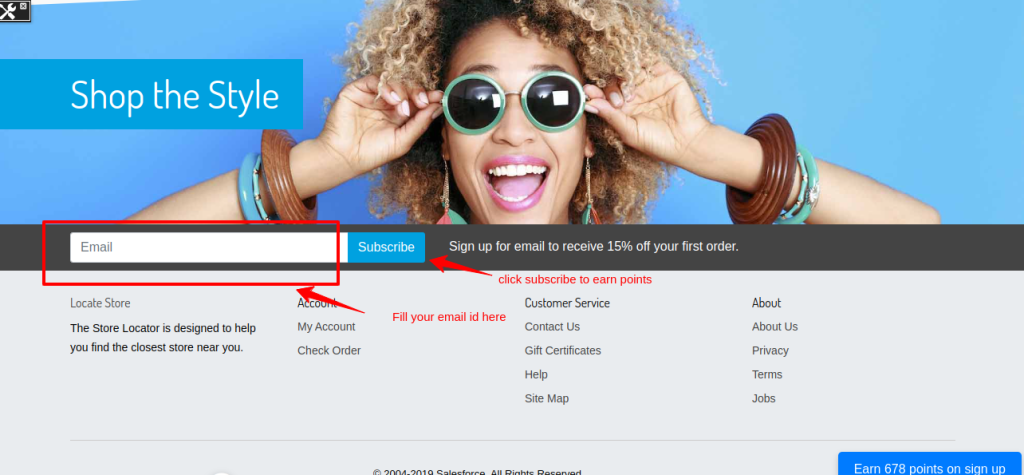
Afterwards, filling in the details and subscribing newsletter, the points earned message will be shared in your email.
Redeem Your Earned Points
Customers can redeem their earned points for coupons. They can go to their Loyalty Program dashboard and then click on the “Redeem Points” button.
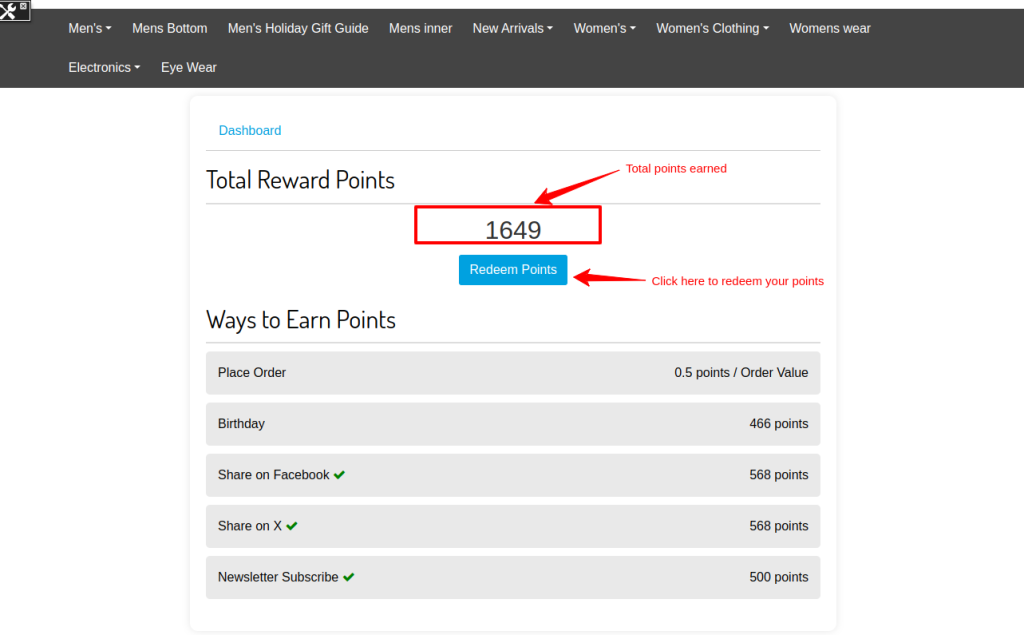
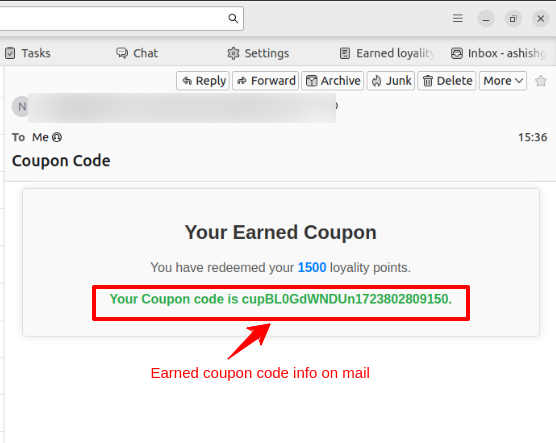
The smart algorithms of the loyalty program for Salesforce Commerce Cloud will do the work by giving the coupon code according to the total points earned by the customer.
The customer will automatically receive the coupon code according to their earned points in their email.
Salesforce AppExchange Consulting Profile
Ready to transform your business with the power of Salesforce?
Webkul is your trusted partner with over a decade of experience and a proven track record of delivering innovative solutions.
Explore our portfolio of 10+ AppExchange apps and discover how our certified developers and dedicated consultants can help you achieve your goals.
Visit our Webkul Consulting Profile to learn more about our Salesforce journey and partner navigator achievements. Let’s build something extraordinary together
Support
-
For customized, affordable, quick solutions, get the Salesforce PDO Services now.
-
For any further queries, Click To Create a Ticket.

Your email address will not be published. Required fields are marked *