User Guide For Xero Salesforce Connector
Welcome to the User Guide for Xero Salesforce Connector, designed to help you seamlessly integrate your Xero accounting software with Salesforce CRM. This integration will streamline your sales and financial operations by connecting customer and financial data across both platforms.
With Xero Salesforce Connector, you can view customer financial data, invoices, and payment information in Salesforce, allowing you to better understand your customers’ economic history and improve sales opportunities. The integration also enables you to automate financial data transfer between Salesforce and Xero, saving you time and reducing the risk of data entry errors.
This guide will walk you through the steps to set up the connector and configure the settings according to your business needs. We’ll cover everything from installing the integration, mapping data between the two platforms, and troubleshooting common issues.
Whether you’re a small business owner, an accountant, or a sales professional, Xero Salesforce Integration is a powerful tool that can help you simplify your operations and improve your bottom line. So, let’s get started and discover how this integration can benefit your business and how you can connect it.
What Are The Benefits Of Xero Salesforce Connector?
Some of the benefits of integrating Xero and Salesforce include the following:
- Streamlined processes: Integrating Xero and Salesforce can help automate processes such as invoicing and payments, reducing the need for manual data entry and saving time.
- Improved visibility: Integrating Xero and Salesforce can provide a complete view of a customer’s financial history, helping businesses make better-informed decisions.
- Collaboration: Integrating Xero and Salesforce can improve the collaboration between finance and sales teams, as both teams have access to the same data.
- Accurate data: Integrating Xero and Salesforce can help ensure that data is accurate and up-to-date, reducing errors and minimizing the risk of financial mistakes.
Installation & Setup at Salesforce’s end
- First of all, get the application eShopSync For Xero from AppExchange
- Click on Get it now button
- It redirects you to the screen where you have to choose the user type you want to do the installation
- Then select the acknowledgment and click on the Install button.
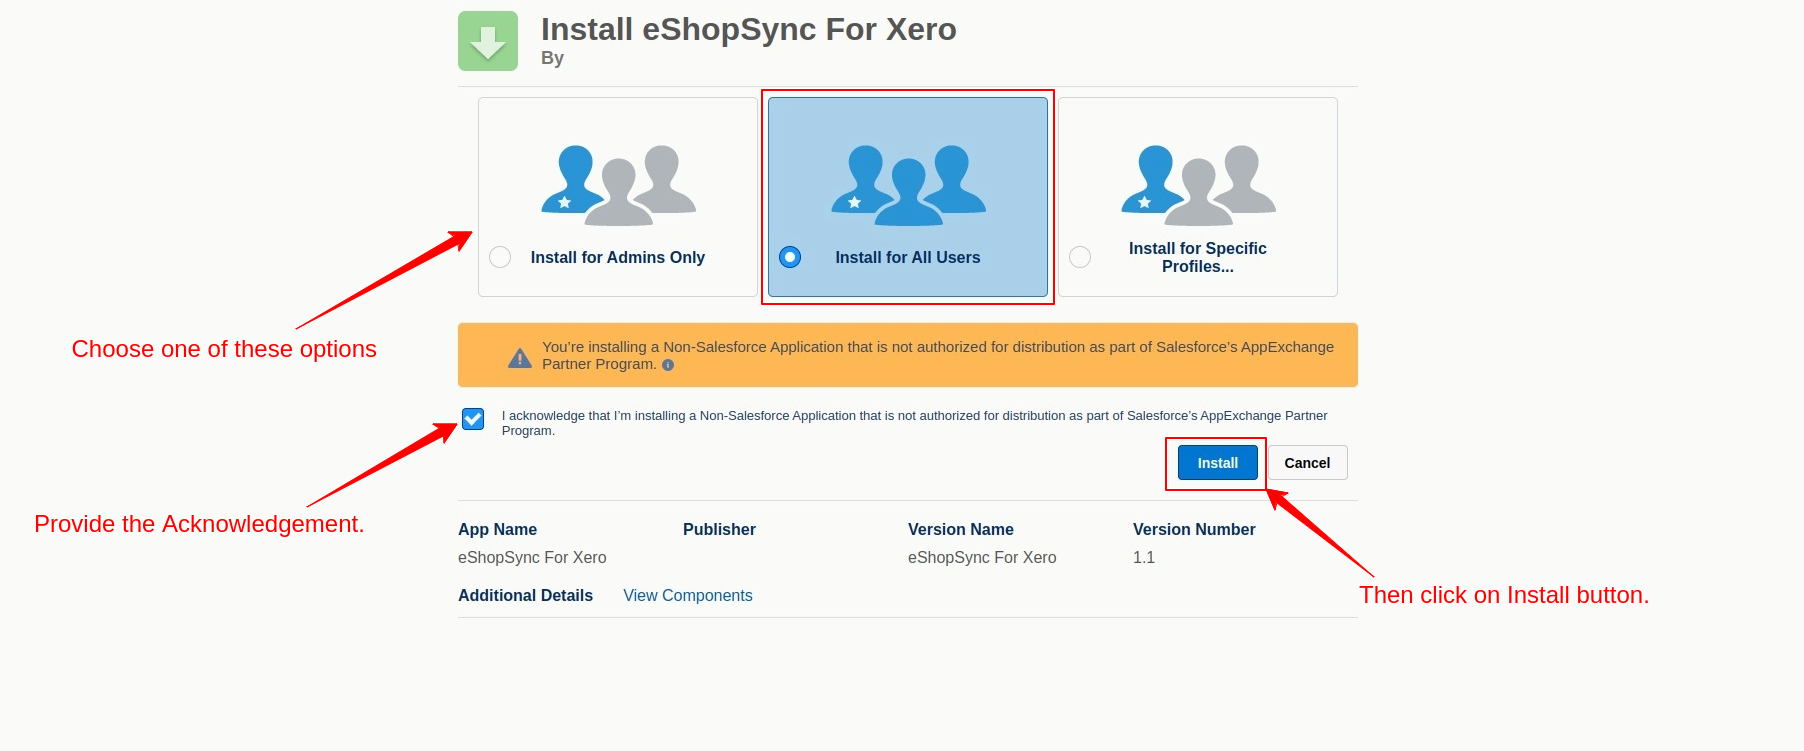
- Now give the installation access and click on the Continue button.

- Grant appropriate permissions for objects and fields to respective users of the application.
Create A New Organization In eShopSync For Xero
If you already have an existing organization, you can continue using it, or if needed, you can create a new organization by following the instructions provided below:
- To create a new organization, visit https://go.xero.com
- Then from the top left side click on the drop-down arrow and further select “Add a new organization”.

- Now a form opens up on your screen.
- Fill in the required details in the form and save it.
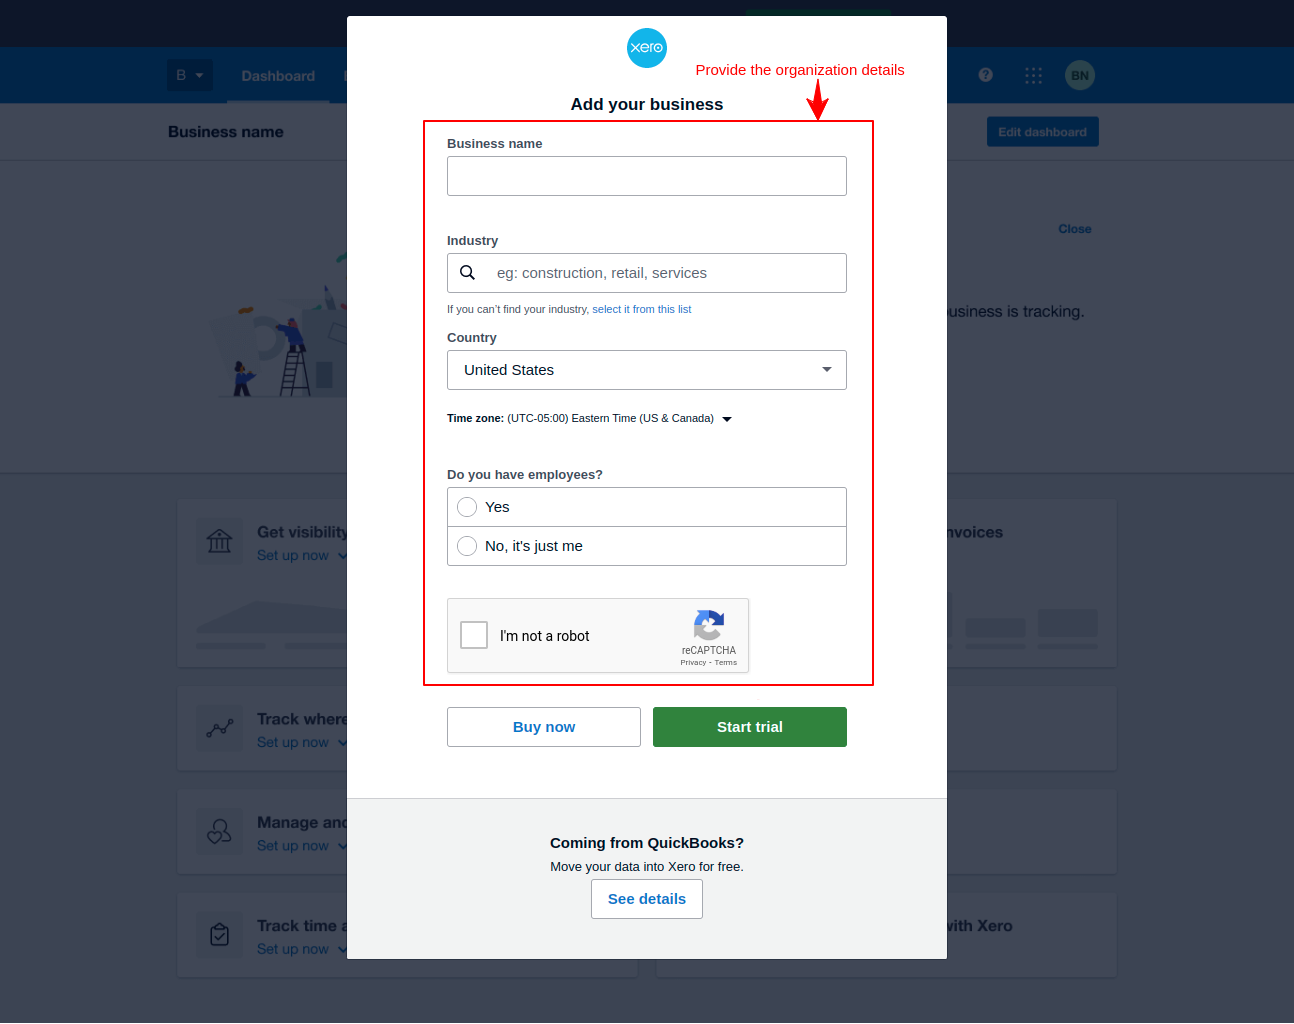
- The new organization is shown in the drop-down menu. Click on it to open it.

How To Add Xero Organization To Salesforce?
- Open Salesforce Org and click on the App launcher.
- Then click on the Xero Salesforce Connector to open it.
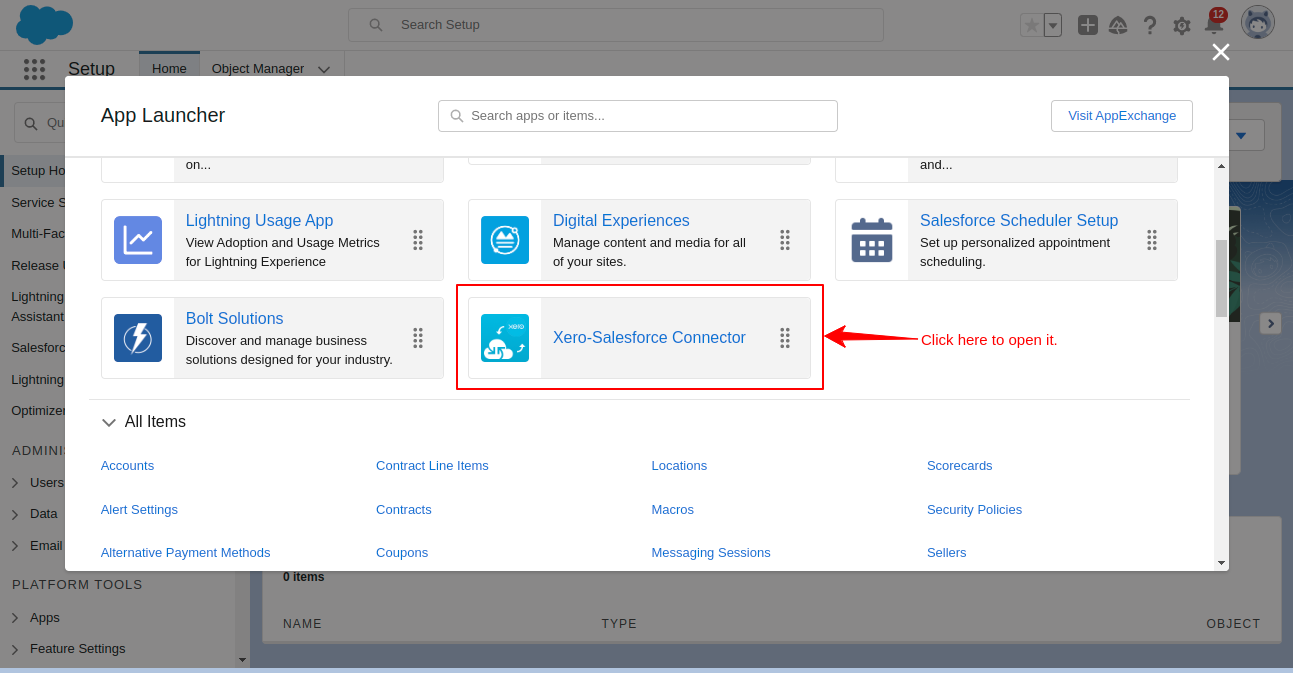
- Add a new company by clicking on the Add button.
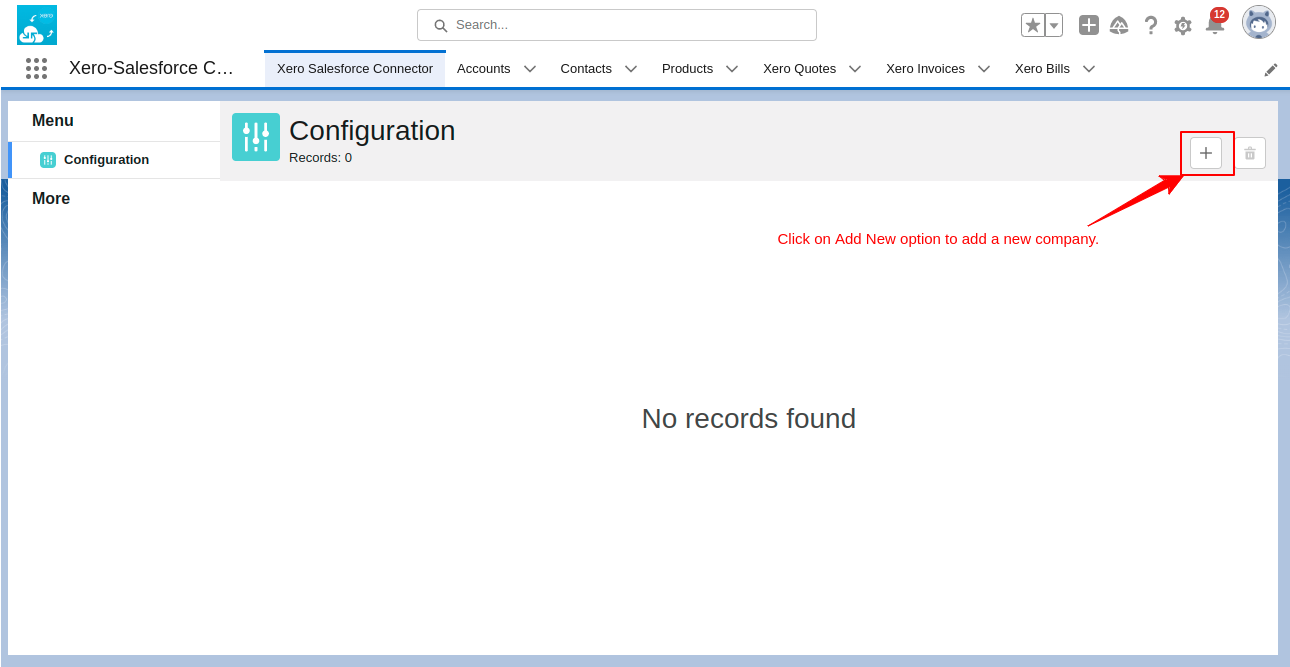
- A form named “Add a Xero Organization opens up”.
- Provide the required information such as Organization name, Client ID, Client Secret, and Webhook Key.

- For Client ID and Client Secret, visit https://developer.xero.com
- Click on the New App button to create a new application in Xero.

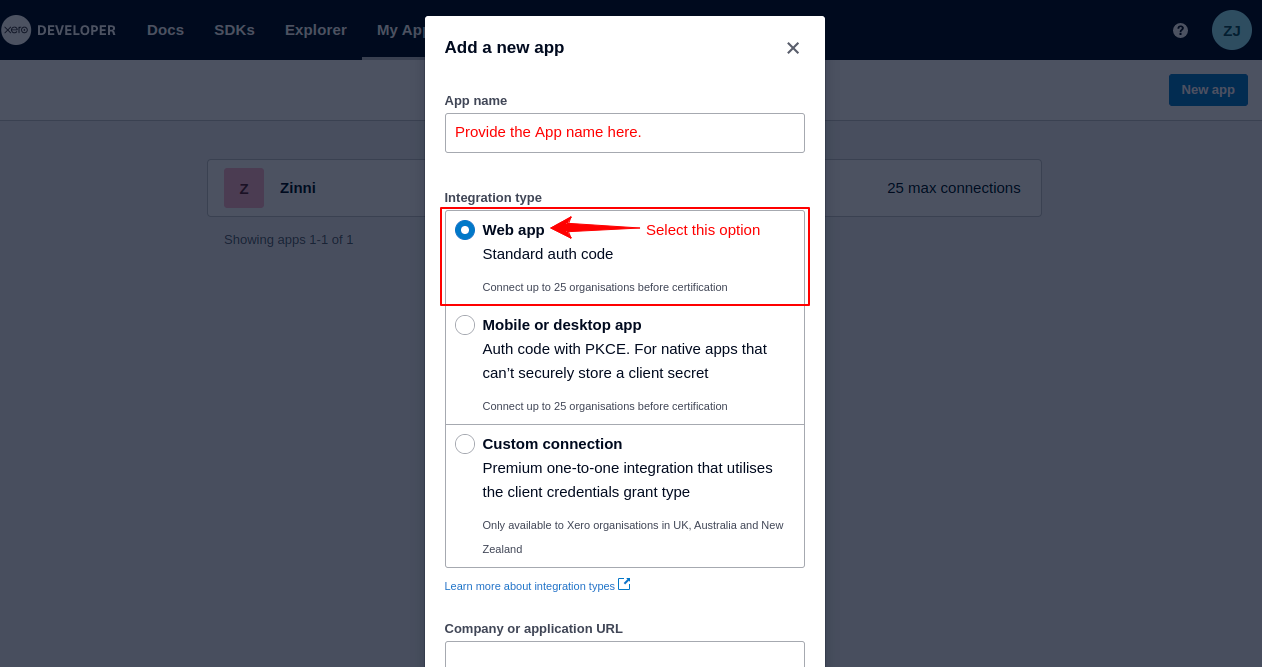
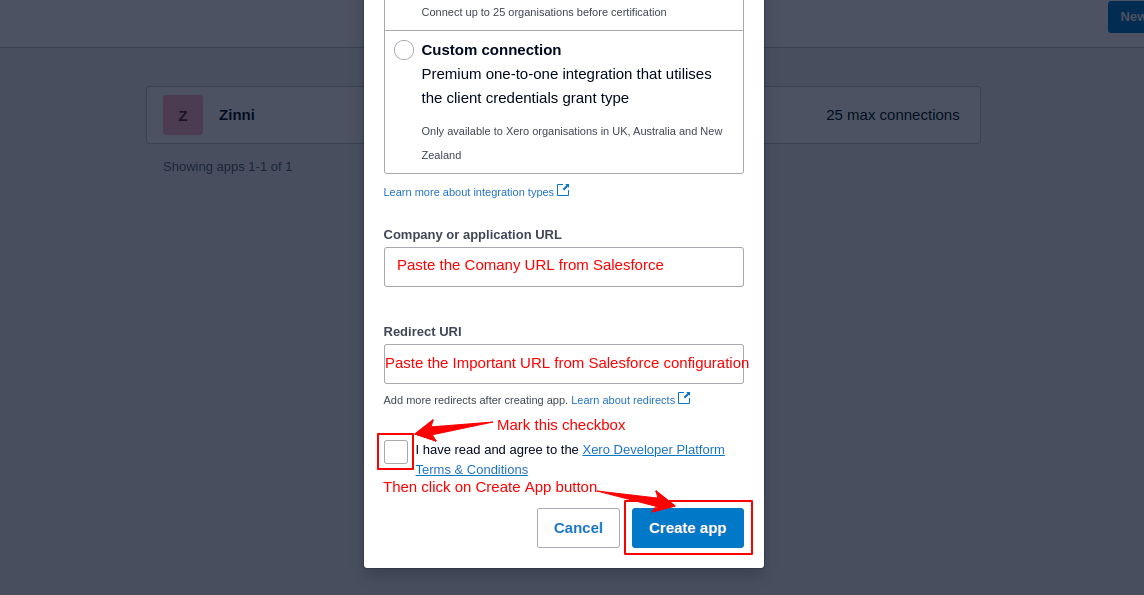
- After successfully creating the application, open it
- Then go to the Configuration option from the left navigation panel
- Now, copy the URL from the new organization Window and paste it into the configuration window in Add New URI
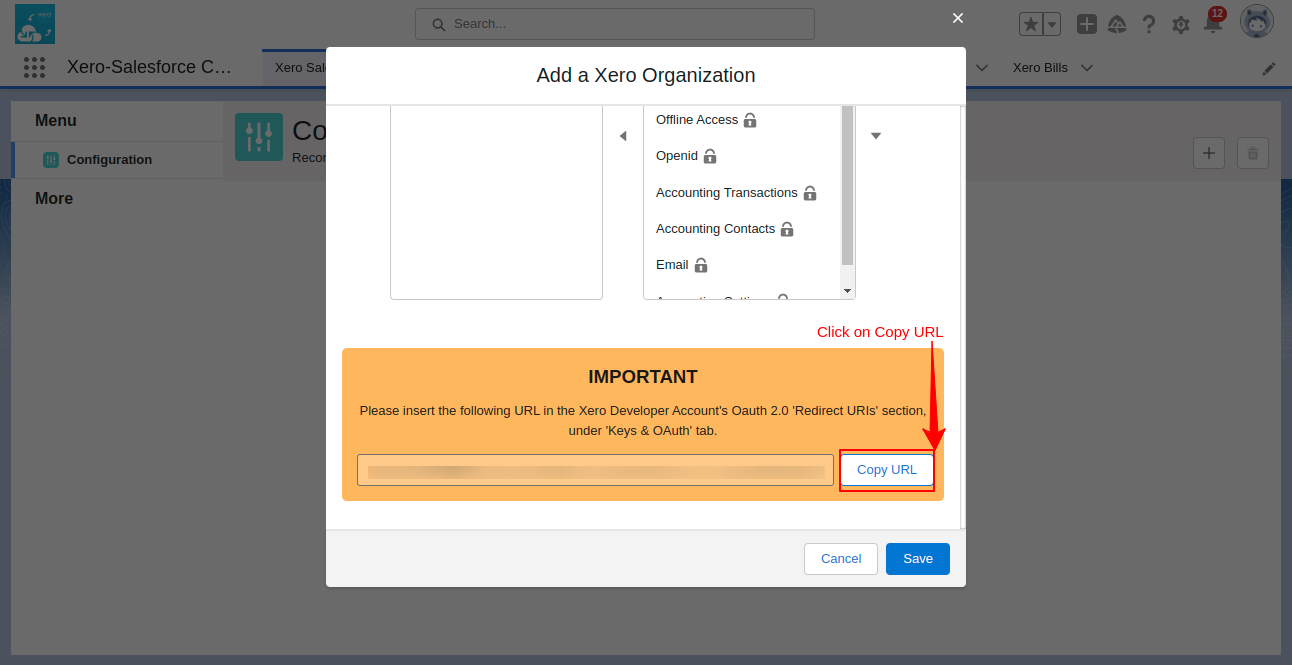

- After this, copy the Client ID and paste it into the Add Xero Organization window in the configuration of the Xero Salesforce Connector
- Now click on the “Generate Client Secret” button. Copy and then paste it into the Salesforce configuration of Xero Salesforce Connector

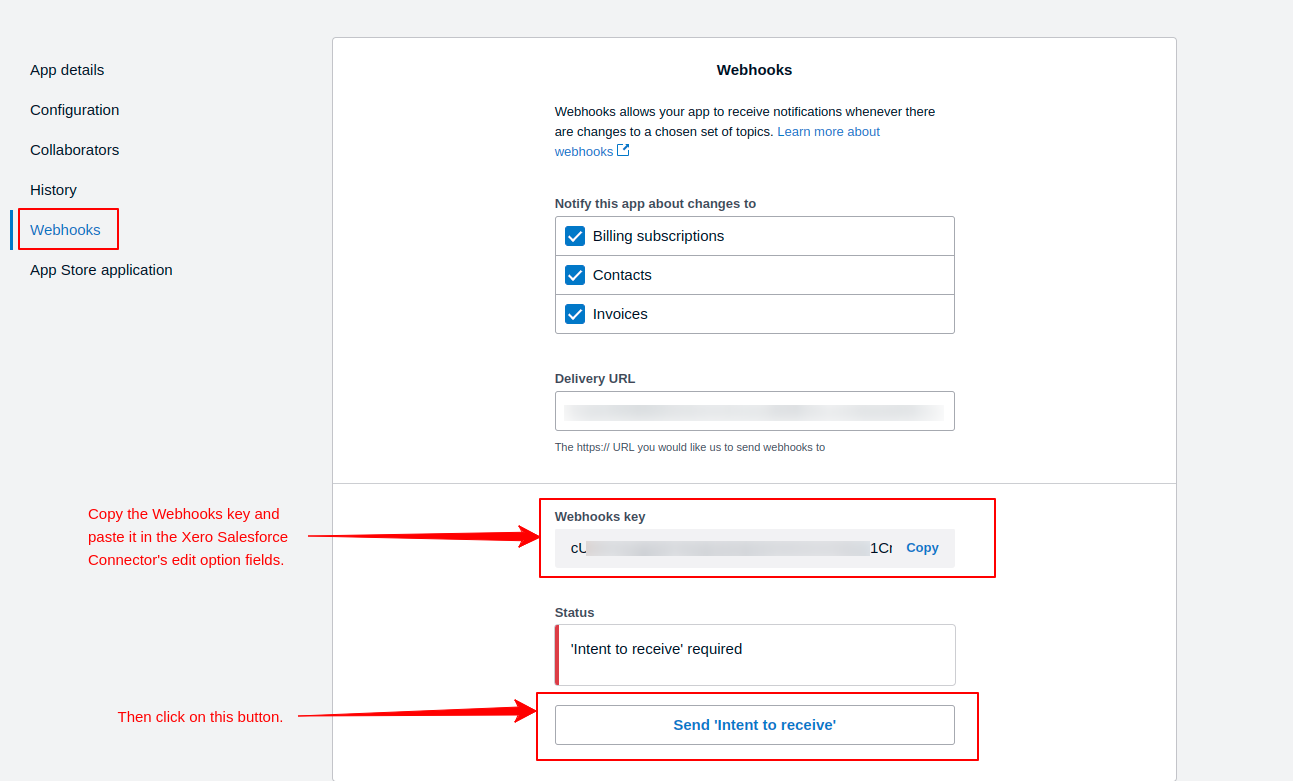
- For Webhook Key, go to the Webhook option from the left navigation panel in the Xero configuration window.
- Then select the option for which you want to run webhooks to get real-time updates. Then mention the Redirect URL from Salesforce in the Delivery URL box and click on Save to save all the settings.
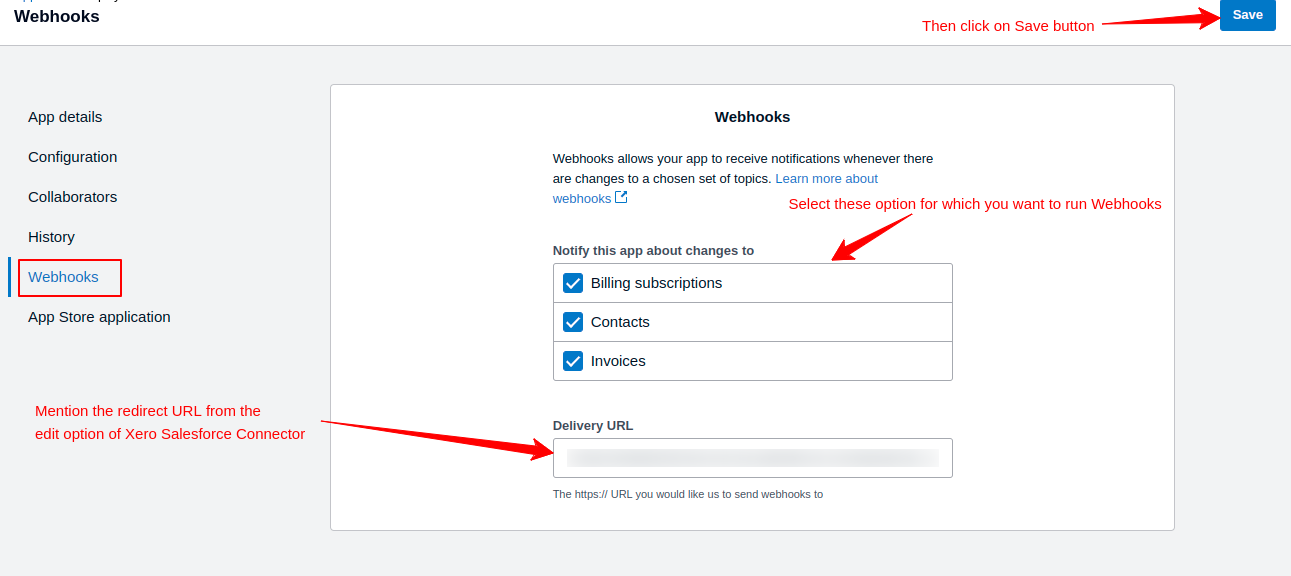
- After saving the information you get the Webhooks key that you have to copy and paste into the “Edit Xero Organization” form in Salesforce. After that, click on the Save button.
Connect Xero Organization To Salesforce
- To connect the Xero organization to Salesforce Org you have to click on Connect to Xero button shown in the Xero Salesforce Integration application.
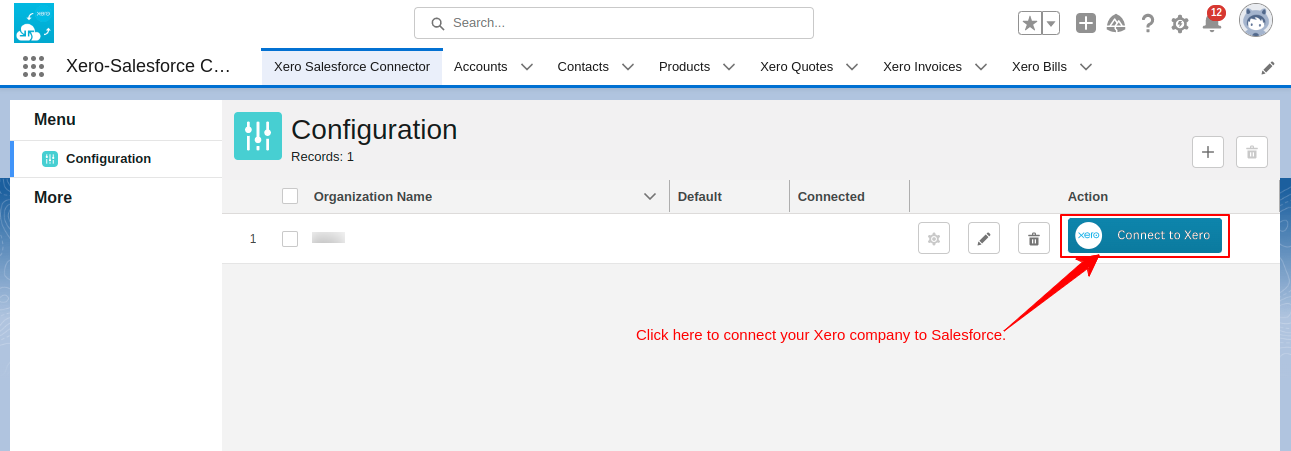
- It opens up the Xero User Consent form where you have to select an organization and click on Allow Access.

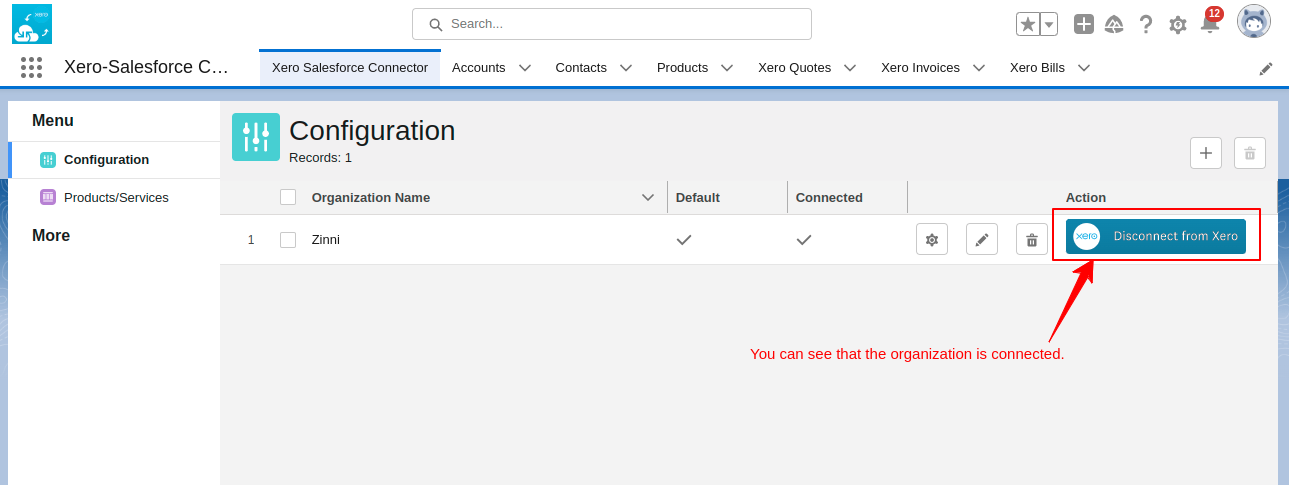
- The button name changes to Disconnect from Xero, which means the Xero is connected to Salesforce using the Xero Salesforce Connector.
Xero Salesforce Connector Application Configuration
- In Xero Salesforce Connector, click on the Configuration button to do the settings of the application.
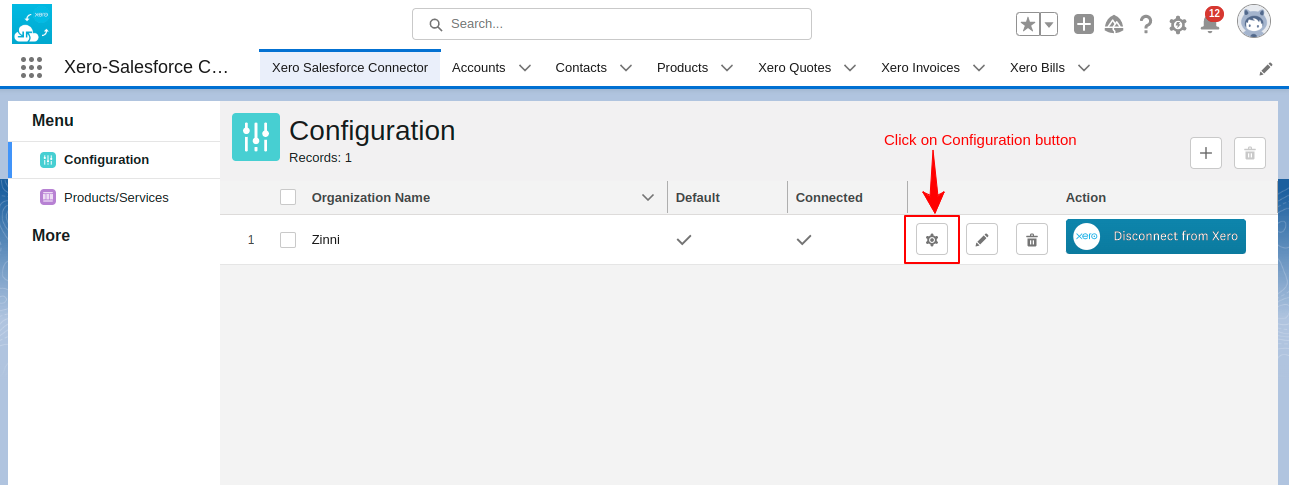
- The configuration box opens up; in this, you have to select the object you want to import.
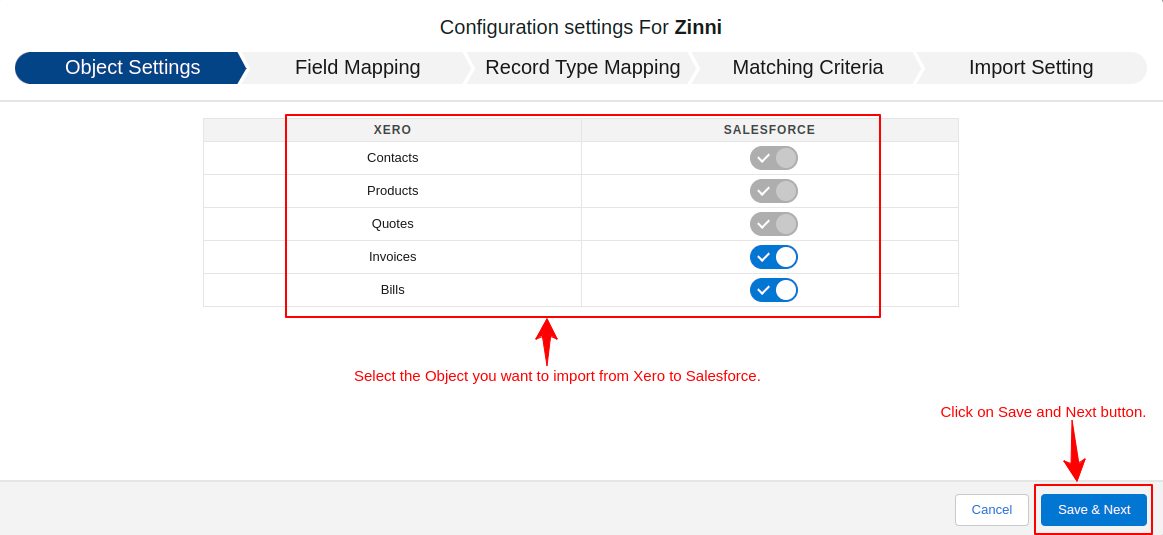
- Now click on Save and Next then it takes you to the Field Mapping tab
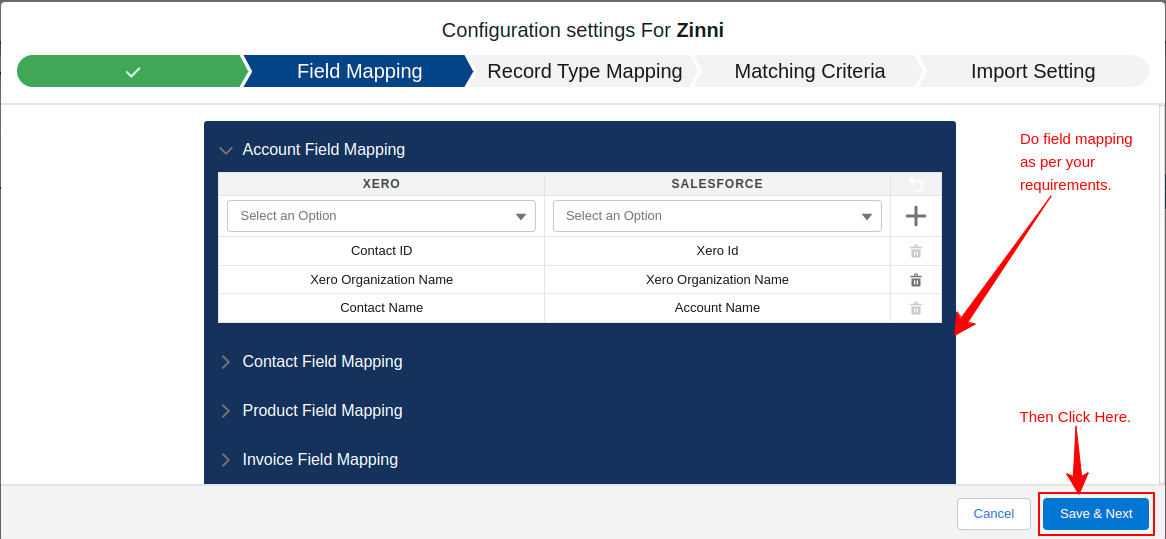
- Now click on Save and Next then it takes you to the Record Type Mapping tab
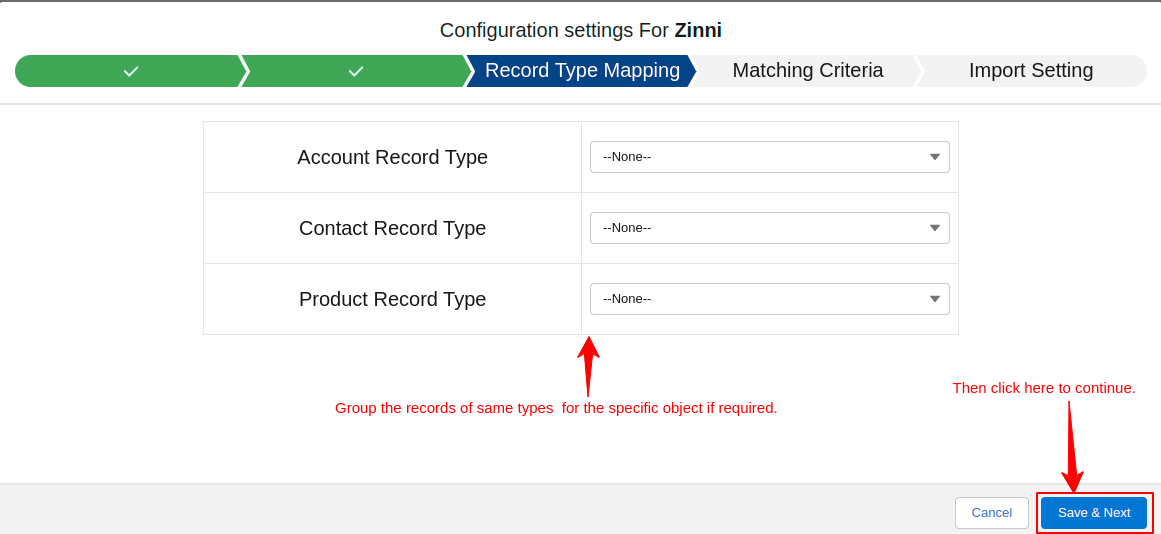
- Now click on Save and Next then it takes you to the Matching Criteria tab
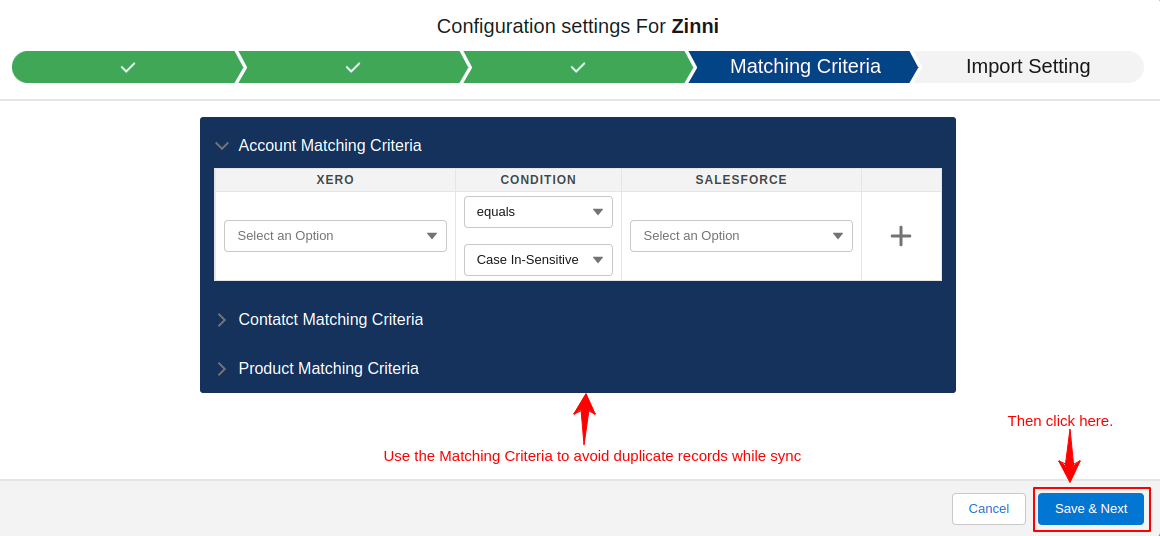
- Now click on Save and Next then it takes you to the Import Setting tab
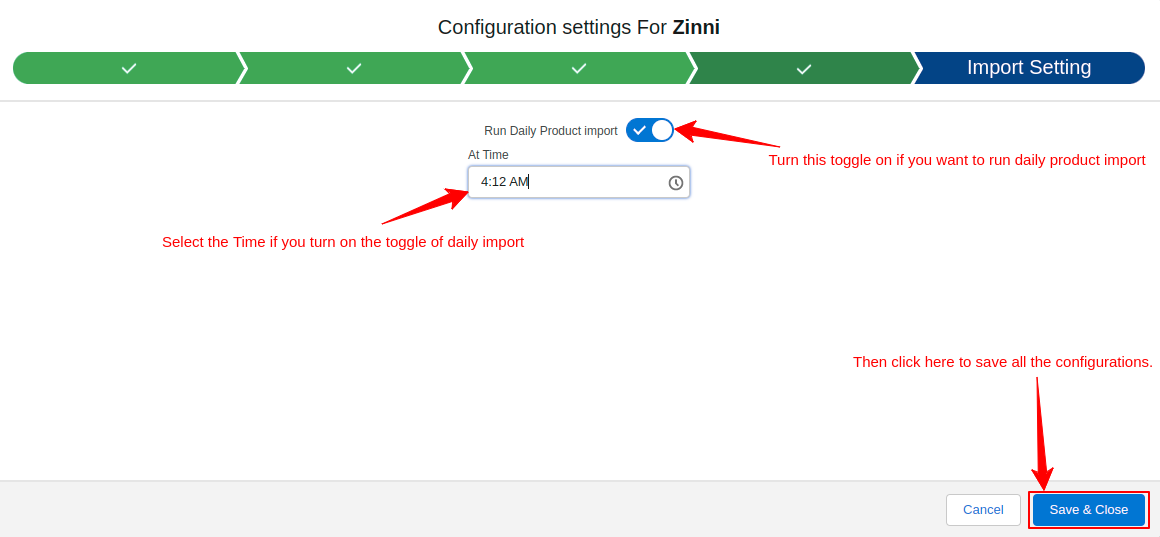
- All the configuration is done and you are ready to sync all your records of contacts, bills, quotes, invoices, and products & services from Xero to Salesforce.
How To Use Row Actions In Xero Salesforce Connector?
Here are the row options that you can use in all the entities such as contacts, products, bills, invoices, and quotes.
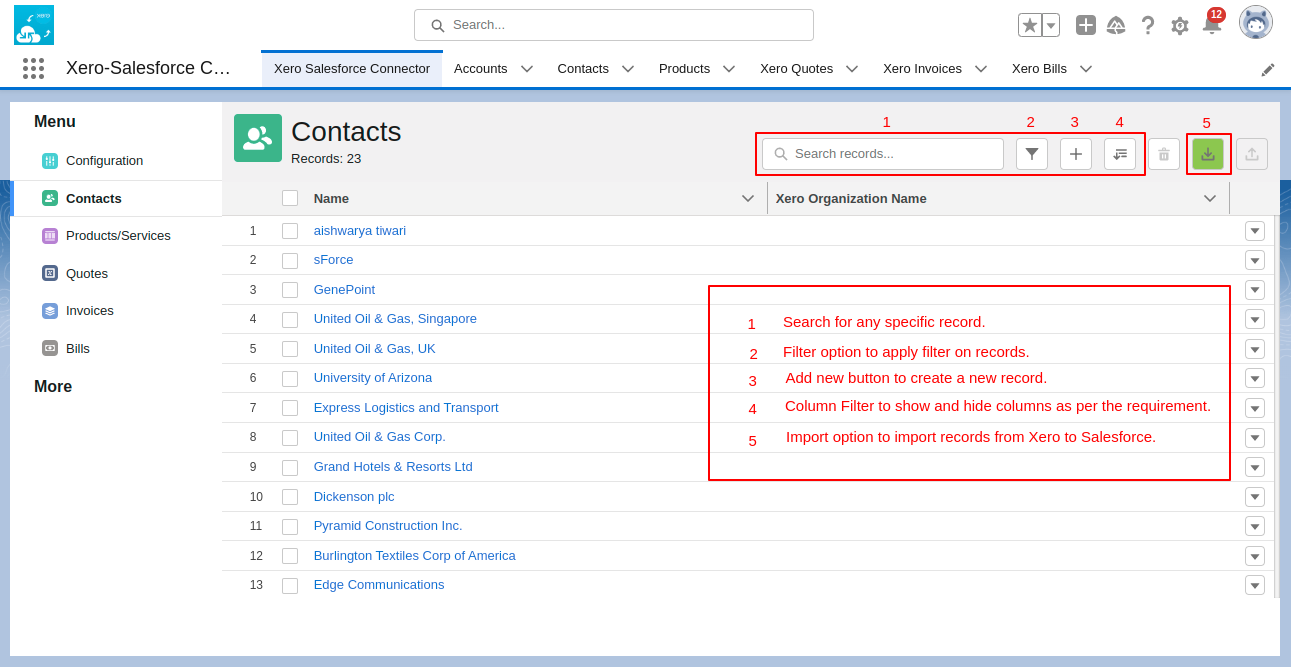
- Search Box- Search any specific record from the records as per your requirement.

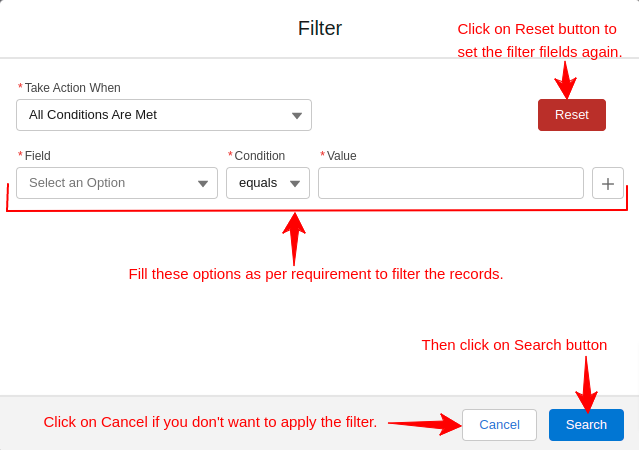
- Filter- Apply the filter to get specific records.

In the filter pop-up form, provide the details to apply the filter to your records.
- Add New- You can create a new record using the Add New button.
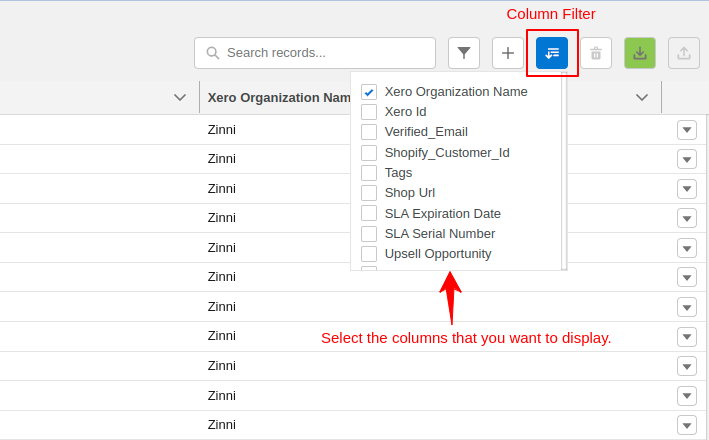
- Column Filter- Use the column filter to show or hide the columns as per the requirements.
- Delete- Select records that you want to delete and then click on the Delete button.
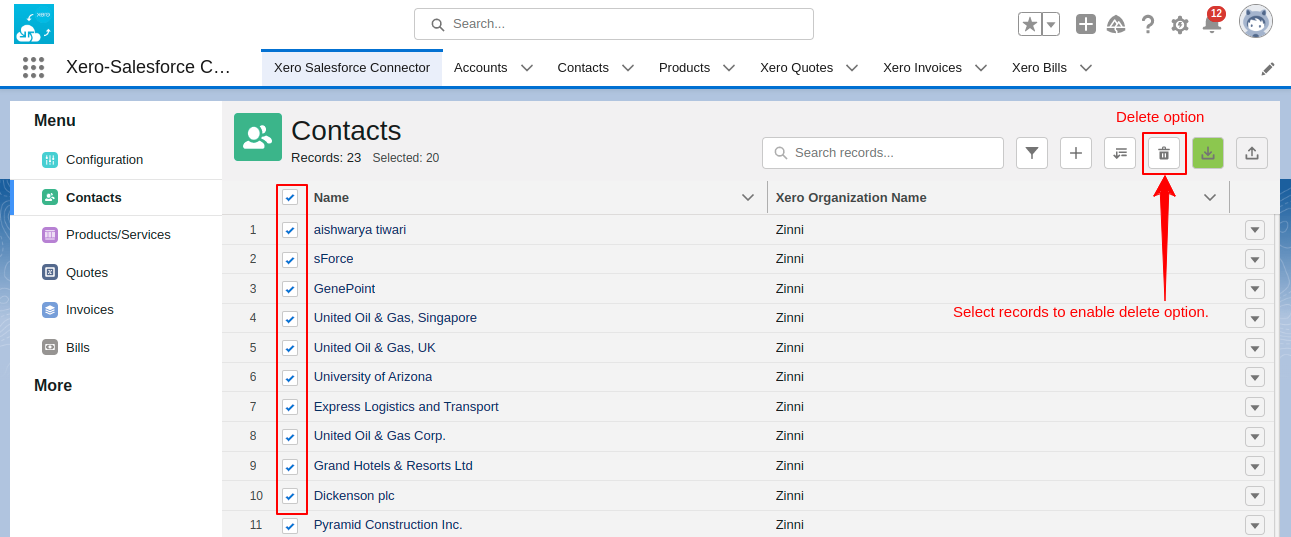
- Import- Click on the import button to import all the records from Xero to Salesforce.
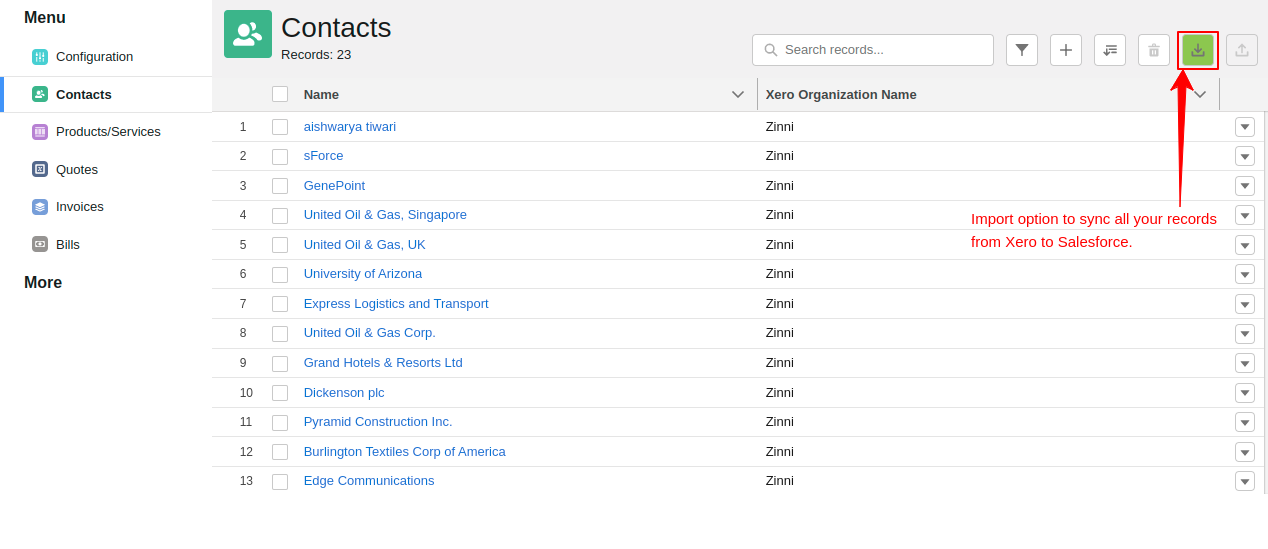
- Export– You can export the records by making the selection of records into your local drive.

There are 4 specific drop-down row actions as follows:-
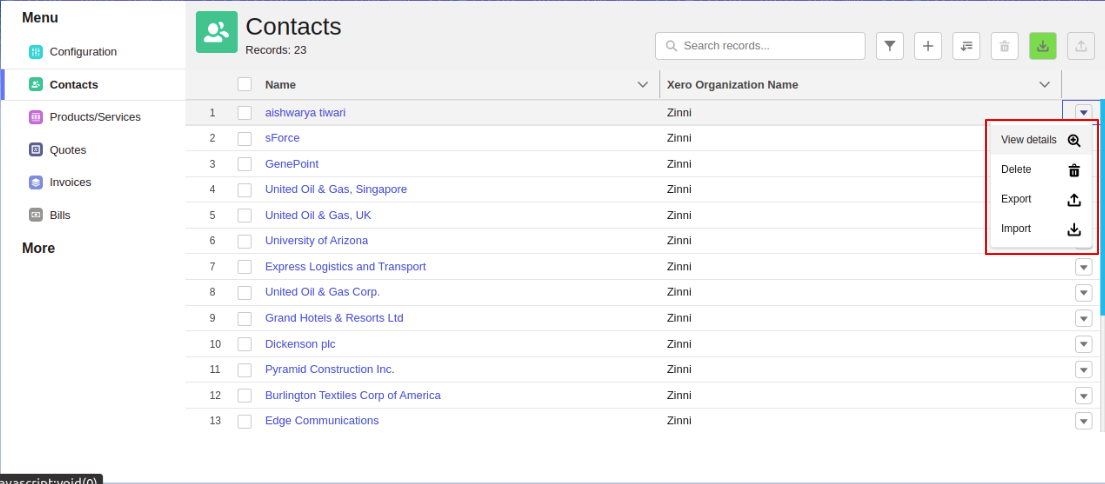
- View Details: View the full information of the record you selected.
- Delete: Delete the record for which you selected this option.
- Export: Export the record from Salesforce to Xero for which you selected this option.
- Import: Import the record from Xero to Salesforce for which you selected this option.
View Of Synced Entities in Xero Salesforce Connector
- Contacts- View of Synced contacts shown in the application.
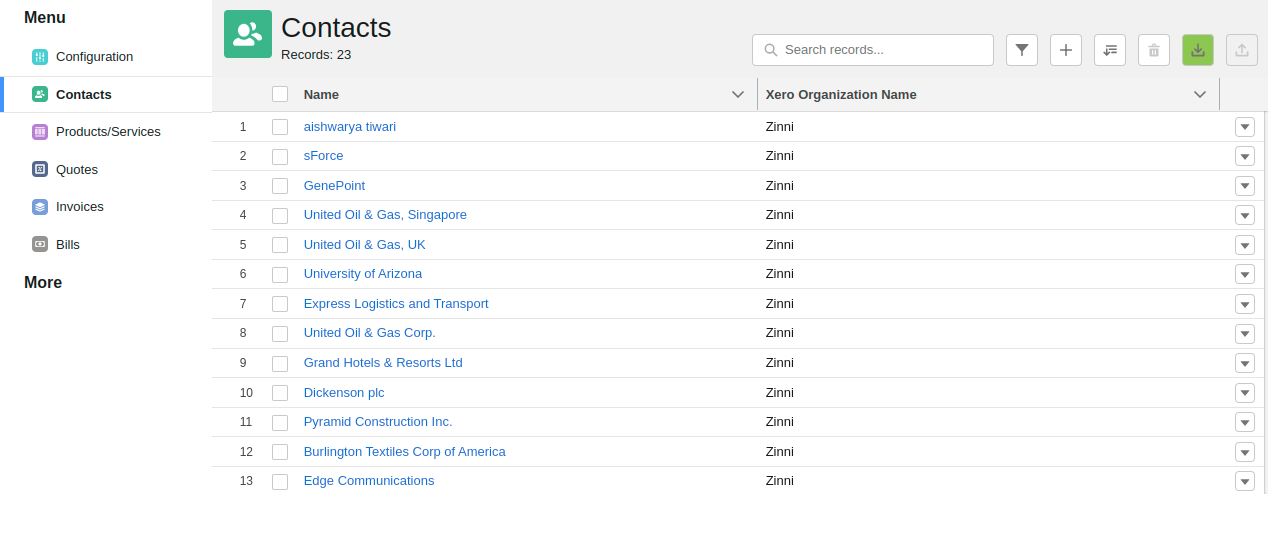
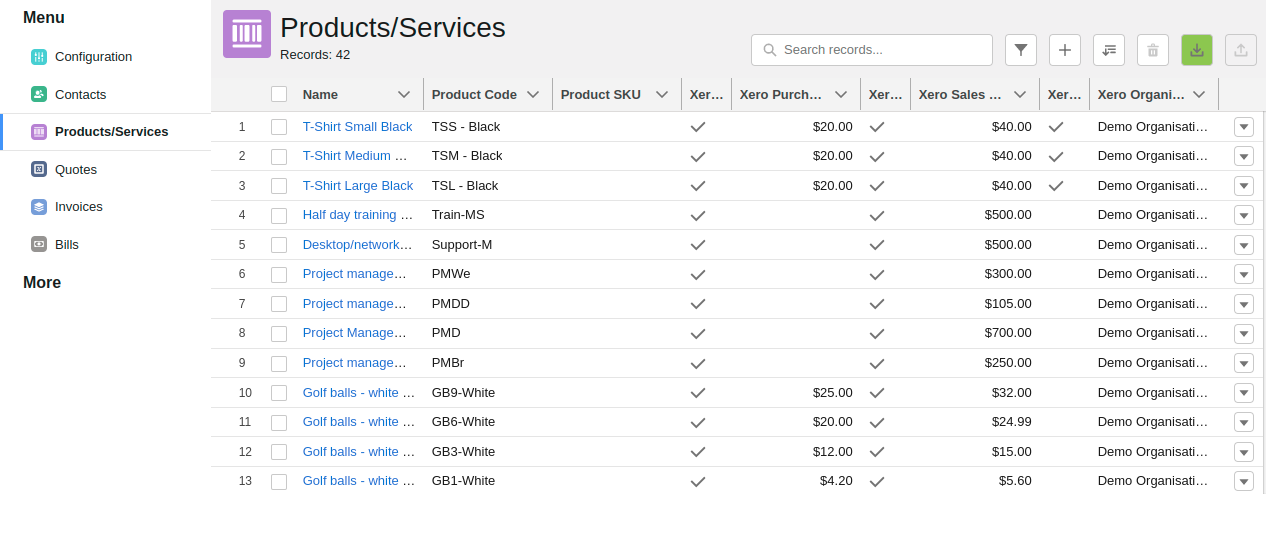
- Products and Services- View of Synced products and services shown in the application.
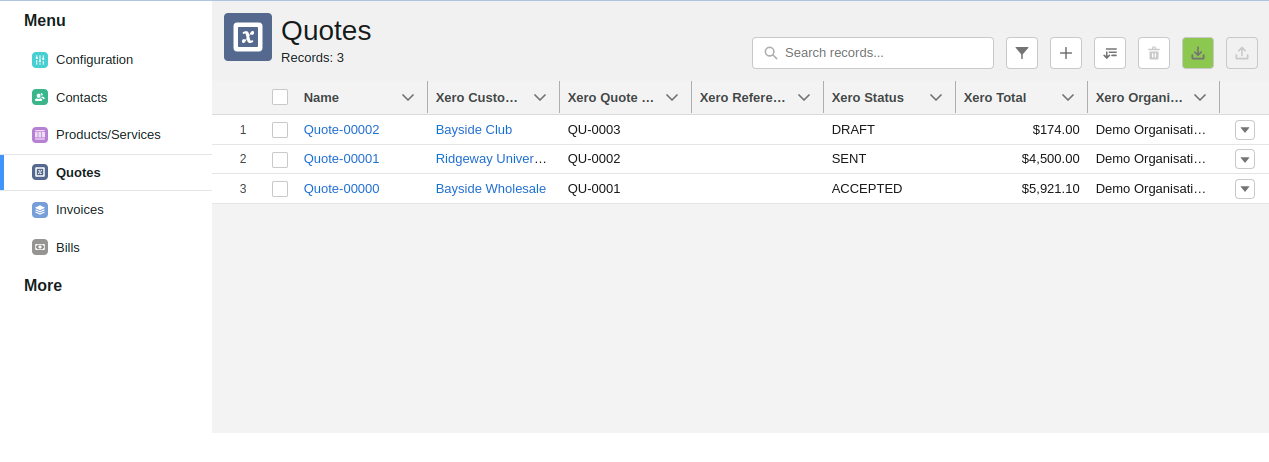
- Quotes- View of Synced quotes shown in the application.
- Invoices- View of Synced invoices shown in the application.

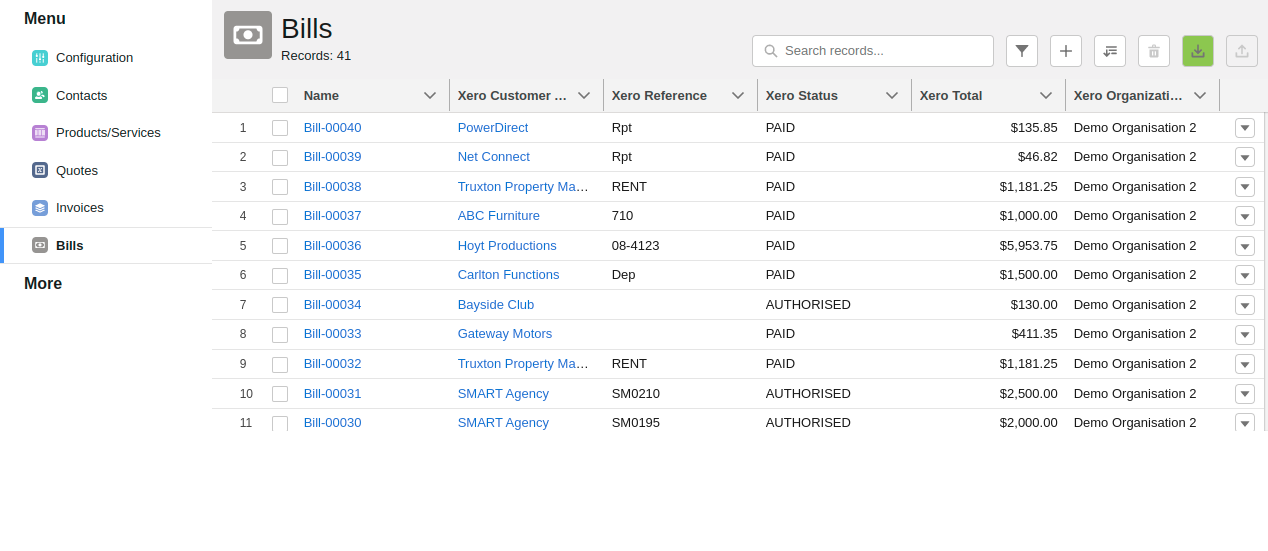
- Bills- View of Synced bills shown in the application.
Conclusion
Xero Salesforce Connector helps you to sync all your data from Xero to Salesforce in no time on a real-time basis. This leads to an increase in the sales process, no duplicate records, running automated campaigns, and more.
We provide the ideal option if you’re seeking Xero Salesforce Integration services. Because we are skilled in developing Salesforce integration solutions. As eShopSync is a brand of Webkul, these solutions are made by qualified Salesforce developers, allowing you to operate in a hassle-free setting.
Salesforce AppExchange Consulting Profile
Support
For any further queries, Click To Create a Ticket
To know the feasibility of specific requirements: Request For Customization
To view all our applications in Appexchange, visit Webkul Appexchange Apps.



Leave a Comment
Comments (0)