Features
-
- Sync Products, Abandoned Checkouts, Subscribers, Customers, and orders from Shopify to Marketing Cloud manually & in real-time.
- 100% accurate data is being synced with the marketing cloud.
- Very easy to integrate & manage at your store.
- ***Note***: Abandoned Checkout auto-sync is available with Business Plan.
New Updates:
- In our new update, a large amount of data can be synced partially which saves your time. Now there is no need for you to sync all the data at once.
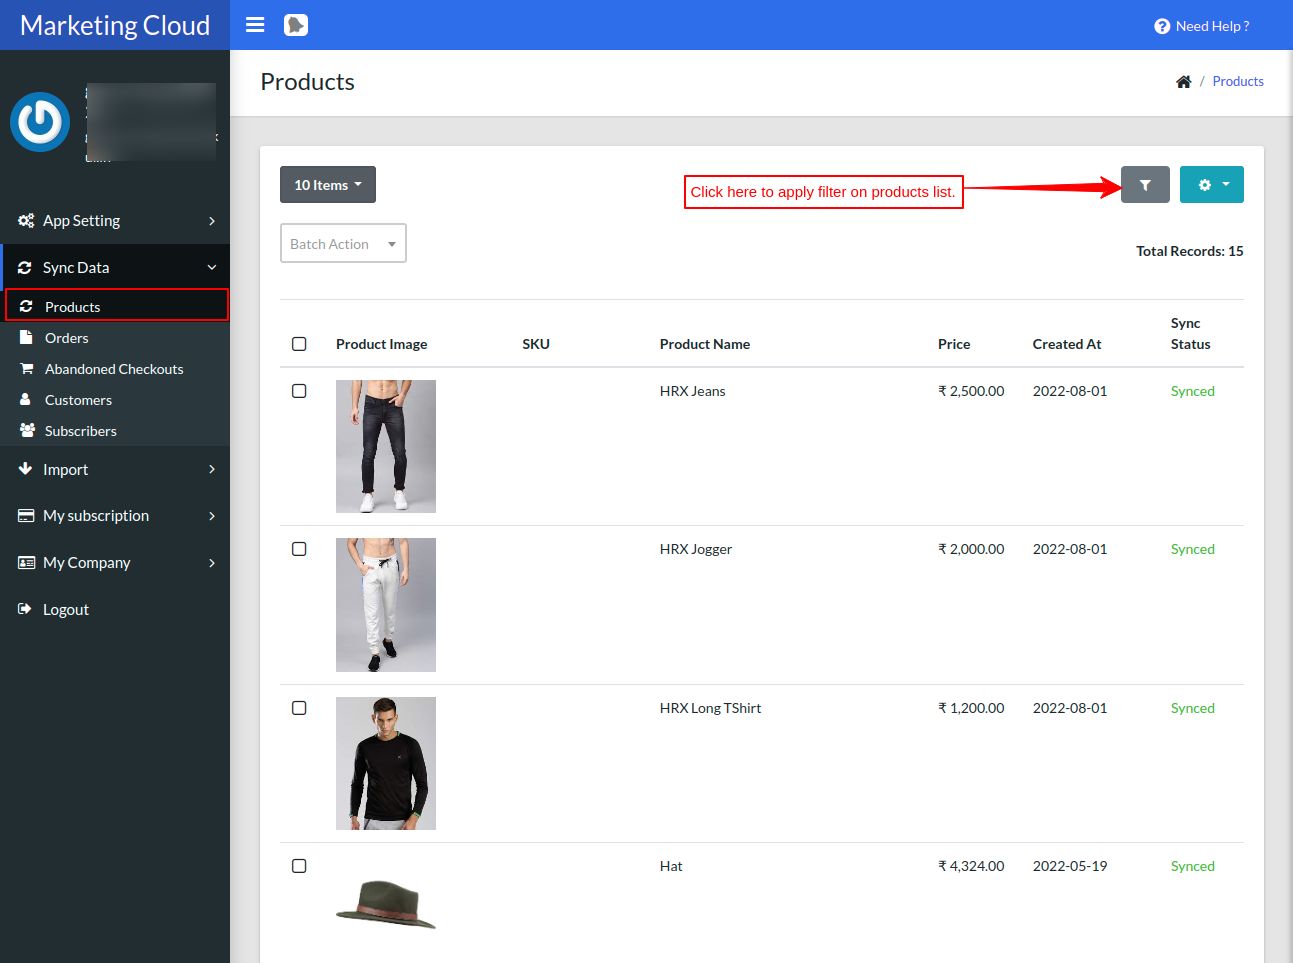
- The option to filter the product data has been provided through product name or SKU, sync status, or date.
- The option to filter the order data has been provided through sync status, order status, subscriber email, max total, min total, or date.
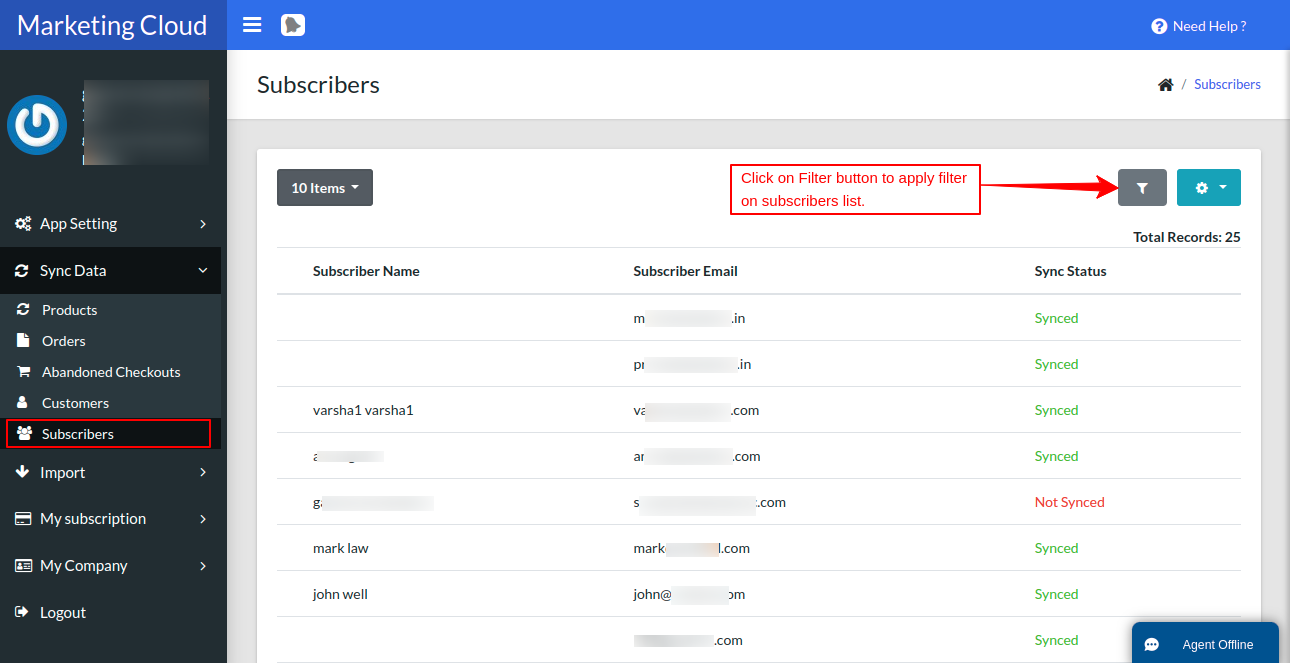
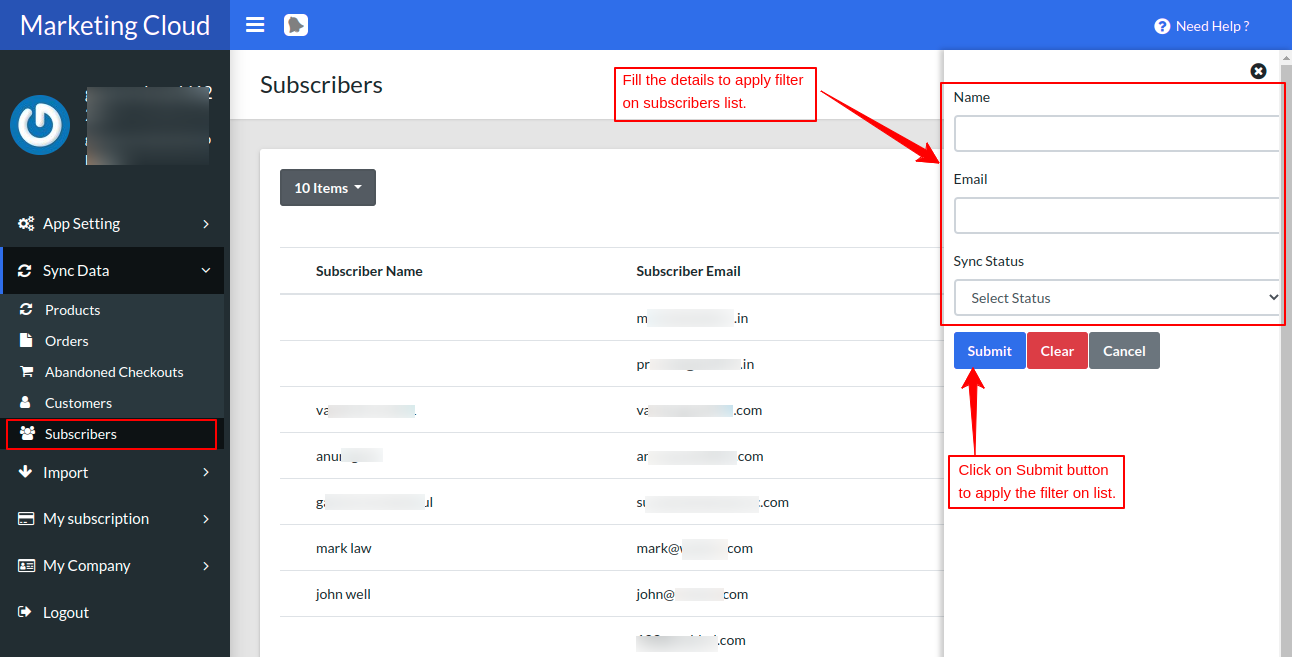
- The option to filter the subscriber data has been provided through name, email, or sync status.
- Likewise, the filter option above has been provided for Abandoned checkout and customer data.
How to Connect :
Export Customers as Subscribers to Marketing Cloud In Real-Time
Now you can easily run email campaigns for the customers of your store by simply exporting the existing customers to the subscribers’ list of the marketing cloud.
Export Product Catalog & Orders to Marketing Cloud Data Extension In Real-Time
If you want to send particular products or order details in the email campaign from a single platform then this feature will be really helpful. You can get the catalog & order details of your Shopify store on the Marketing Cloud itself by integrating this connector.
Export abandoned checkout details to Marketing Cloud Data Extension
Now reach out to your abandoned checkouts and increase the conversion probability by fetching the abandoned checkout data from Shopify to the marketing cloud data extension. Simply sync the data and approach the target audience via email campaigns.
***Note***: Abandoned checkout auto-sync is only available with Business Plan.
Prerequisites on the Marketing Cloud end :
There are some prerequisites that need to be taken care of, at the Salesforce Marketing Cloud end.
You need to have API User enabled in the “user” section.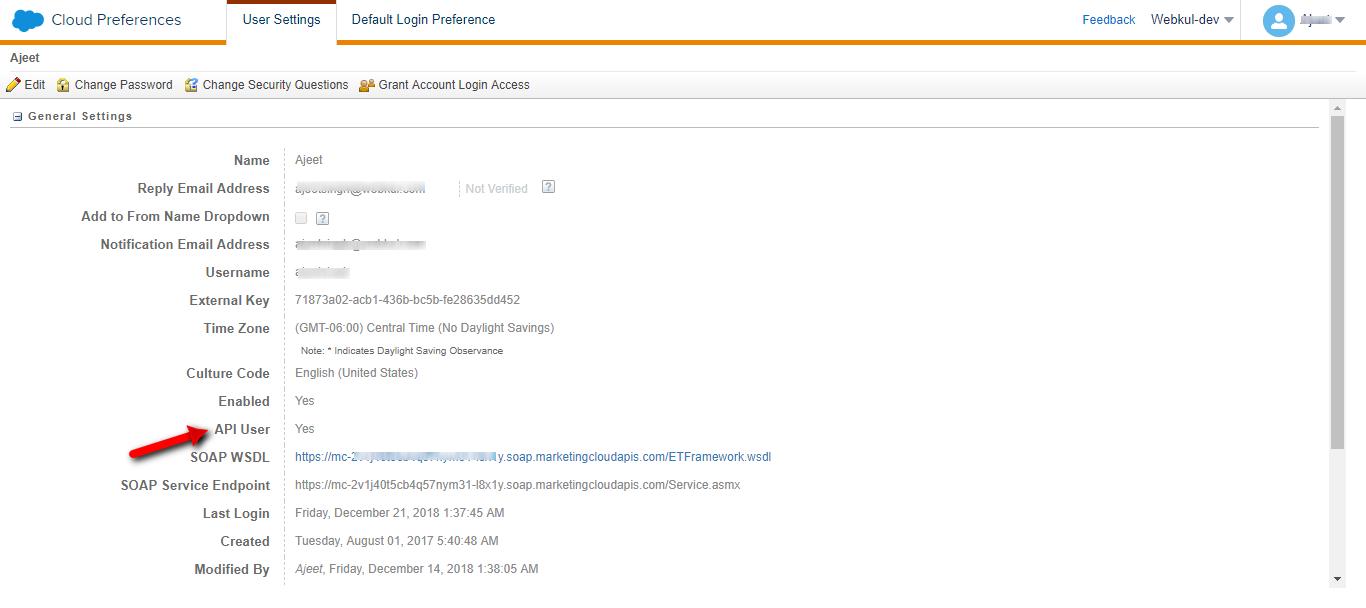
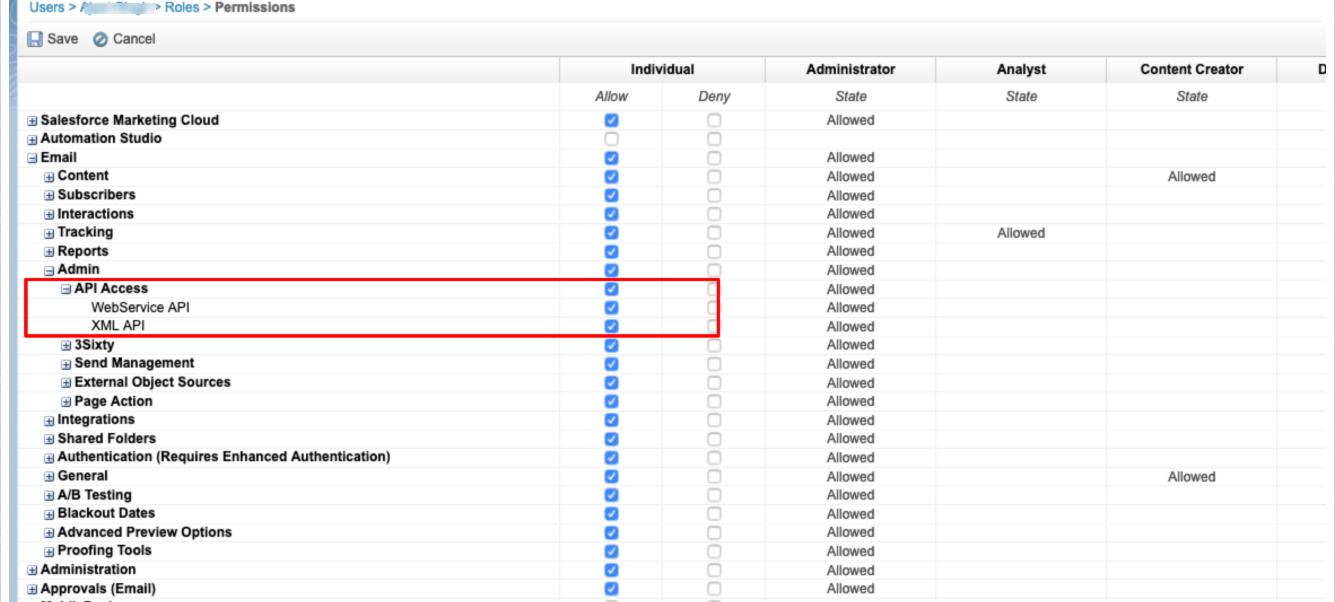
How to Install App
Now at the Shopify end, you need to do the following setup:
Visit Shopify App Store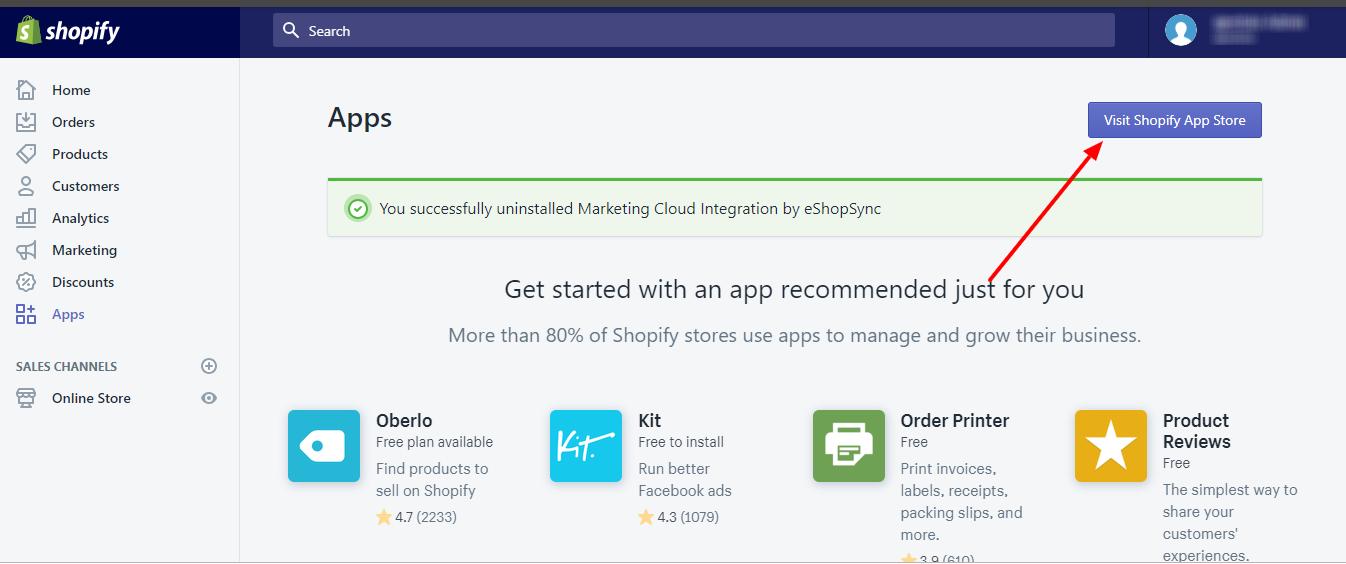
Type Marketing Cloud in the search box.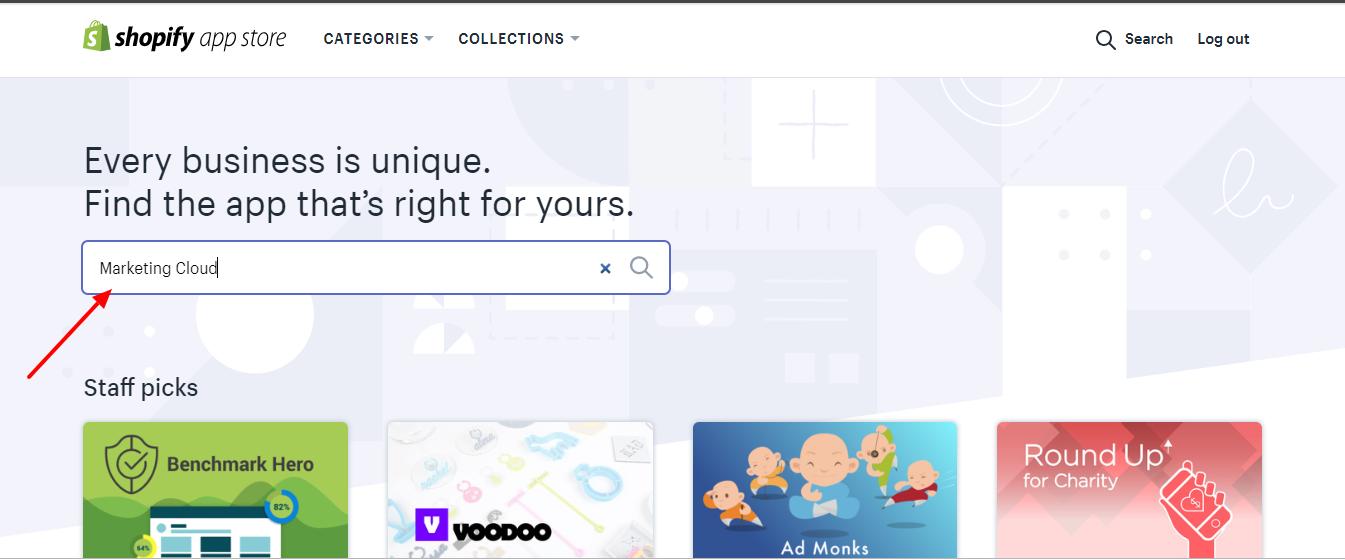
Click on the application. 
Click on Add App Button to add our application.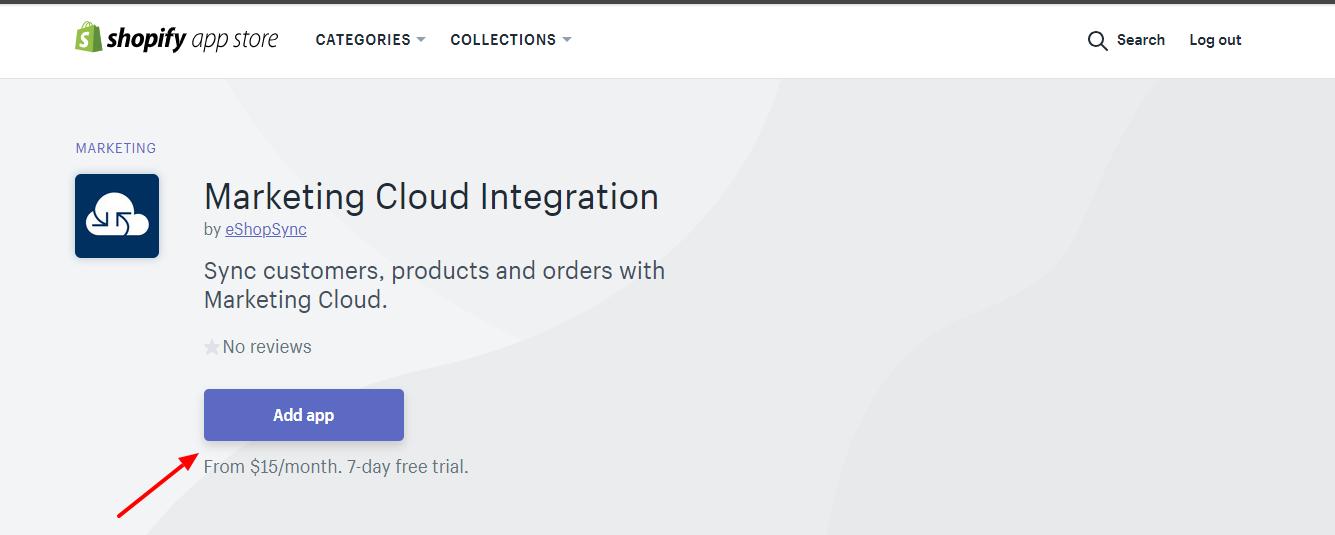
Click on the Install app as shown below.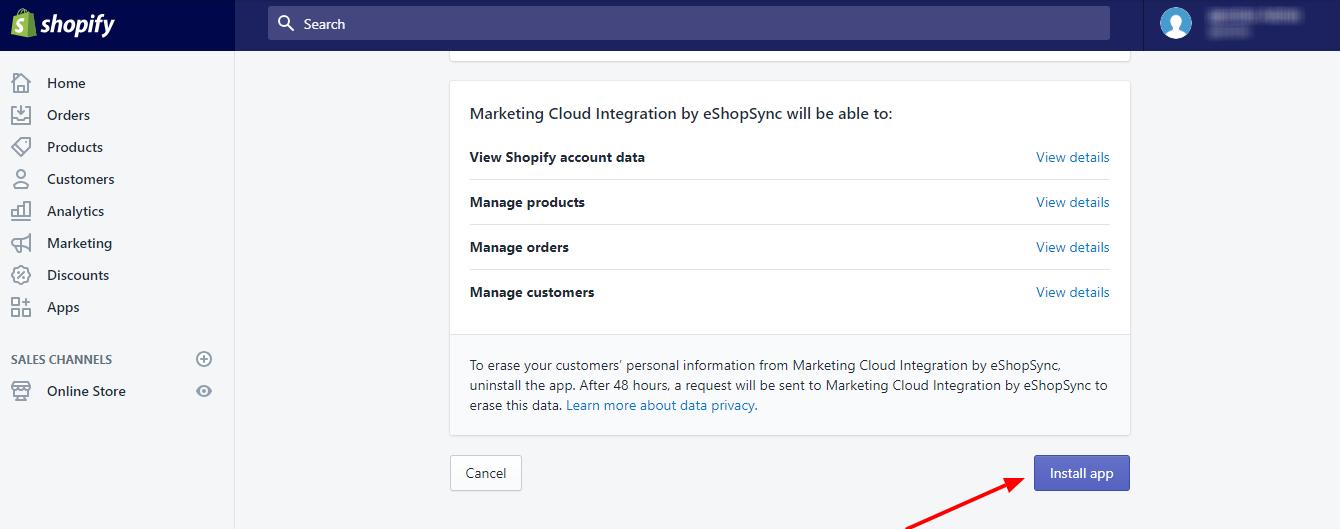
After successful installation, you will be redirected to the configuration page of the Marketing Cloud Connector as per the below screenshot. In step 1, you just need to enter the Salesforce Marketing Cloud Connector Client ID, Client Secret, Marketing Cloud Account ID, and Sub-Domain, and afterward Click on save to save all the credentials.
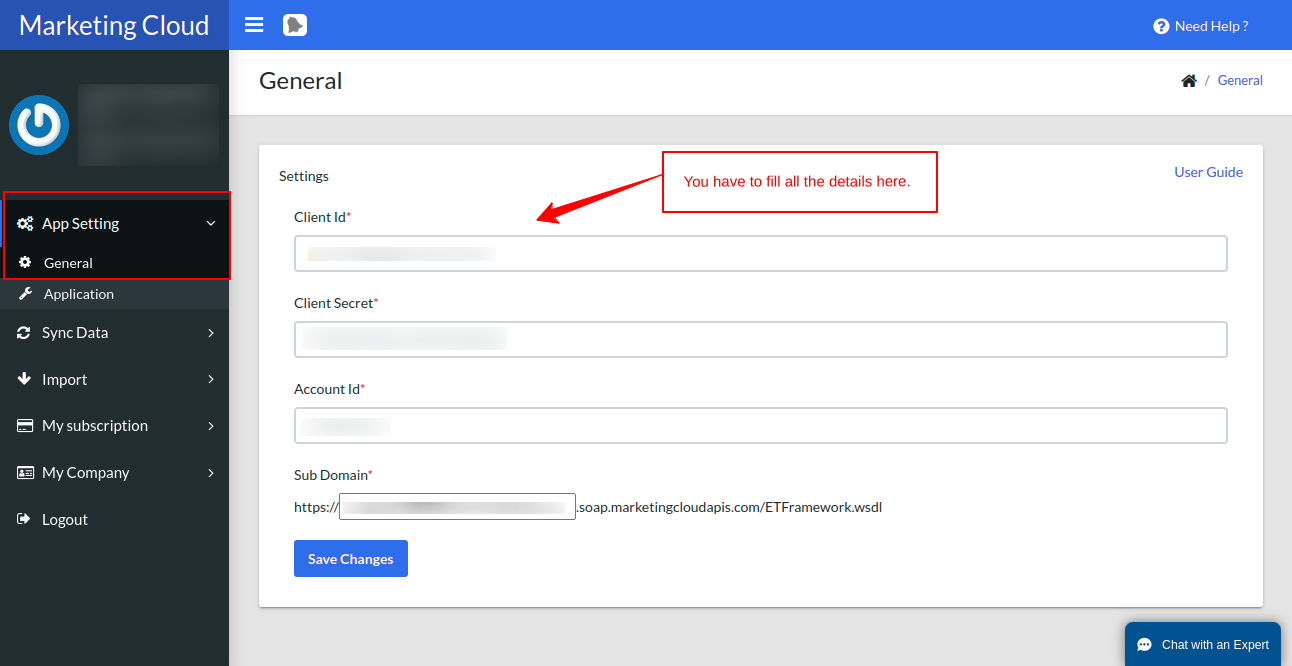
To get the Client ID, client secret, and Account ID click on this user guide and follow the required steps.
App Settings
For Apps Settings, here is the screenshot attached below, which can help you with the inside App Settings
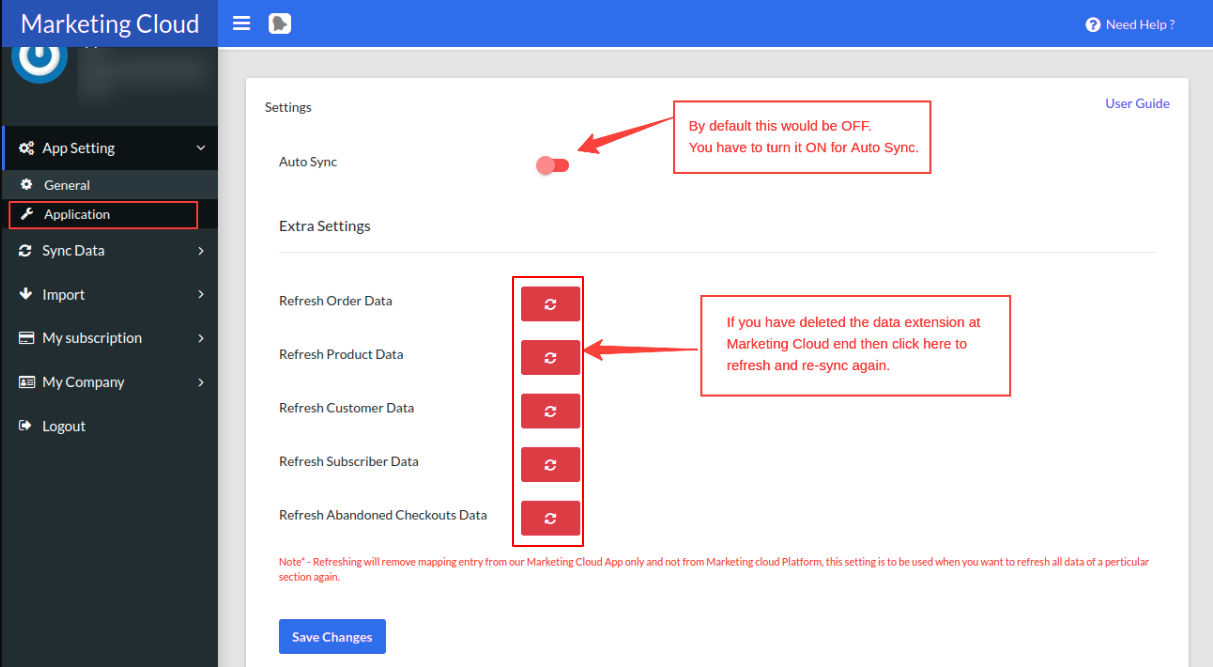
In our application, there is an option to sync the Shopify and Marketing Cloud data in real-time. You can switch the button On to sync the data in a real-time.
How to Sync Data in Marketing Cloud
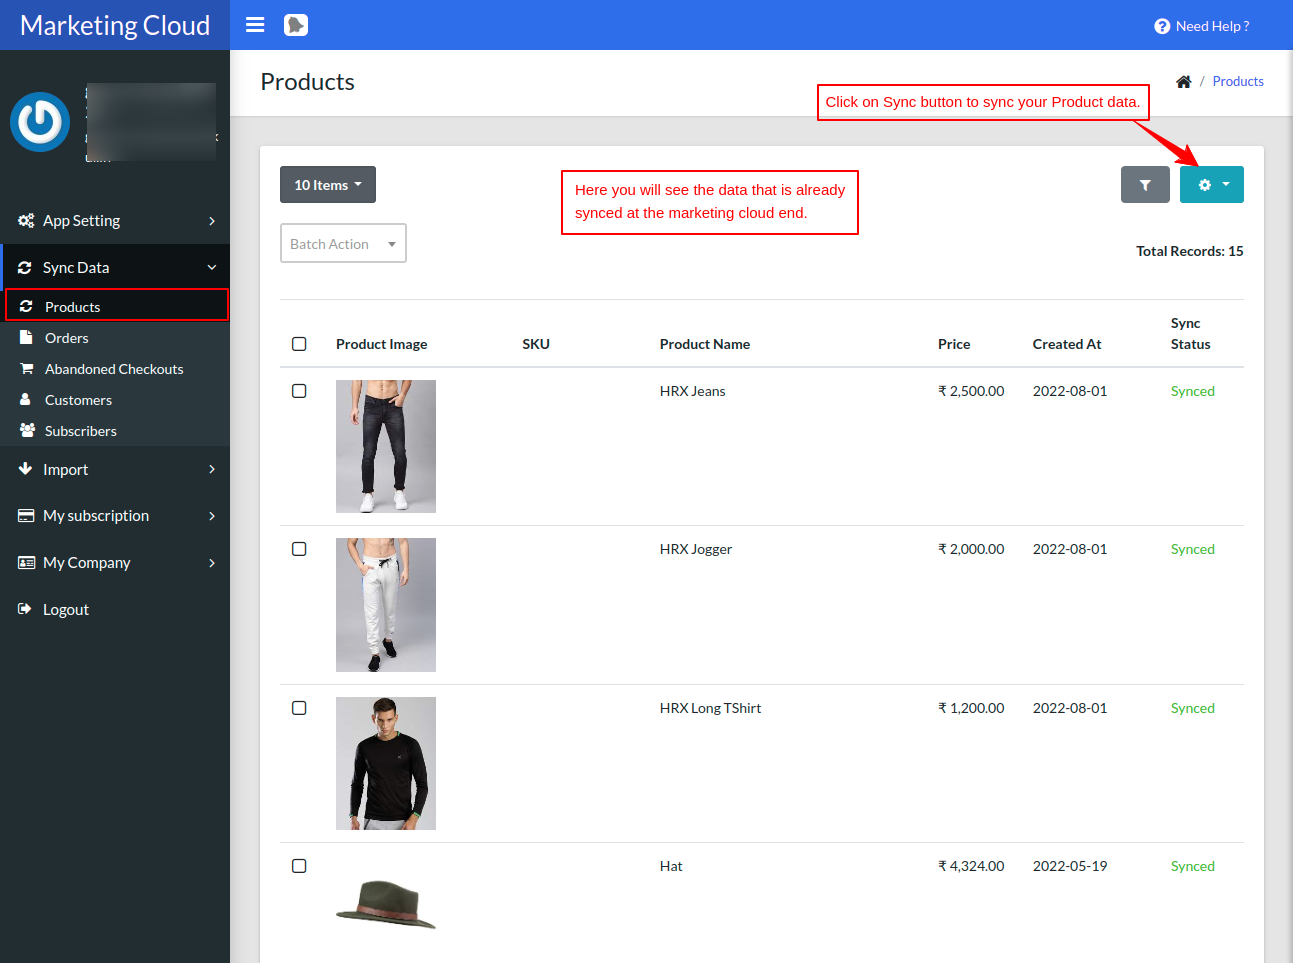
Sync all the past records using the sync button within the Shopify Marketing Cloud Connector. The sync data view is shown in the screenshot below.
Sync Products
Just click on the Products tab. Click the export button (Product DataExtension) provided for exporting these products to the Marketing Cloud data extension. This is how you can export the products to the Marketing Cloud.
To filter the product data, click on the filter button as shown below.
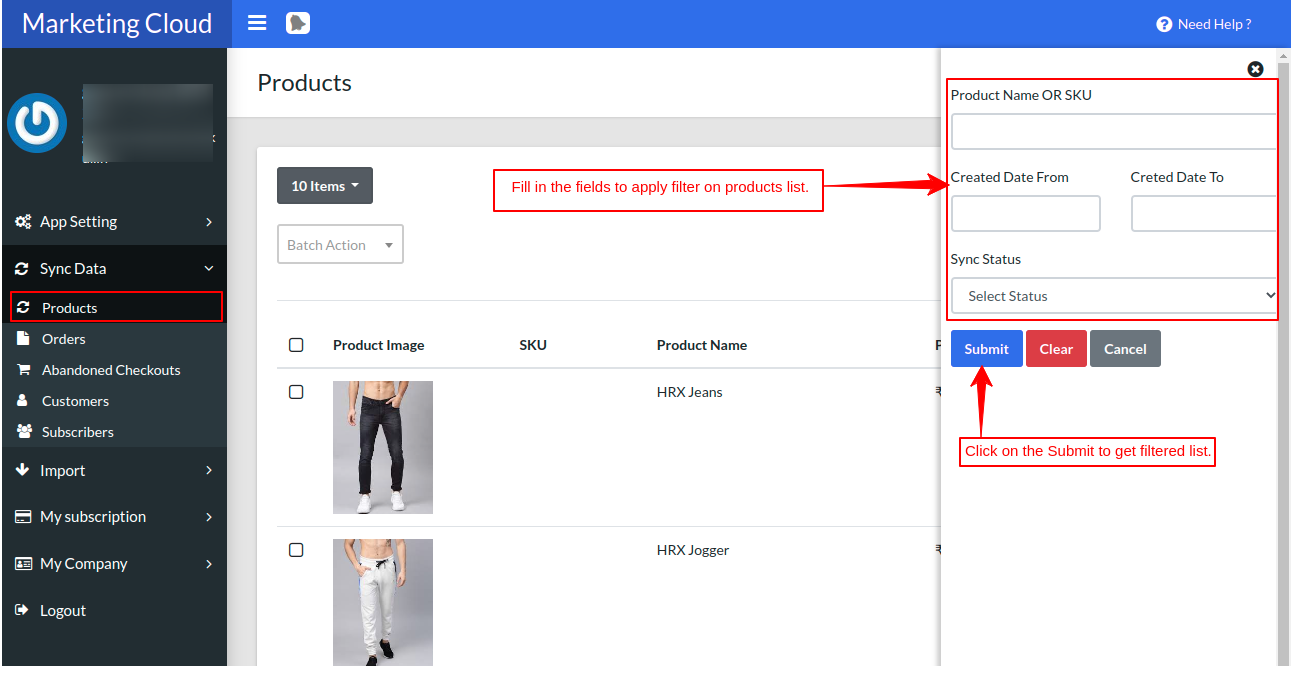
The “Batch Action” button is used to sync the specific records whose sync status is shown as “Not Synced”.
Sync Orders
This is how your Orders data will be exported to the marketing cloud data extension.
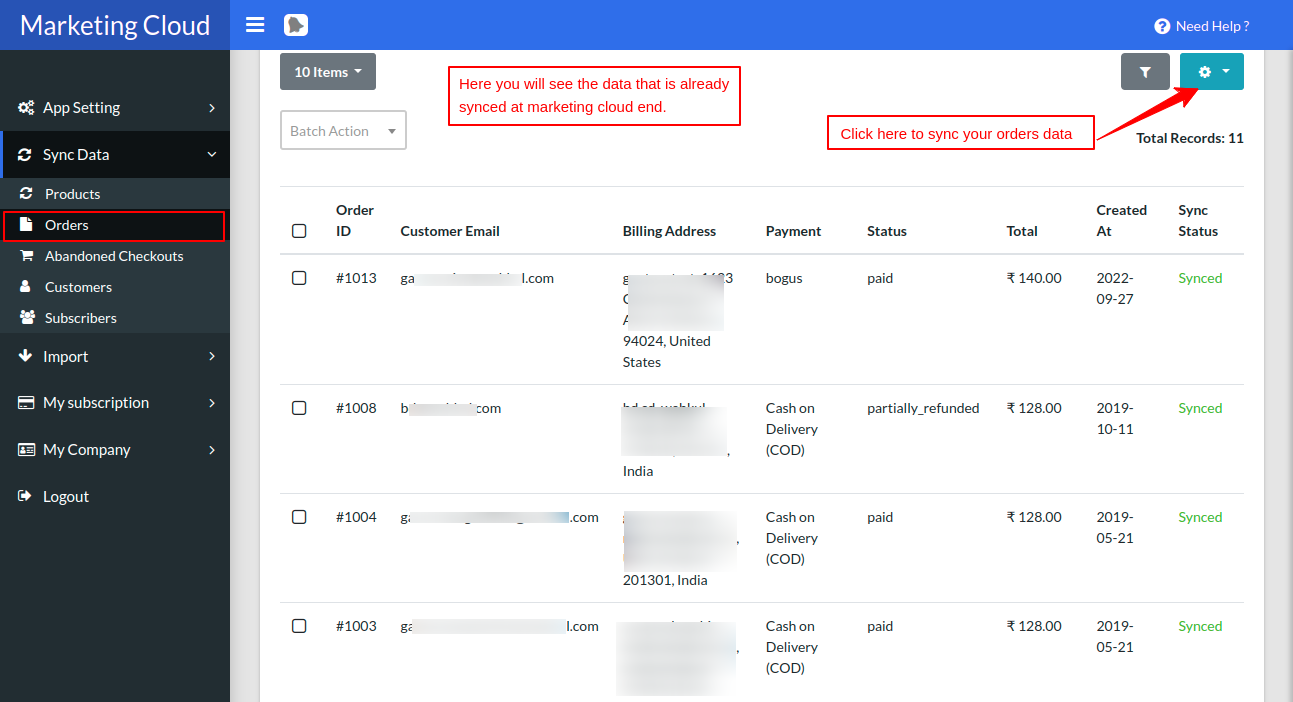
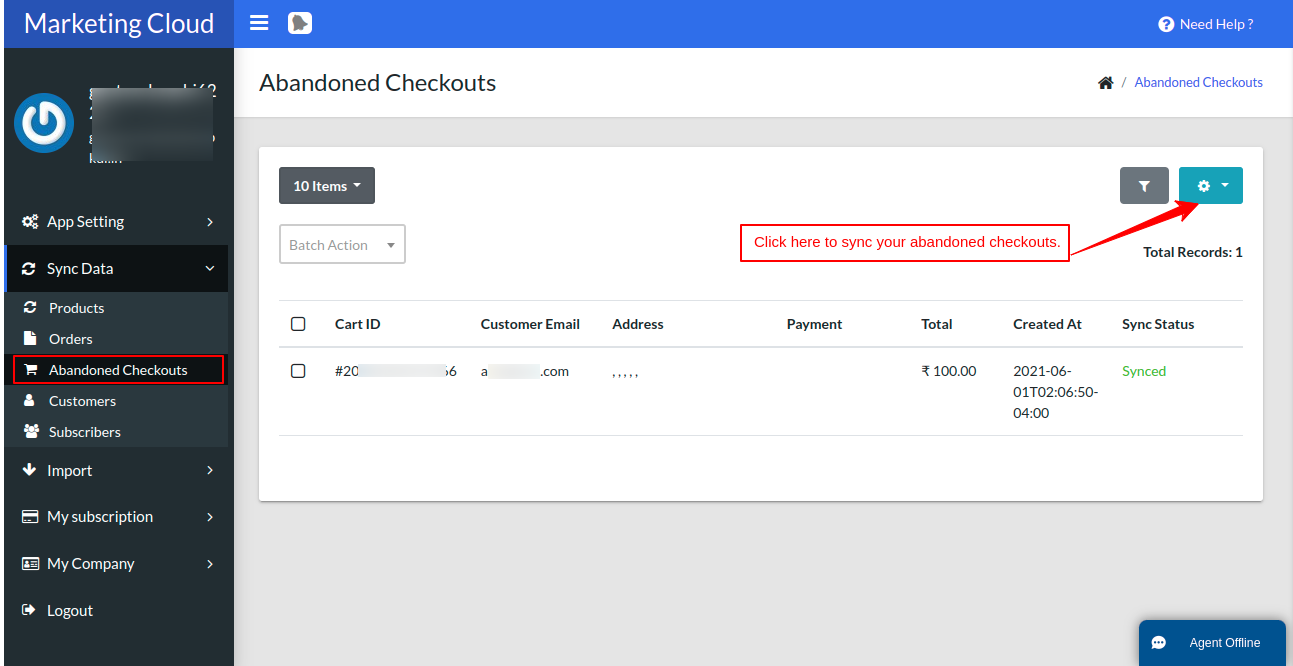
Sync Abandoned Checkouts
This is how your Abandoned Checkouts data will be exported to the marketing cloud data extension.
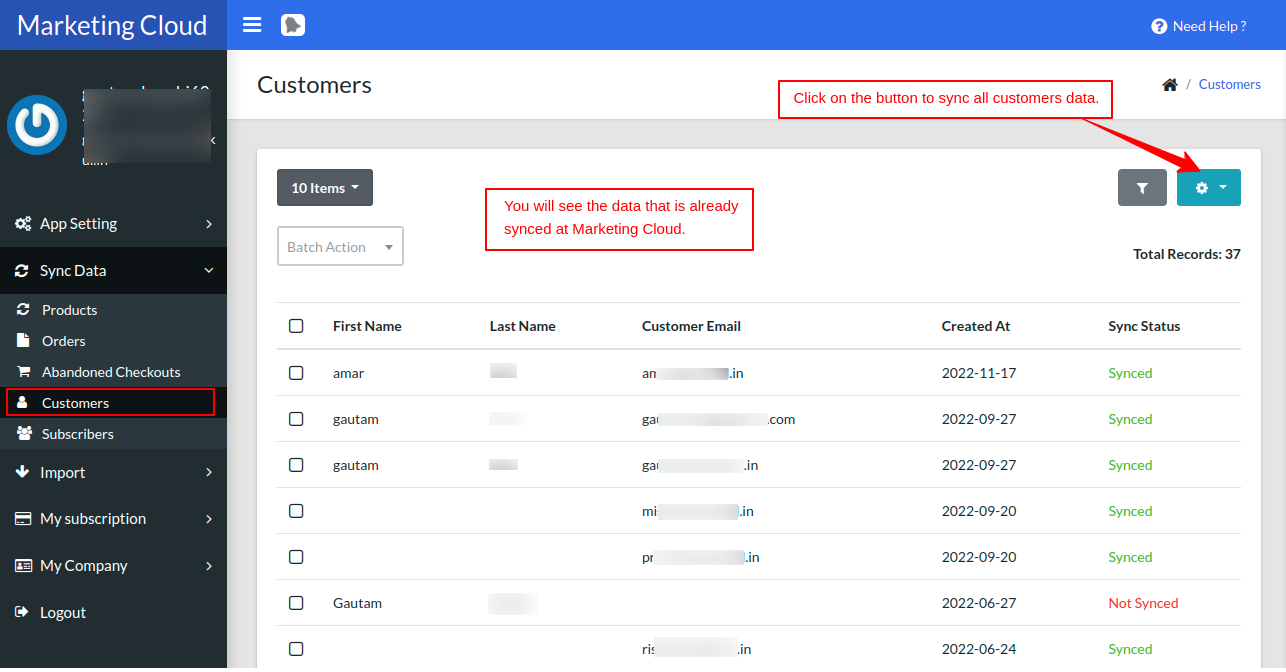
Sync Customers
This is how your Customer’s data will be exported to the marketing cloud data extension.
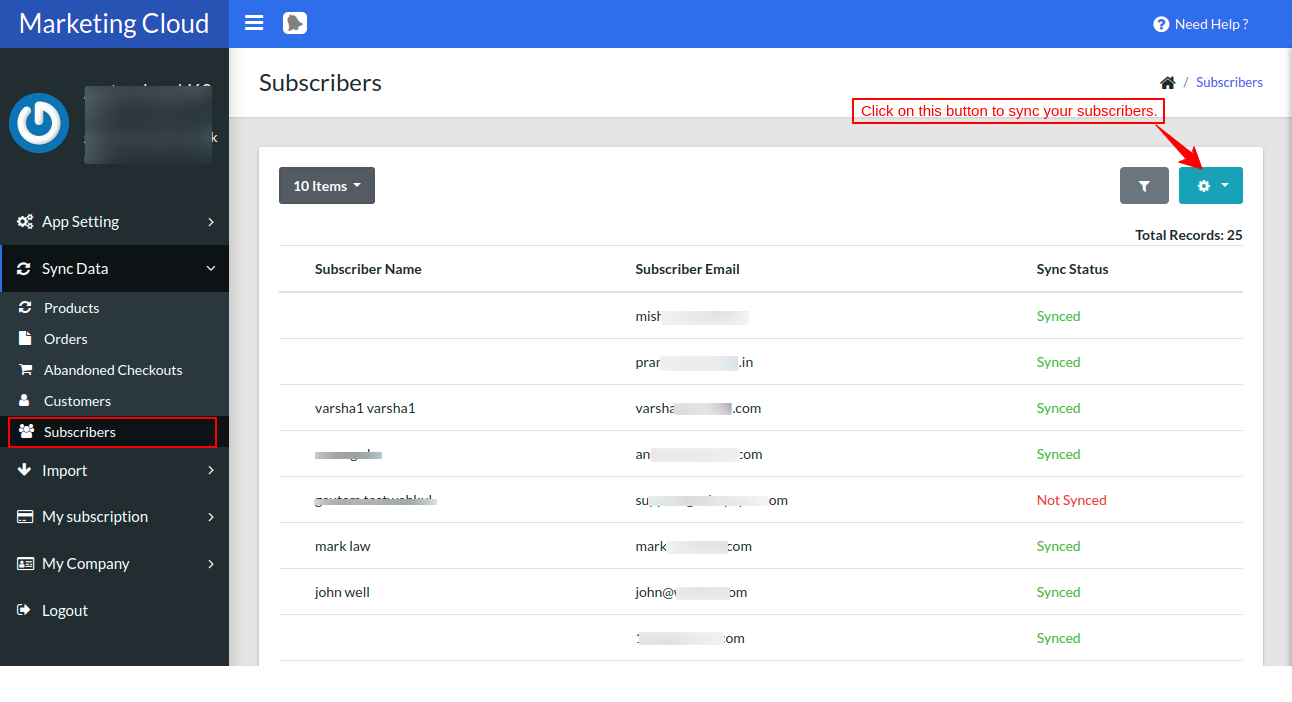
Subscribers List
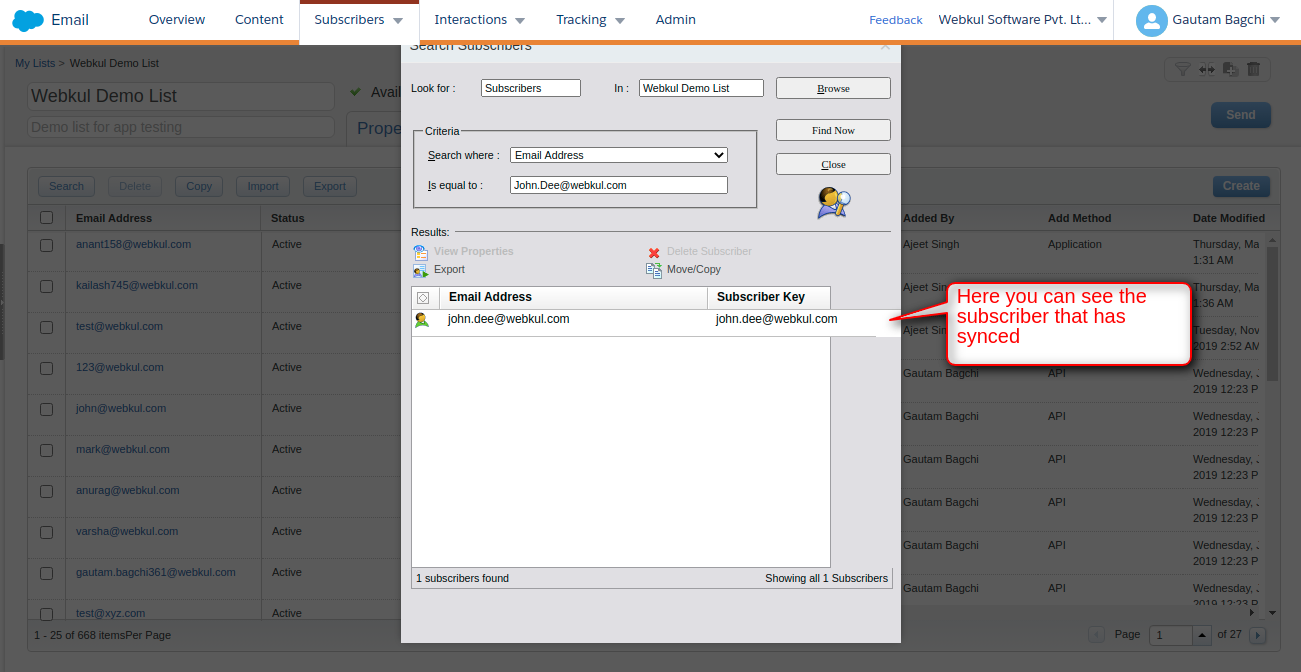
In the screenshot attached below, you can easily see whenever a new subscriber comes to your Shopify store, the data of the new subscriber will sync in real-time in the subscriber’s list.
- To filter the subscriber data, click on the filter button as shown below.
Note :
For bulk data of past records of customers and orders, you have to import the data using the import section as shown below :
For that, you need to simply export the CSV file from the Shopify end, and import it from here in order to sync all the bulk past records of customers and orders onto your Marketing Cloud end.
Go to the Import, click on import

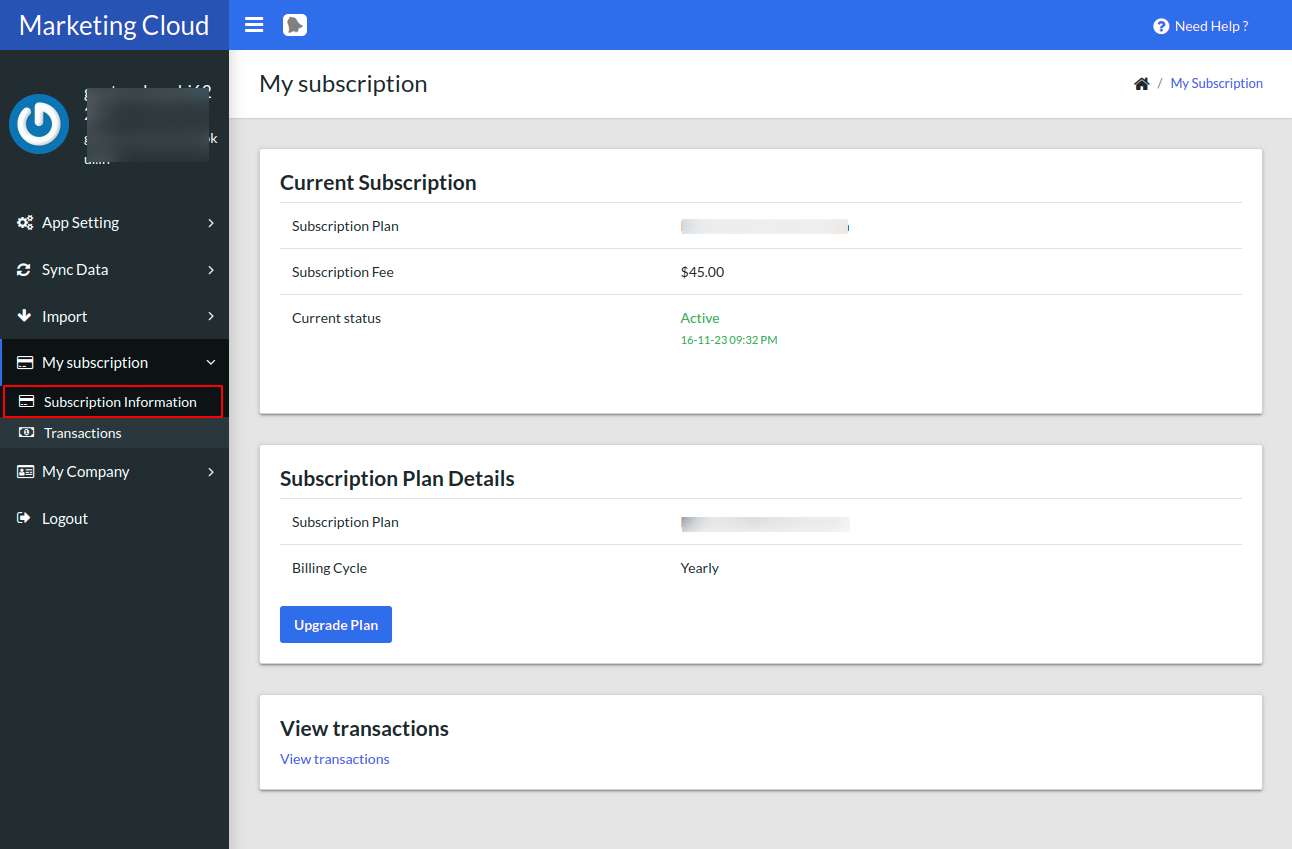
Subscription Plans
In this section, you can easily view your current plan & can change the subscription plan of Shopify Marketing Cloud Connector at any time.
Exported Data At Marketing Cloud
Navigate to Email Studio-> Emails-> Subscribers->Data Extensions. The data ie; products, customers, and orders will be exported here in these data extensions.
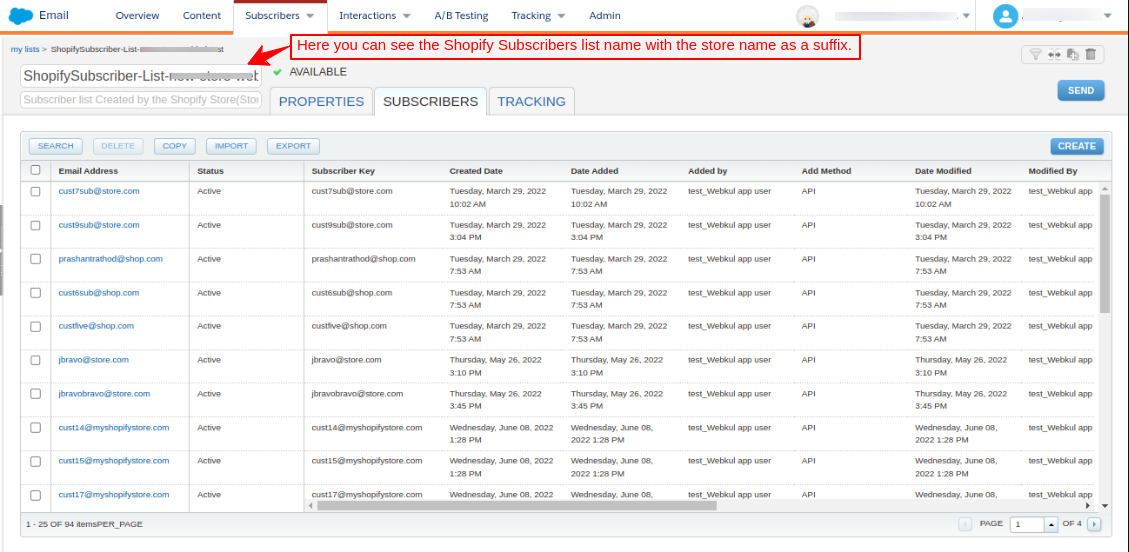
Subscribers List View At Marketing Cloud End
Once you first-time sync all your existing Shopify subscribers then a new subscriber list would be created at SFMC Org along with the store name as a suffix. Under that list, you will find all your synced subscriber from Shopify to SFMC and all future Shopify subscribers will auto-add to this list. This will help you to easily find out all your Shopify subscriber in your SFMC Org.
How to sync the data partially at different times when auto-sync is disabled?
- If Auto-Sync is Disable: If Auto-Sync is disabled then you need to sync data through the “Sync Icon” as shown in the below image. For example, you have 5000 customers and in a day you have synced 2000 customers, now if you want to shut down your system, and the next day you want to sync 3000 remaining customers then when you will click on the “Sync Icon”, the count will start from 2001. You don’t have to sync the data from the start. In this way, you can easily save time.
- If Auto-Sync is On: If Auto-Sync is On then every time data sync starts from the initial count (this is a back-end process) it will not impact anything. In the case of the auto-sync webhook trigger, if any data is updated at the Shopify end then the webhook will trigger and data will get updated at the SFMC end too. For any further queries, Click Here To Create a Ticket


Leave a Comment
Comments (0)