Mangopay Payment For Salesforce B2C Commerce User Guide
Updated 14 October 2025
Do you want to integrate Mangopay into your eCommerce store then here we are with the solution that helps you to easily integrate Mangopay and receive payments through it. Refer to this user guide of Mangopay Payment For Salesforce B2C Commerce. The Salesforce Commerce Cloud (SFCC) users can get it from the Salesforce App Exchange for free and integrate it into their eCommerce site.
About Mangopay
Mangopay is a payment solution provider that offers a comprehensive set of services for businesses looking to manage online payments and transactions. It provides a secure and reliable platform that allows businesses to collect and disburse funds, handle complex payment scenarios, and ensure compliance with financial regulations.
Mangopay Payment For Salesforce B2C Commerce provides businesses with a flexible, secure, and feature-rich payment solution that streamlines payment processing, enhances user experience, and supports growth in the digital economy.
With Mangopay, businesses can set up customized payment flows tailored to their needs. It offers a range of features and functionalities designed to facilitate seamless payment processing.
Mangopay offers a developer-friendly API (Application Programming Interface) that allows businesses to seamlessly integrate payment services into their own applications or websites. This enables enterprises to maintain a branded payment experience while leveraging the robust functionalities provided by Mangopay.
Features Of Mangopay Payment For Salesforce B2C Commerce
- Supports Base Currency- Support store base currency to be considered as the payment base currency setup.
- Security- Ensures safe & secure payments.
- Accept Multi Cards- Allows buyers to make payments using cards Carte Bleue (CB)/Visa/Mastercard.
- Wallet Control- The admin can choose a user and wallet in which the amount will be transferred via payments that later can be transferred to their bank account.
- User Privacy- Uses Mangopay payment page that ensures no capturing or storing of user’s card data information.
Installation
Deployment:
-
- Run `npm install` to install all of the local dependencies (SFRA has been tested with v12.21.0 and is recommended).
-
- Make sure that the Path: Base is correct, which you have to check in the Package.json file.
-
- Run `npm run compile:js` from the command line that would compile all client-side JS files. Run `npm run compile:scss` that would do the same for CSS.
- Create a `dw.json` file in the root of the project. Providing a [WebDAV access key from BM] (https://help.salesforce.com/s/articleView?language=en_US&id=cc.b2c_access_keys_for_business_manager.htm&type=5) in the `password` field is optional, as you will be prompted if it is not provided.
{
“hostname”: “your-sandbox-hostname.demandware.net”,
“username”: “AM username like [email protected]”,
“password”: “your_webdav_access_key”,
“code-version”: “version_to_upload_to”
}
-
- Run `npm run uploadCartridge`. It will upload the `wk_mangopay` cartridge to the sandbox you specified in the `dw.json` file.
-
- Add the `wk_mangopay` cartridge to your cartridge path in Administration > Sites > Manage Sites > “Select Your Preferred Site” – Settings.
- Then click on the Apply button.

- To check that file is successfully uploaded go to Administration > Site Development > Code Deployment > “Select your active version”.
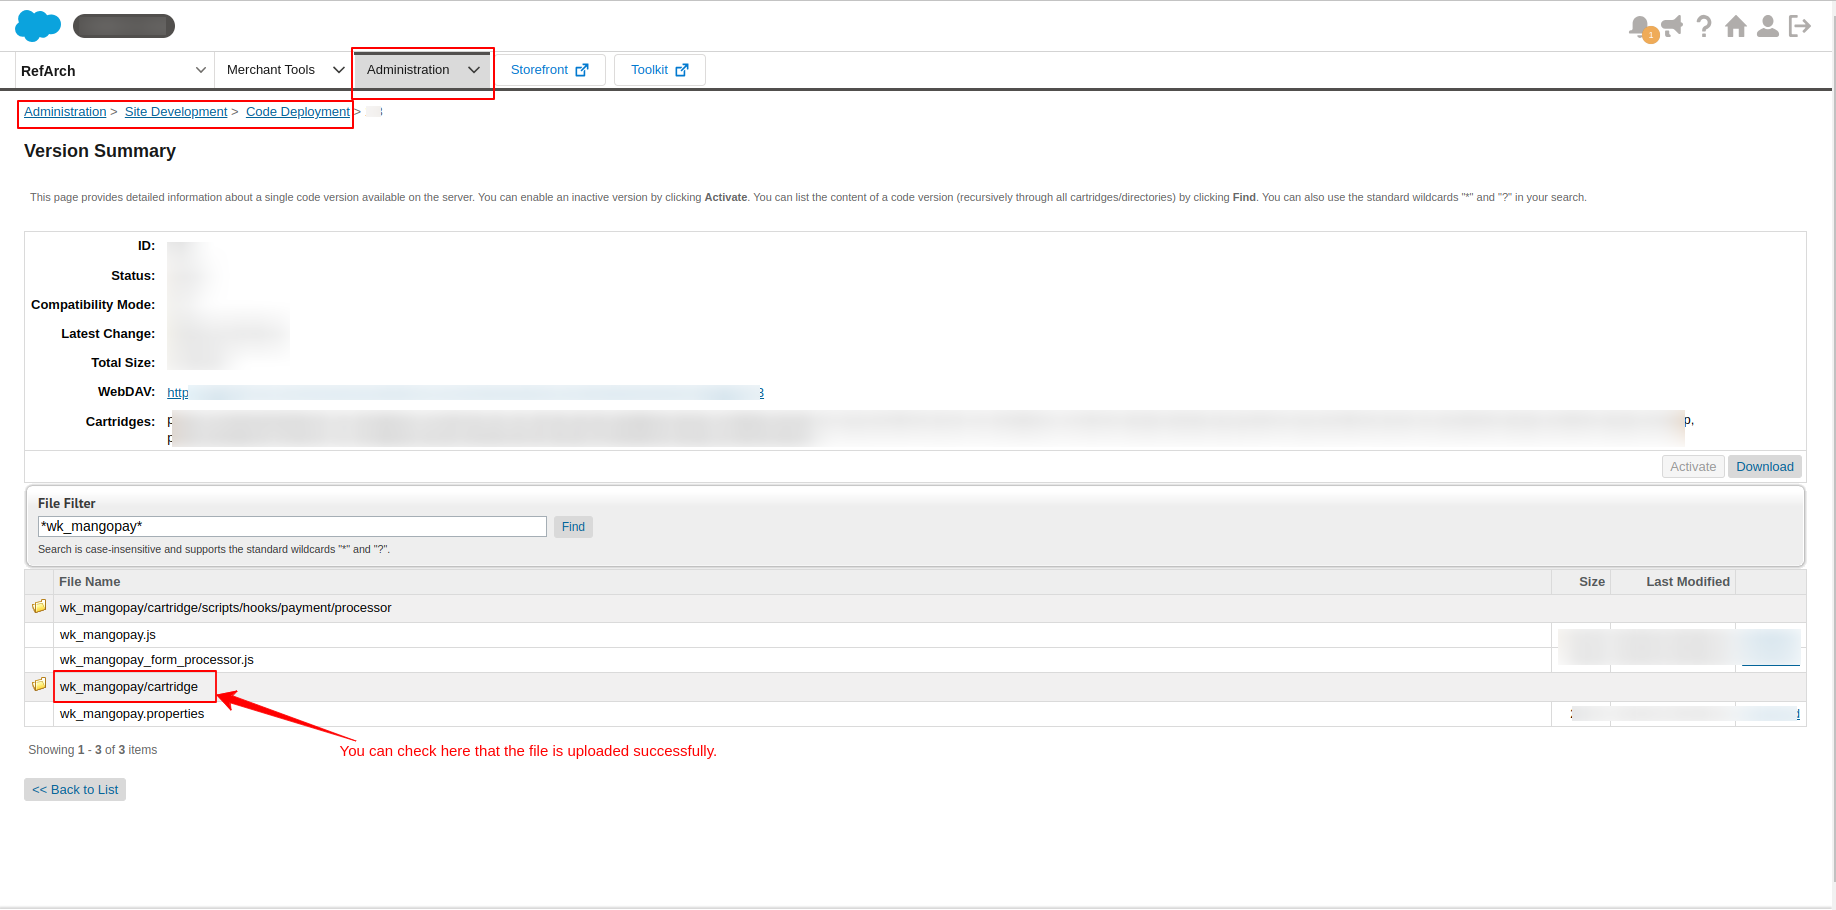
- All right! The code deployment is done.
Site Import:
- To import the site configuration, like payment methods, processors, etc., unzip mangopayData.zip and replace your site name in place of RefArch.
Note: This zip file is found in the package provided by us.
-
- Then create the zip.
-
- To import the site, open Salesforce Commerce Cloud Business Manager. Go to Administration > Site Development > Site Import & Export.
-
- Then, upload the modified mangopayData.zip file and then import the file.

Configuration Of Mangopay Payment For Salesforce B2C Commerce
- In SFCC, go to the Merchant Tools option.
- Further, click on the Payment Processors under the Ordering section.
- Then click on the wk_mangopay.
- Click on the Settings tab to get the details that you have to configure the Mangopay gateway.
- Now provide the API key, client ID, User ID, and User Wallet ID from the Mangopay account.
- Click on the button named Apply.

These details were found in the Mangopay account:
-
- Open Mangopay then from the left panel, click the Manage API keys option.
-
- Here, you get the API key that you have to copy and paste into the Salesforce Commerce Cloud Payment Processors Settings tab.
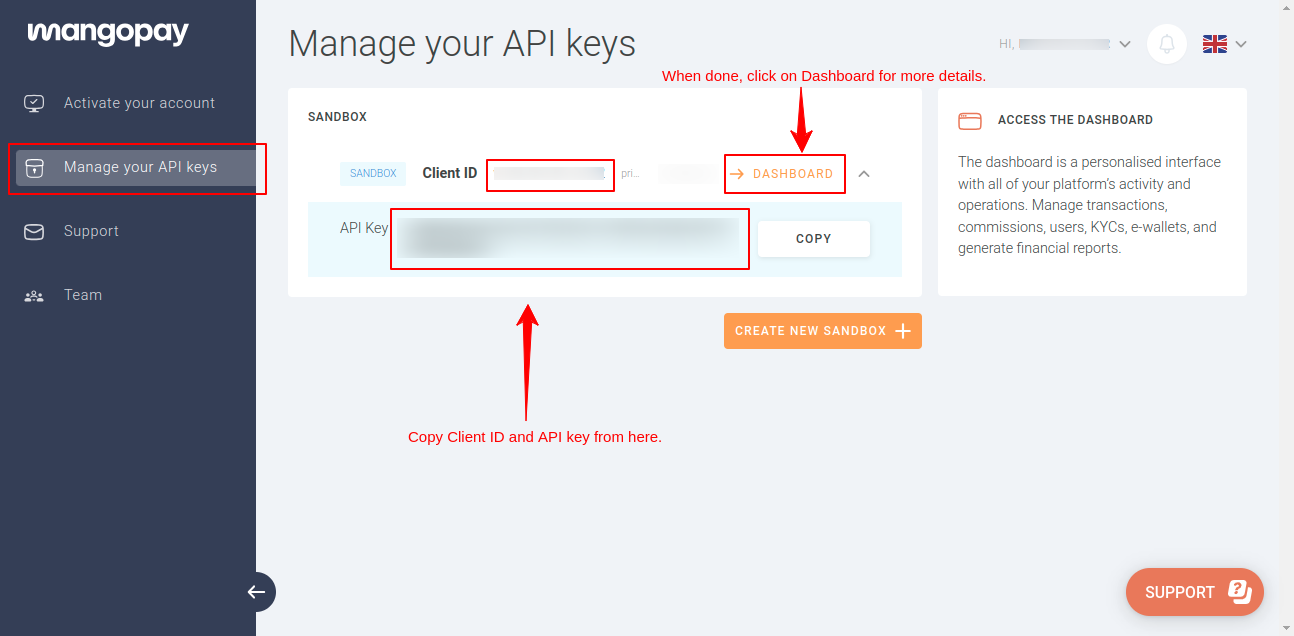
-
- Hit on the Dashboard for further details.
-
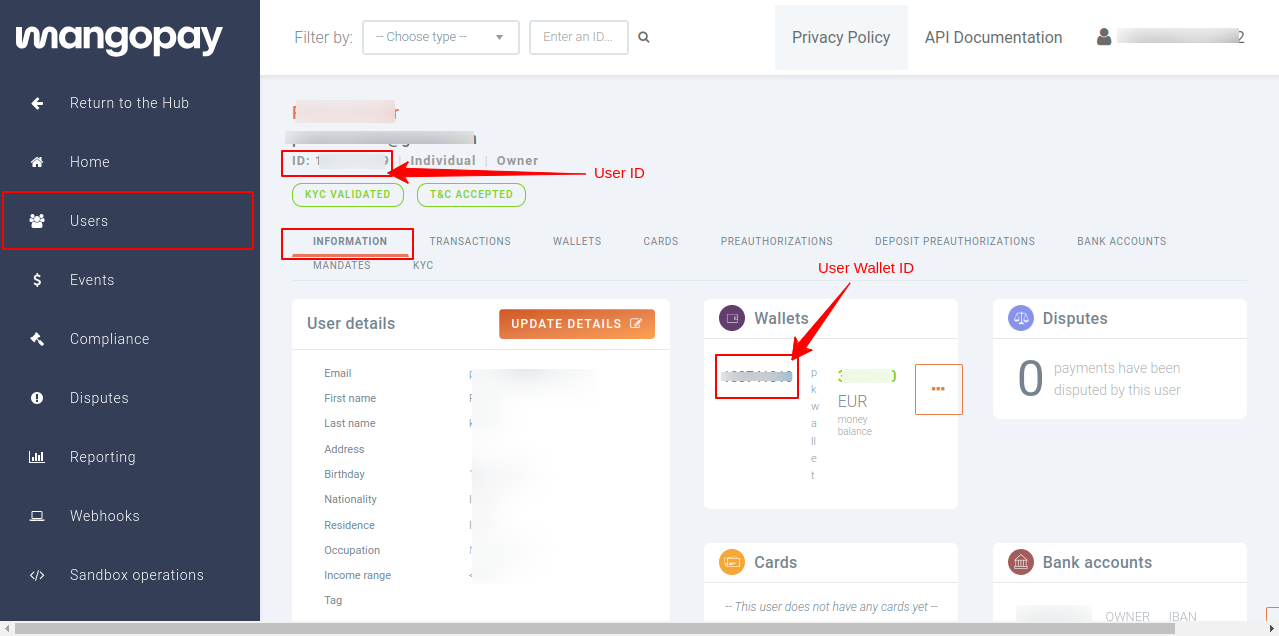
- Now, in the new redirected tab, click on Users from the left navigational panel.
-
- Click on the user to open for information.
-
- Here, you get the User ID and User Wallet ID.
- Now, you are done with the Configuration also.
Workflow Of Mangopay Payment For Salesforce B2C Commerce
On your eCommerce Site, which you have built on Salesforce Commerce Cloud the user pay using the Mangopay gateway.
- Whenever a user places an order and proceeds toward checkout by clicking on Checkout.
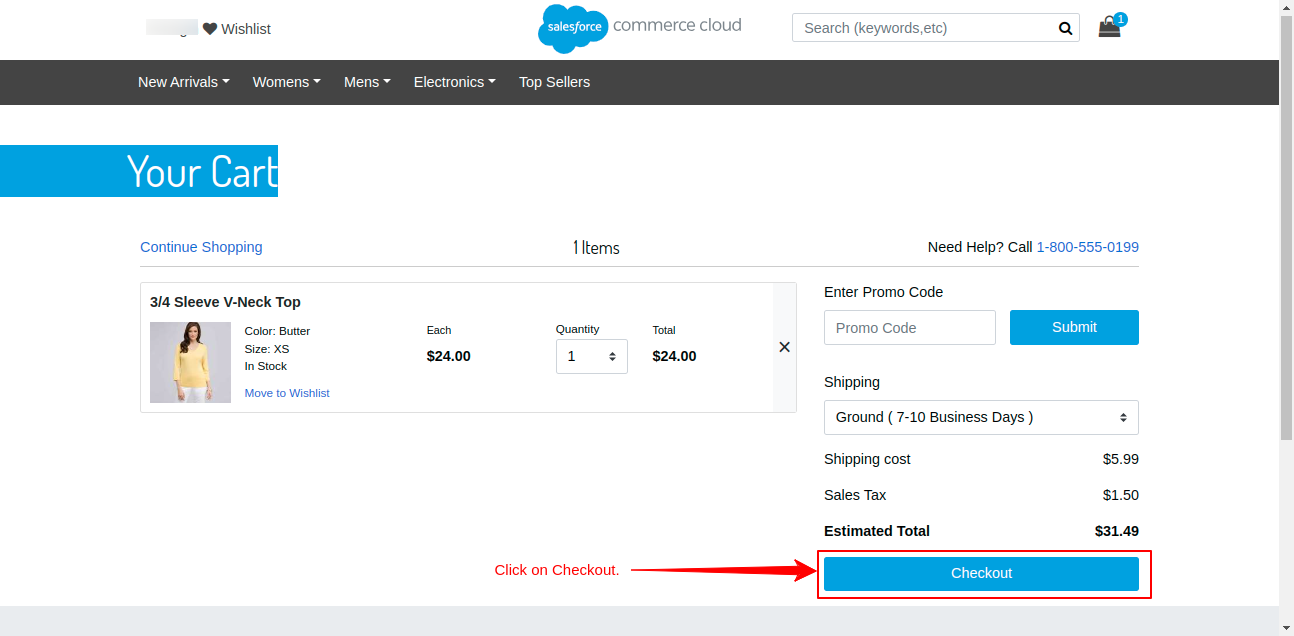
-
- Then they can see the Mangopay option for payment processing. So click on the Mangopay tab.
- After that, click the Place Order button.
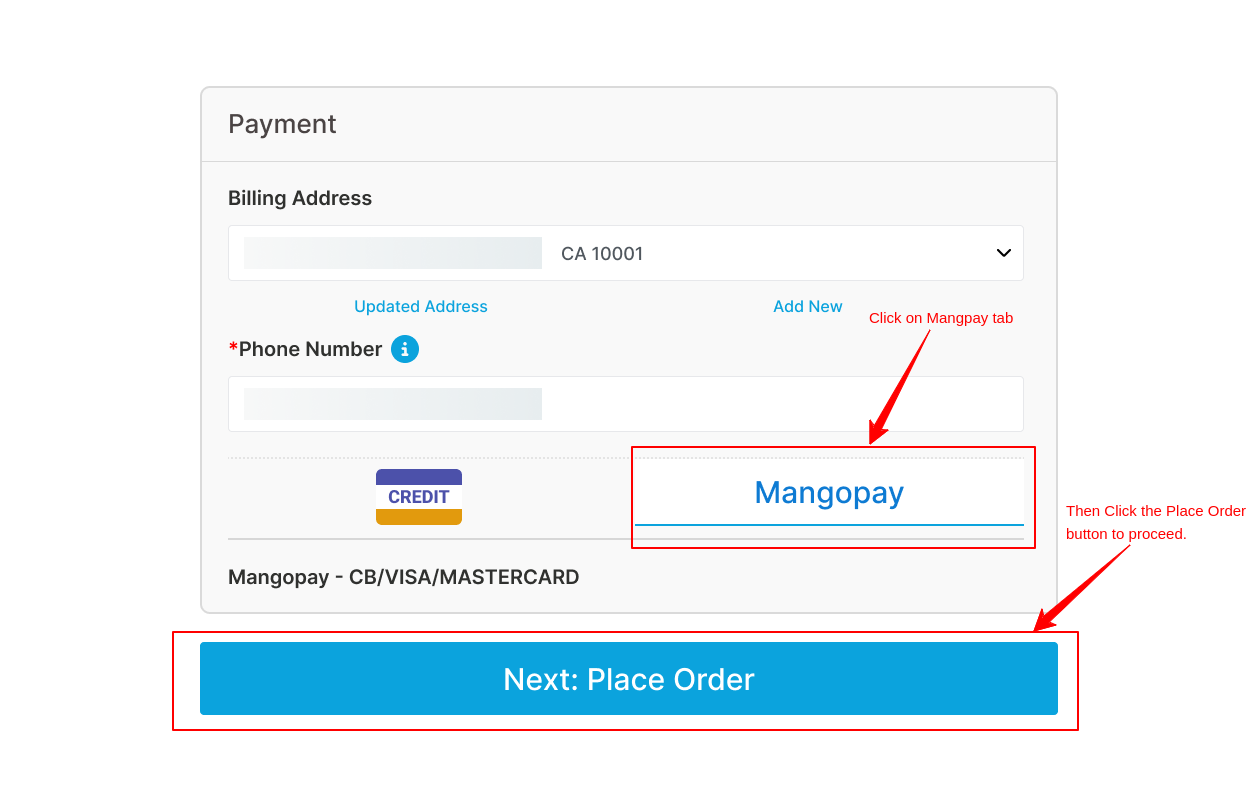
-
- Now, it redirects you to the payment page where you must fill in your card details.
- Click on the Pay By Card button below.
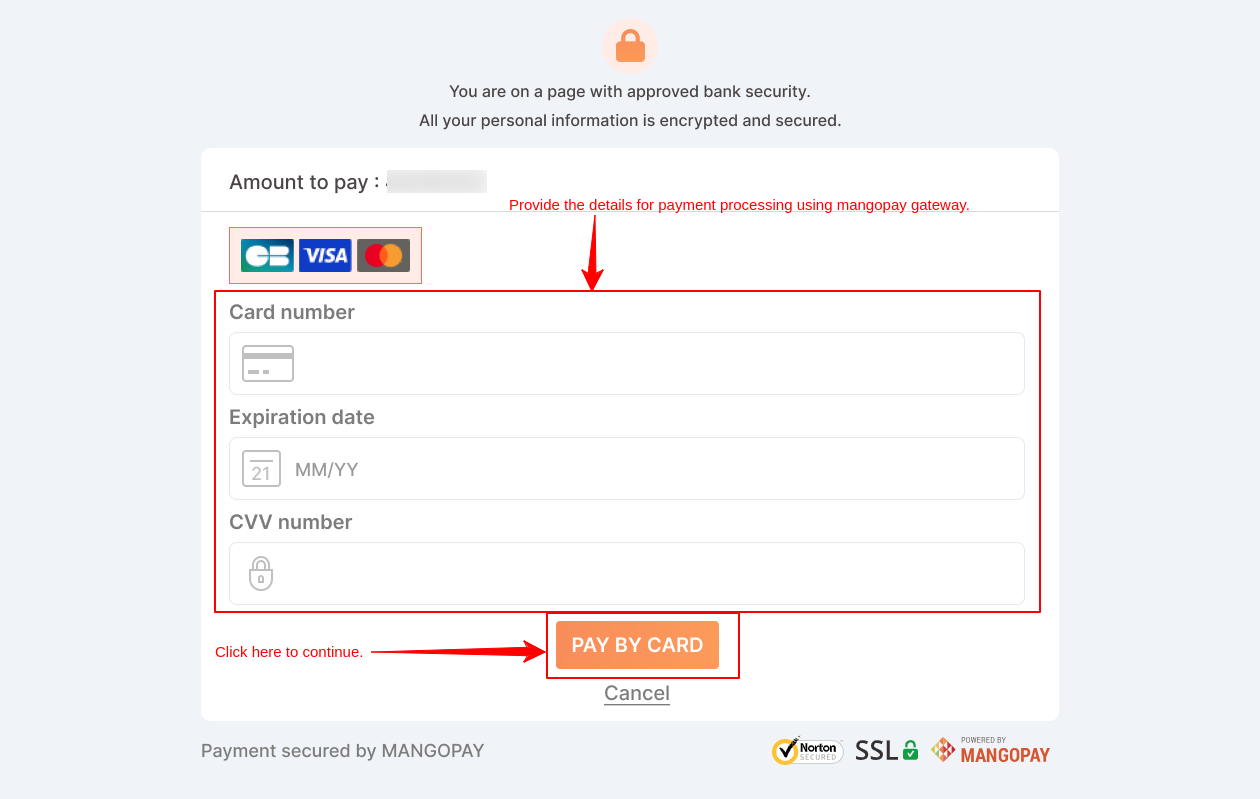
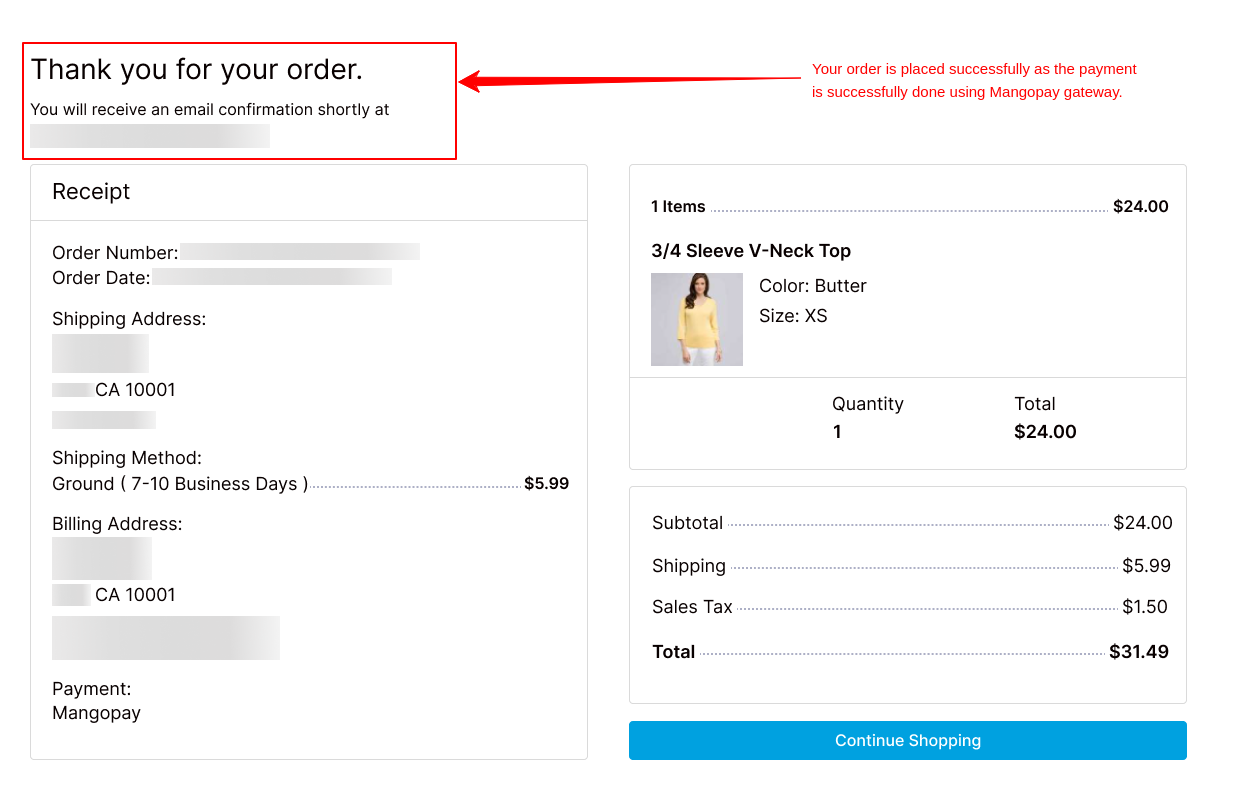
- After successful payment, the order is placed successfully.
The admin can check the orders and their payments received. To check you have to follow these steps:-
-
- In SFCC Business Manager, click on Merchant Tools.
-
- Then under Ordering, click on Orders.
-
- Here you can search for your particular order number or you can check it from the list of orders.
-
- Click on the order that you want to check.
-
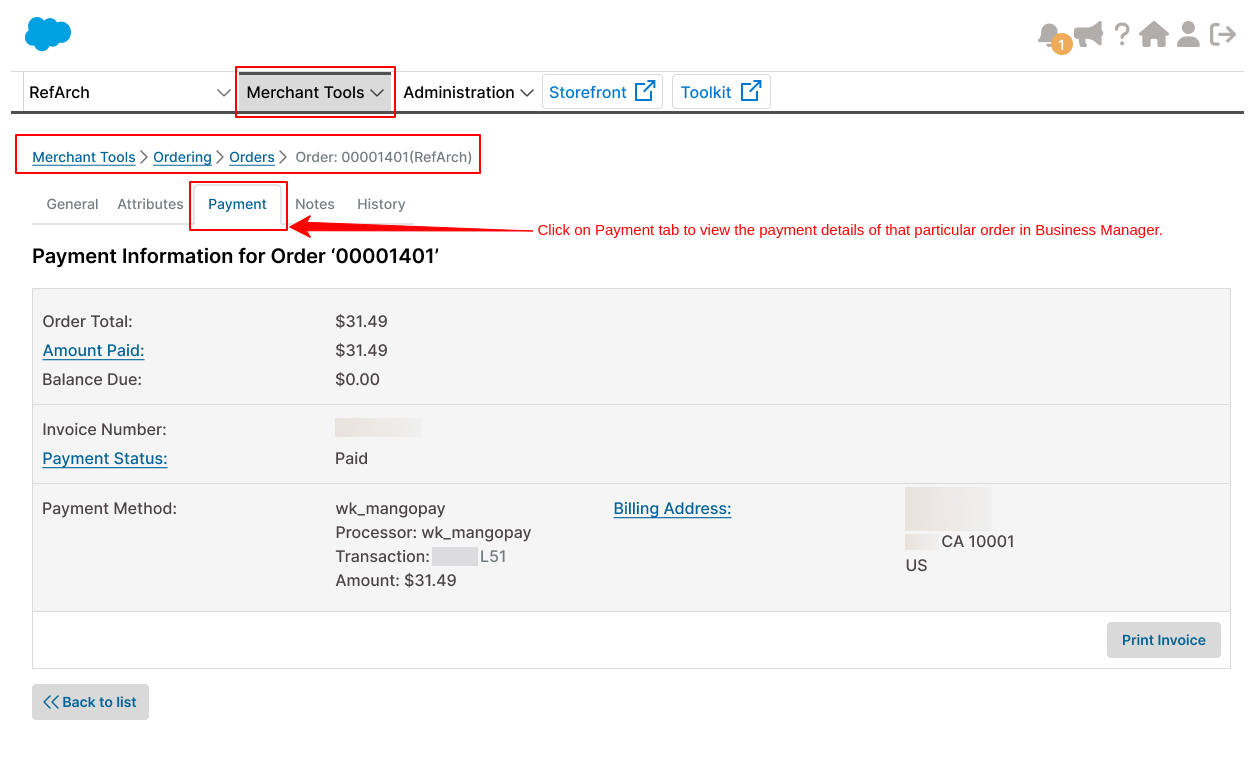
- Hit on the Payment tab.
-
- Here, you can check the payment method processor, transaction ID, and amount paid.
Salesforce AppExchange Consulting Profile
We are a business software development, consulting, and PDO firm with 13+ years of experience. We provide services for different Salesforce clouds such as Sales Cloud, Marketing Cloud, Health Cloud, Commerce Cloud, Service Cloud, and Experience Cloud. Also, we have a team of certified Salesforce developers and dedicated Salesforce Consultants. There are more than 10 applications that we have published on the Salesforce AppExchange.
Please visit the Webkul Consulting Profile to check our expertise and partner navigator achievements
Support
- To view all our applications in Appexchange, go to Webkul Appexchange Apps.
- For any further queries, Click To Create a Ticket.

Your email address will not be published. Required fields are marked *