
Salesforce SAP B1 Connector can help you run your CRM and ERP platform side by side.
The disconnection between these two crucial platforms creates a gap that human labor cannot fill.
This results in delayed orders, outdated data, and simple customer queries becoming lengthy email conversations.
That’s where our connector steps in. It helps in syncing your products, customers, categories, and orders.
You don’t have to do double-entry to update your data. Now, you have one connected flow of information between these two platforms.
This guide will walk you through the step-by-step process of installing, setting up, and syncing your records.
Key Features of Salesforce SAP B1 Connector
- Import and export customers, products, orders, and categories between Salesforce and SAP B1.
- Sync in real-time. That means any changes made only in Salesforce are instantly reflected in SAP B1.
- You can manually trigger sync jobs with a single click—no complex steps required.
- Apply filters to decide which records to sync. Keep full control over your data and avoid unnecessary transfers.
- Track sync status, record counts, and the last updated time directly from the Salesforce interface.
- Your SAP connection credentials are securely stored within Salesforce, ensuring your data is protected from end to end.
- Get complete visibility into each sync job. The system logs every action and displays detailed error messages, making it easy to resolve issues quickly.
- Built with batch processing, the connector easily manages large data volumes.
Installation Steps of The Connector
Install the Package on your Salesforce Org through the provided installation link. Choose your target environment (Production or Sandbox).
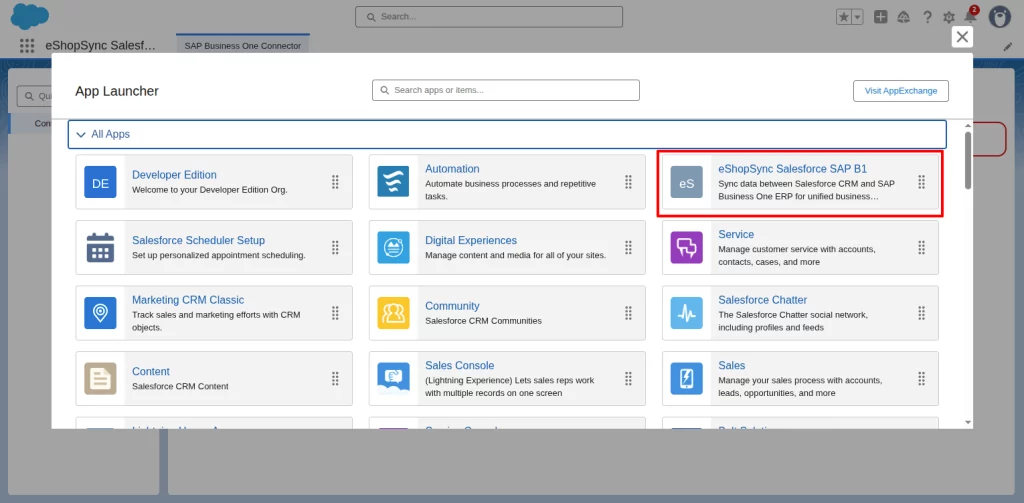
Once installed, you’ll see a new app in Salesforce named eShopsync SAP B1 Connector.

Set Up the Connection
Open the SAP B1 Connector App. In this view, click on the Configure here link.
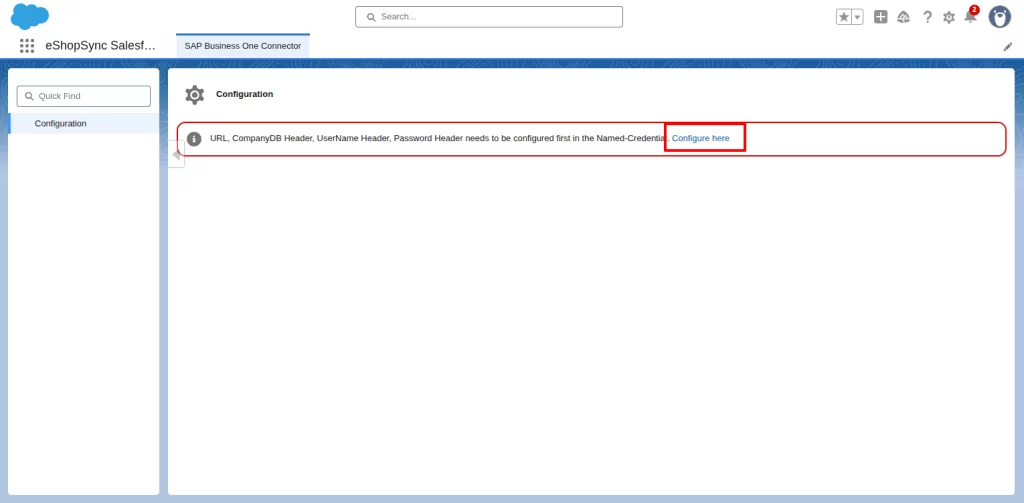
It will take you to the named credential settings page. Now, scroll down and enter your SAP B1 Service Layer URL, Company DB, Username, and Password.
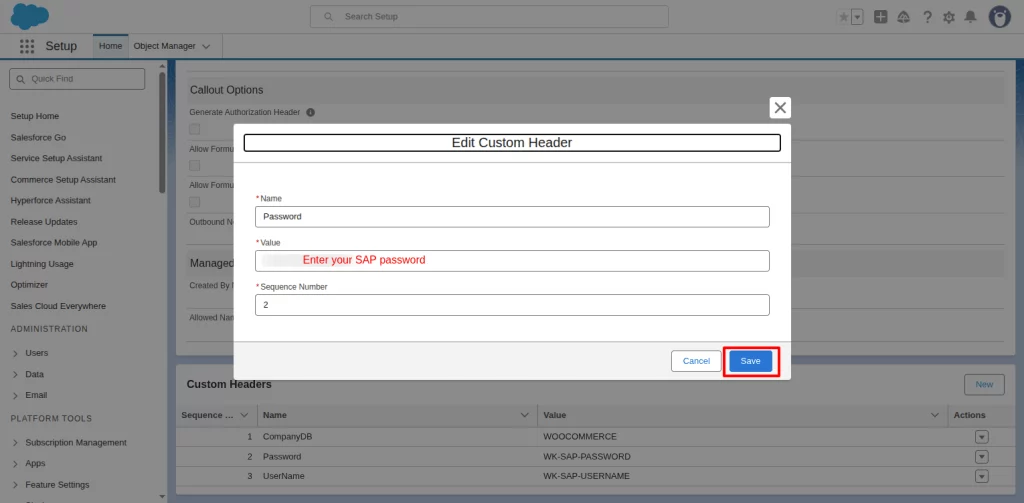
Click on the icon under Actions and press the edit button.

Enter the value of the company’s database in the pop-up window.
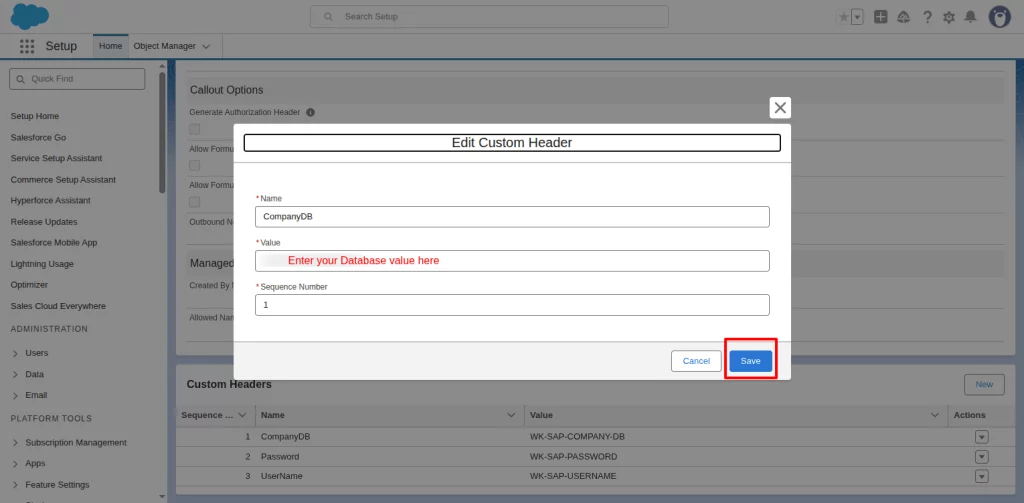
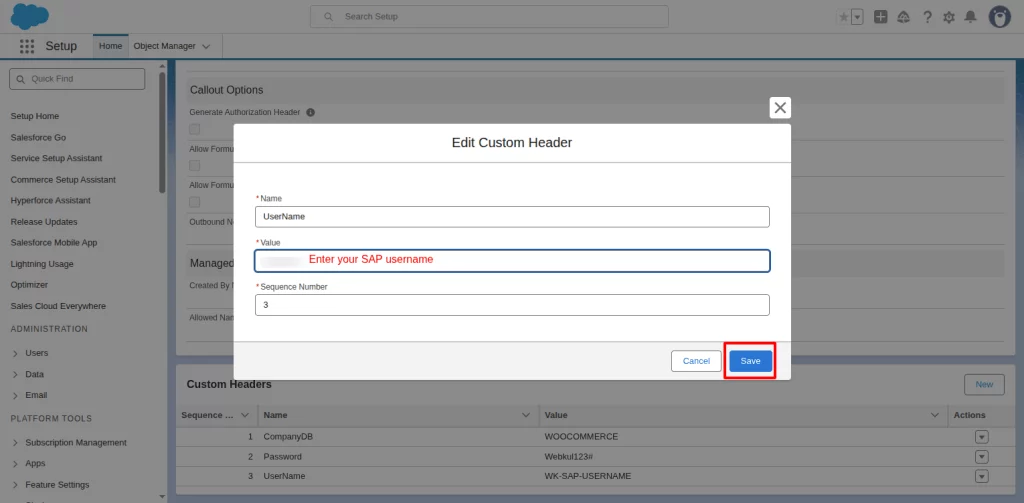
Next, follow the same process for Password and Username.
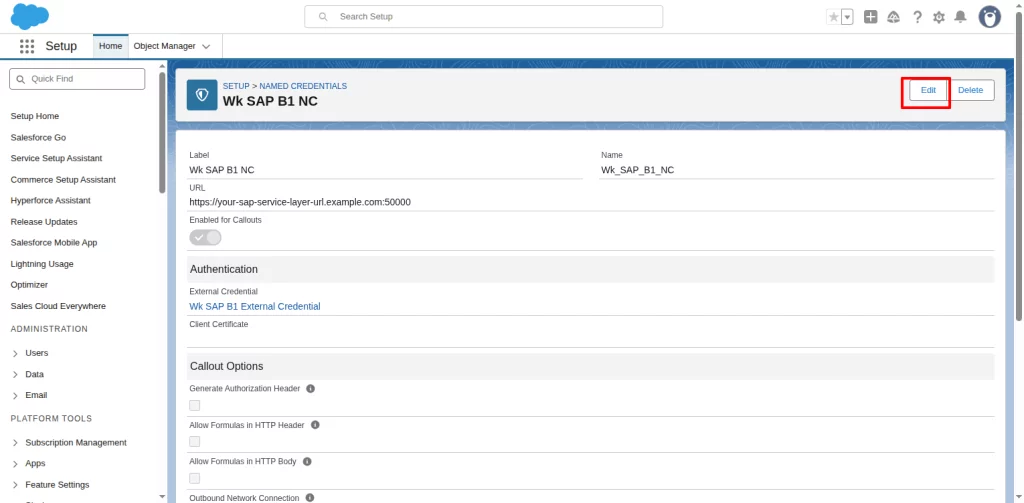
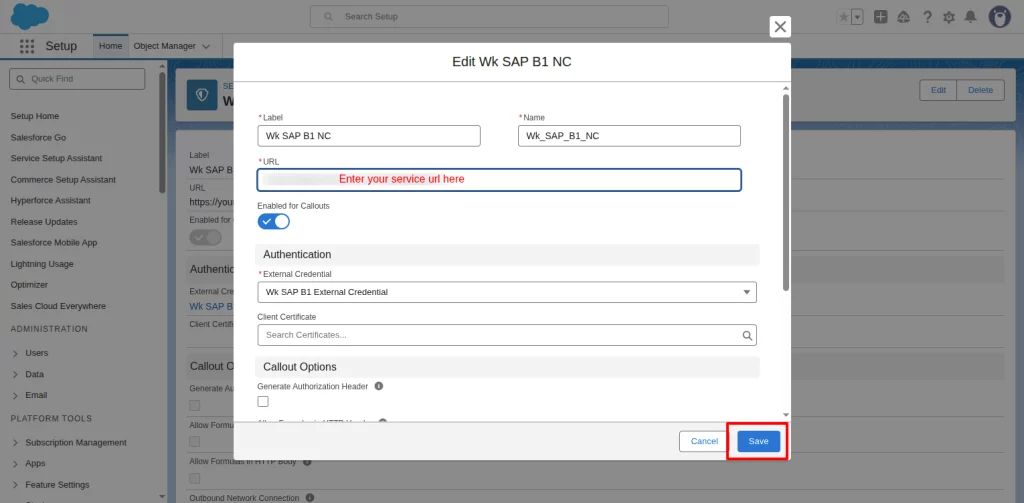
To enter the SAP URL, click on the edit button at the top right side of the Named Credential page.
Add your SAP URL and save changes. Your credentials will be saved securely inside Salesforce.
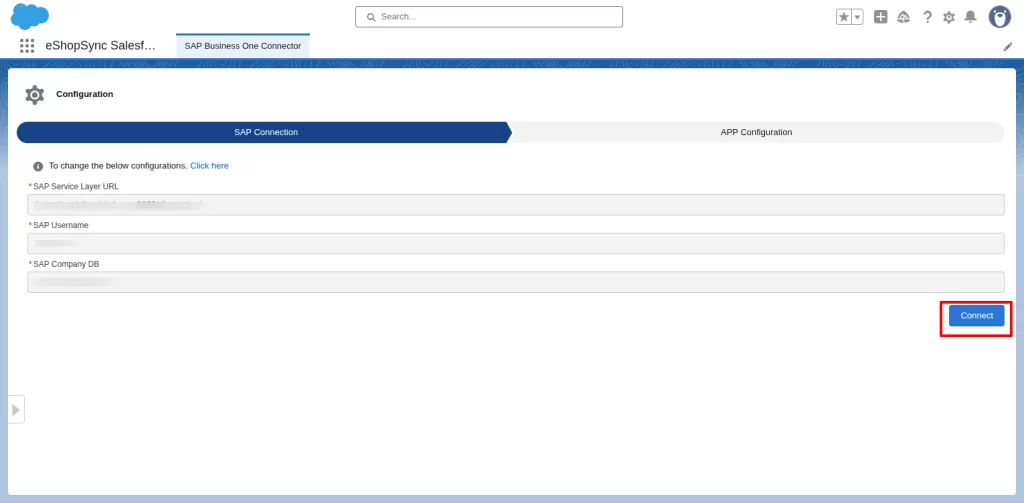
Further, go to the App launcher and open the Salesforce SAP B1 Connector application.
Now, it will show your entered SAP B1 credentials. Then, click on the connect button to establish a connection between Salesforce and SAP B1.
You’ll see a success message if everything is set up correctly.
Configure the Connector
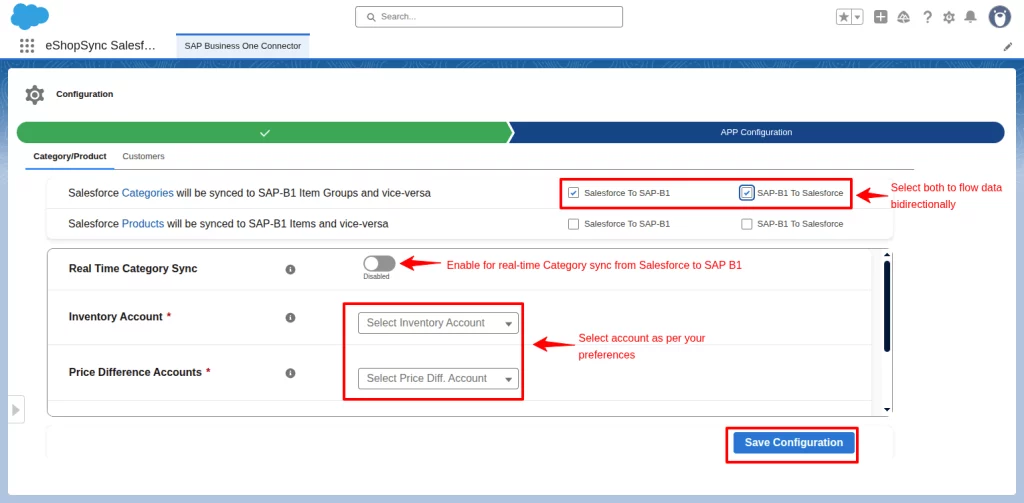
After creating a successful connection. Shift to the App Configuration tab in the connector. Here you can configure the Category, Product, Customers, and Order settings.
In the category setting tab, set import, export of data between Salesforce and SAP. You can also enable real-time data sync, which only works for Salesforce to SAP B1.
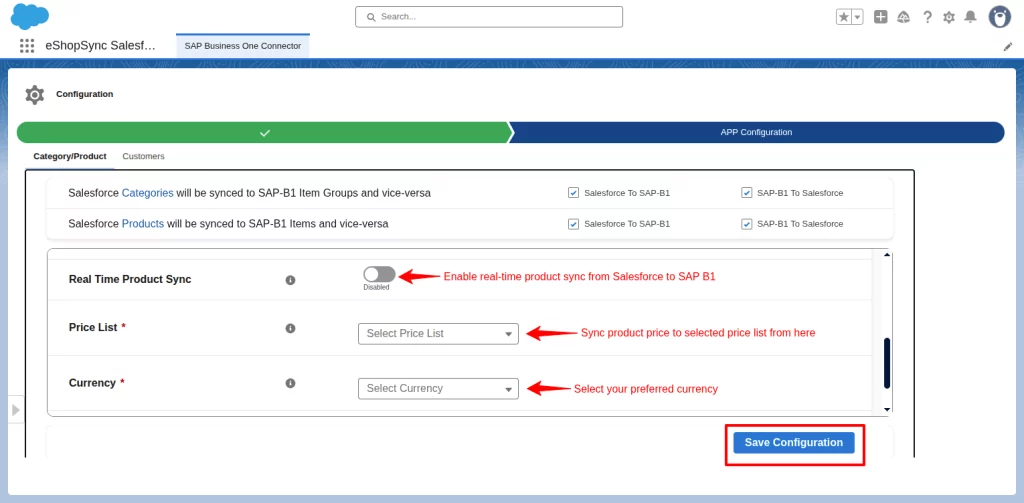
Follow the same process for Product configuration.
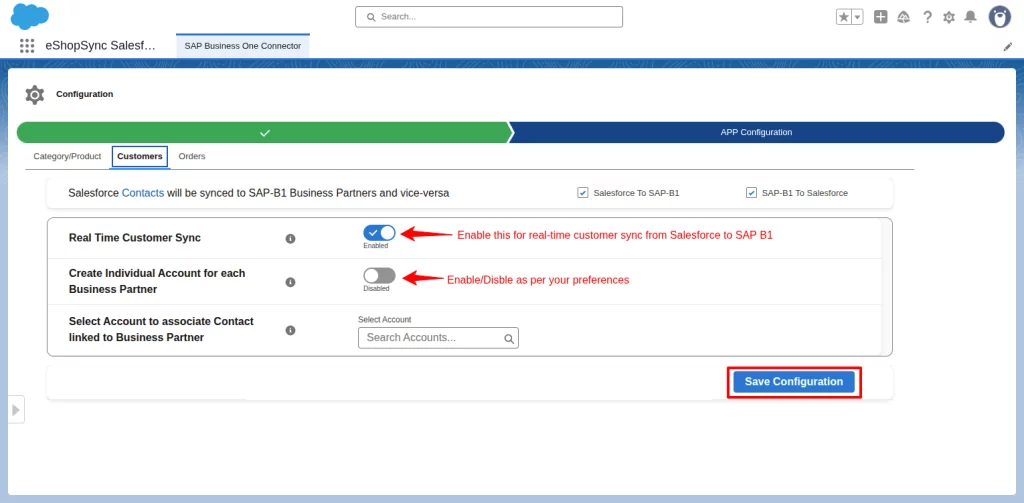
Similarly, shift to the Customers tab to set options related to customers.
In the orders tab, set the values related to order sync.
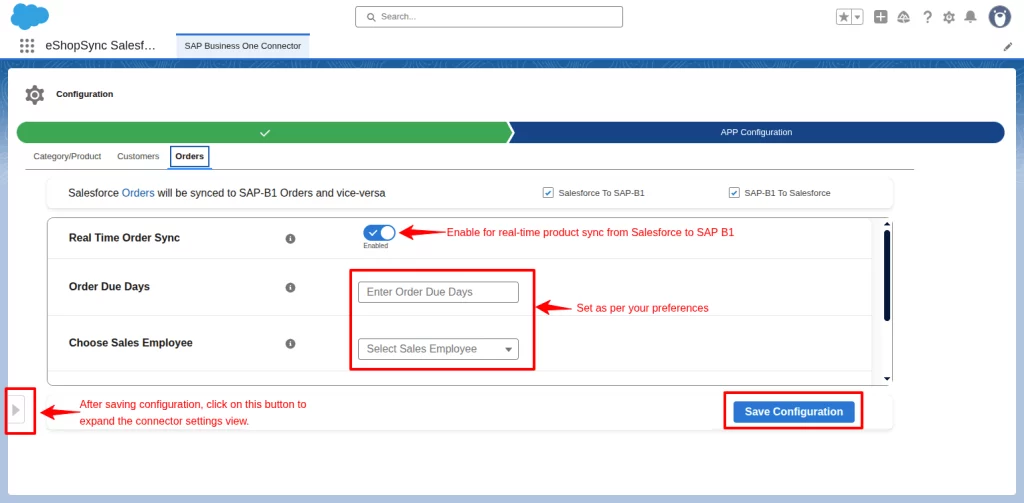
Now, after configuring the object settings, click on the Right arrow icon to access the category, product, customers, and orders sync options.
Syncing your Data
The connector syncs data automatically in real-time, only from Salesforce to SAP B1.
But if you need to push record instantly, manual sync is there. Open the list view, for example, a category, and click the Export and Import button.
An Export button will sync data on the Salesforce platform to SAP B1, and an Import button will fetch data on SAP B1 to the Salesforce platform.
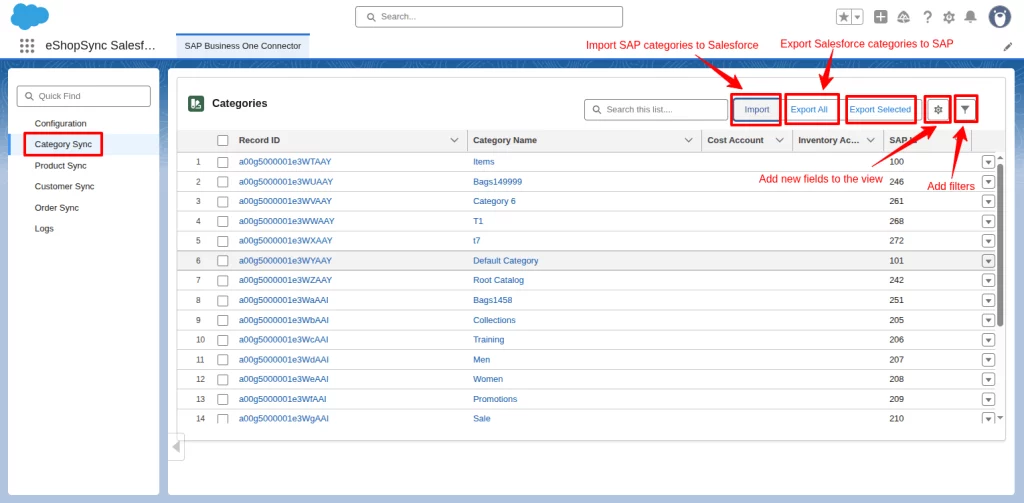
Similarly, the same process is followed for Product, Customers, and Order data sync.
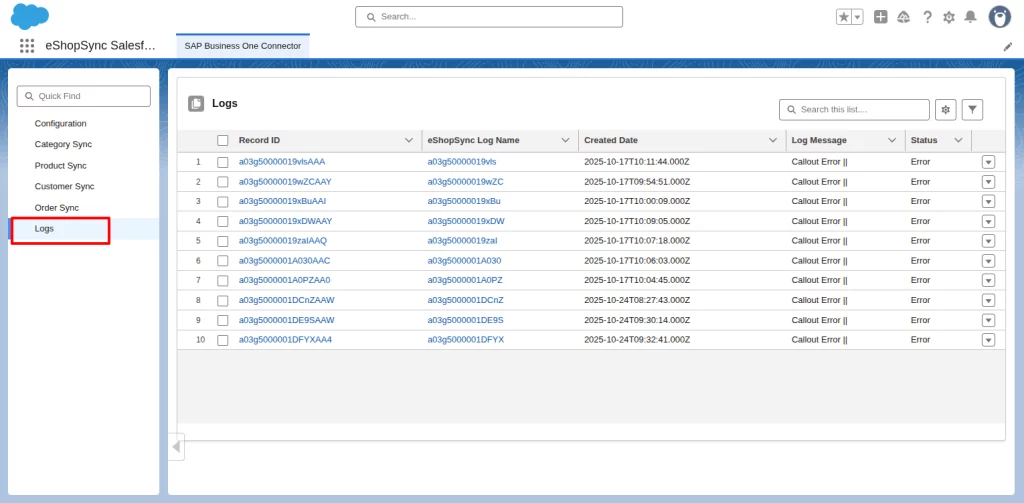
Finally, if you want to see what’s happening behind the scenes, you can go to the Logs option in the app to view:
- Sync status (Success or Failed)
- Record count processed
- Last updated date and time.
If something fails, the log will show exactly why, so you can fix it quickly.
Conclusion
The Salesforce SAP B1 Connector saves time, reduces manual work, and keeps your teams aligned with accurate data on both ends.
With real-time sync, clear visibility, and secure setup — it’s built for reliability. Start syncing today and see how integration tools could simplify your operations seamlessly.
Support
- Need help? Raise a ticket to reach out to our support team anytime.
- We’re here to make sure your integration runs smoothly. Visit our Webkul AppExchange Profile to explore our solutions.