

In this blog we will check how we can delete classes and triggers from production org via workbench.
First we need to connect our salesforce production org with workbench.
Let’s assume we have already connected our org with workbench.
Let’s create two files first is package.xml
<?xml version="1.0" encoding="UTF-8"?>
<Package xmlns="http://soap.sforce.com/2006/04/metadata">
    <version>47.0</version>
</Package>
and then create a xml in which we will write the name of all classes and triggers which we want to delete.
<?xml version="1.0" encoding="UTF-8"?>
<Package xmlns="http://soap.sforce.com/2006/04/metadata">
    <types>
        <members>ClassName1</members>
        <name>ApexClass</name>
   </types>
   <types>
        <members>CustomObjectName__c</members>
        <name>CustomObject</name>
   </types>
   <types>
        <members>TriggerName</members>
        <name>ApexTrigger</name>
   </types>
<version>47.0</version>
</Package>
save it with the name of destructiveChanges.xml and then make zip of these two files.
Now in workbench let’s goto the tab ‘migration’,In migration tab’s dropdown goto ‘Deploy‘ button.


So now on the deploy screen we need to attached our created zip file.

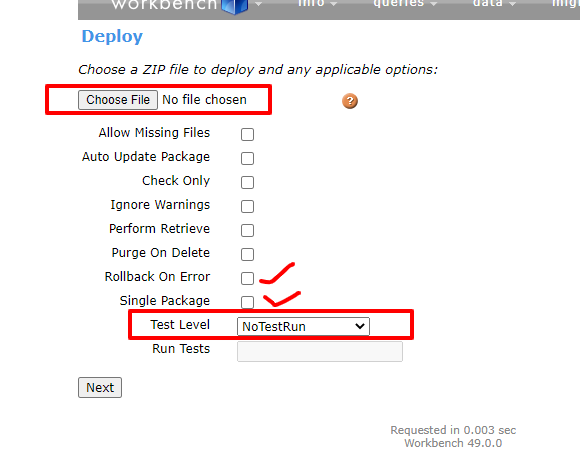
After that click on ‘Next’ and then read Waring message and click on ‘Deploy’ and its done .
Support
If any issue related to this blog feel free to add a ticket and let us know your views to make it better https://webkul.uvdesk.com/en/customer/create-ticket/
Webkul is a proud salesforce partner and offering “salesforce consulting services” https://webkul.com/salesforce-consulting-services/