
The following doc will try to sum up and make you understand the use of REST API in Salesforce to access and manage its Objects via OAuth 2.0 using PHP
What is RESTful API?
A RESTful API or RESTful web service is based on representational state transfer technology, an architectural style that uses HTTP requests for communication. It uses GET, PUT/PATCH, POST, and DELETE requests for the interaction with data present over the web.
What is OAuth 2.0?
OAuth 2.0 is simply a standard protocol or framework for authorization. It provides third-party applications “secure delegated access” to different web applications, desktop applications, phone applications, etc. In general, we can understand it as a permission set provided to an identified client which is associated with a token. So whenever a client requests a set of data, they need to provide this token with their HTTPS request. The authorization server verifies this token and accordingly the request is processed.
To start setting up a connection for requesting Salesforce data we need to follow the below steps:
Step 1: Create a Connected App
In this step, we are setting up OAuth 2.0 for Salesforce so that any client requesting any data must first authenticate via the settings of this app.
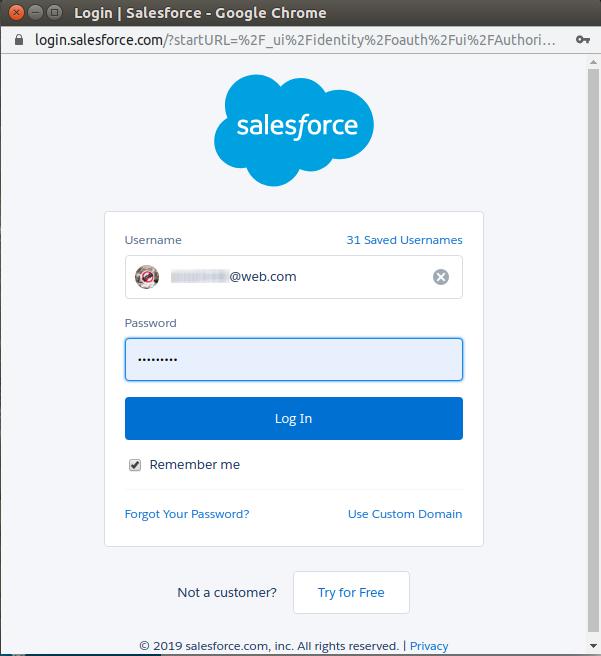
- Login to your Salesforce org via https://login.salesforce.com/
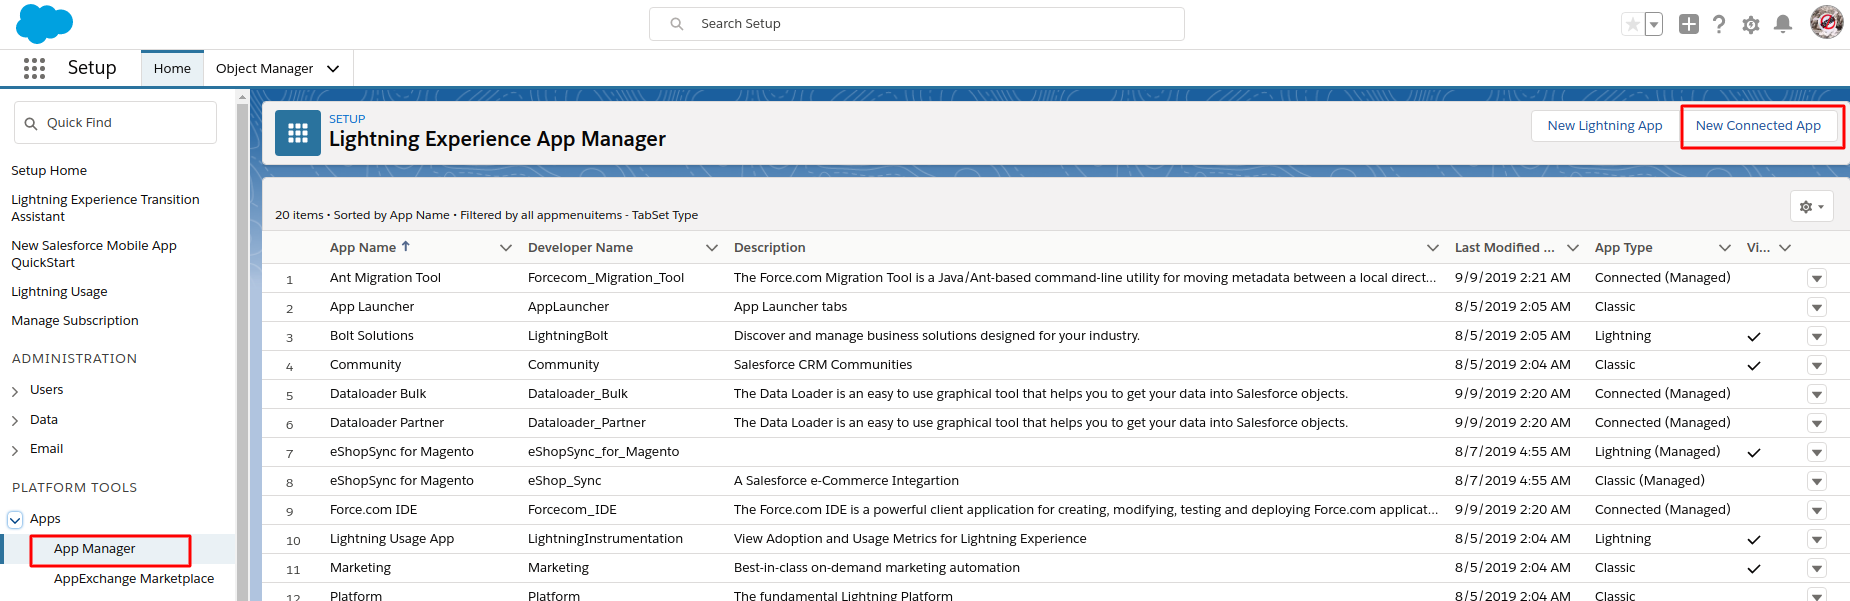
- Goto Setup->Platform Tools->Apps->App Manager click ‘New Connected App’

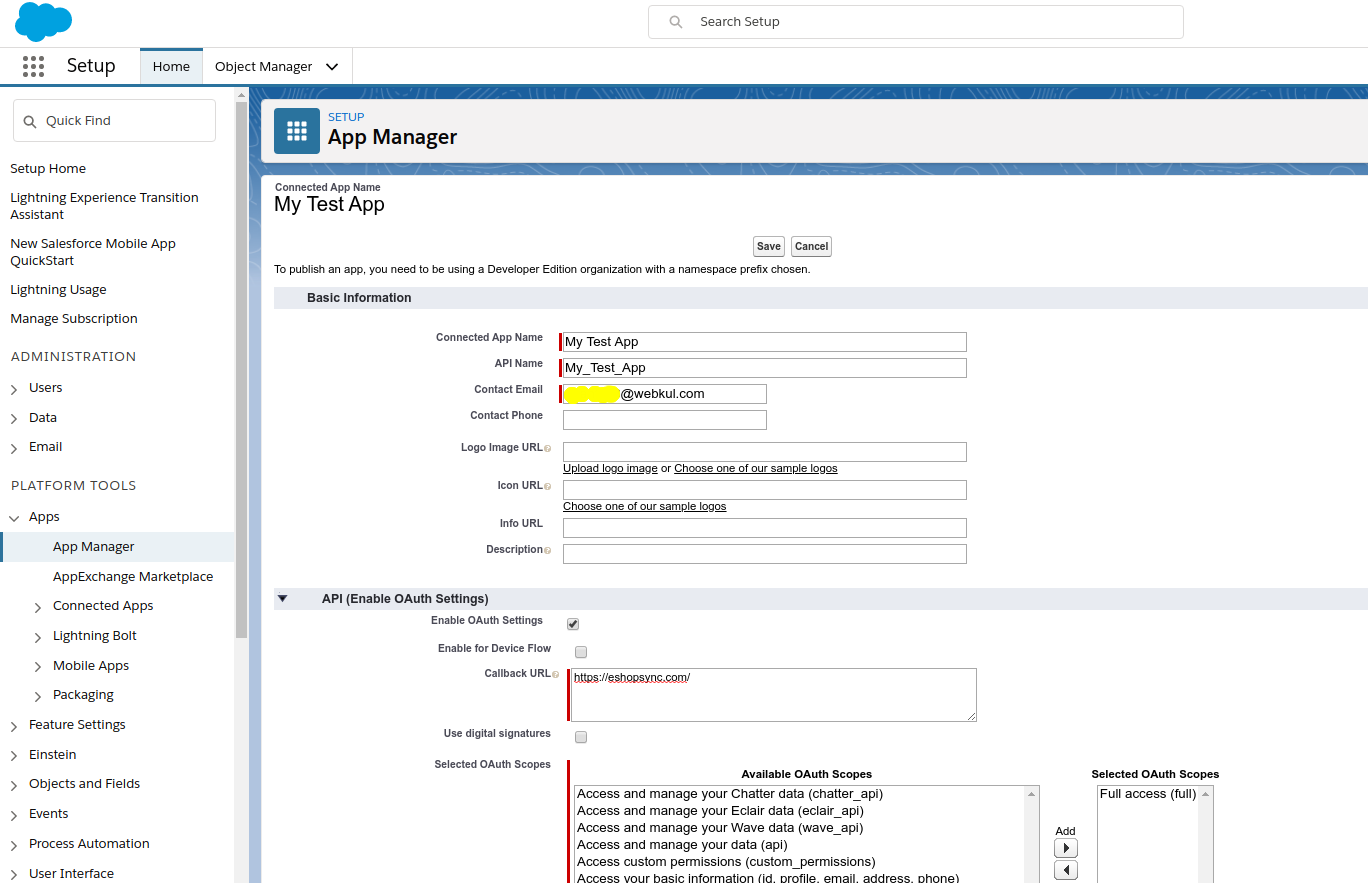
- Fill in Basic Information fields
- Reach to “API (Enable OAuth Settings)” and check “Enable OAuth Settings” this will open a list of options
- Fill in a callback URL (make sure it is https). You use this URL to authenticate any other user with your app and get a set of permissions to perform future operations.
- Select from a list of available OAuth scopes in the “Selected OAuth Scopes” section. The selection from here will provide access to different users’ org’s data. Be sure what data you require access to and which scopes you should set for that.
- Save application

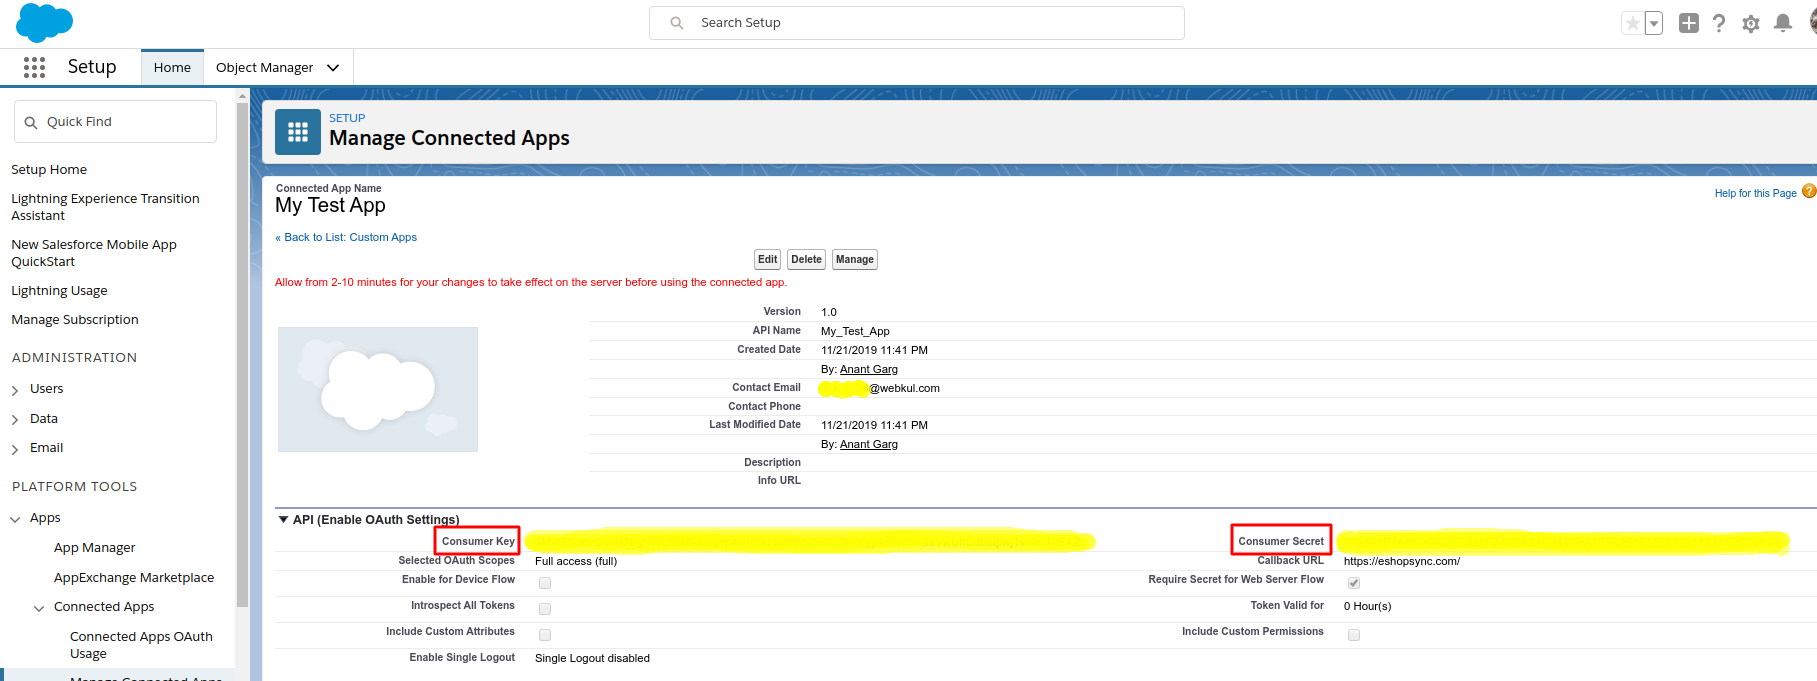
- After saving, your created app will have ‘Consumer Key’ and ‘Consumer Secret’. These will be required to set up a connection link.

There are different OAuth 2.0 authentication flows(set of steps) by which you can authenticate your application and Salesforce, which are as follows:
- Web server flow, where the server can securely protect the consumer secret. (Uses authorization code grant type)
- User-agent flow, used by applications that cannot securely store the consumer secret. (Uses implicit grant type)
- username-password flow, where the application has direct access to user credentials.
Here we will use Web server flow to authenticate the connected app user with Salesforce. Web Server flow is used because it uses a client secret as an extra authorization parameter to prevent spoofing servers and is preferred for any server/cloud application.
Step 2: Authorize via OAuth 2.0
Simply redirect to Salesforce authorization endpoint: https://login.salesforce.com/services/oauth2/authorize with following parameters:
| Parameter | Description |
|---|---|
| response_type | Must be code for this authentication flow. |
| client_id | The Consumer Key from the connected app definition. |
| redirect_uri | The Callback URL from the connected app definition. |
The final authorization URL will be as:
https://login.salesforce.com/services/oauth2/authorize?response_type=code&client_id=APP_CONSUMER_KEY&redirect_uri=urlencode(“APP_ENCODED_REDIRECT_URL”);
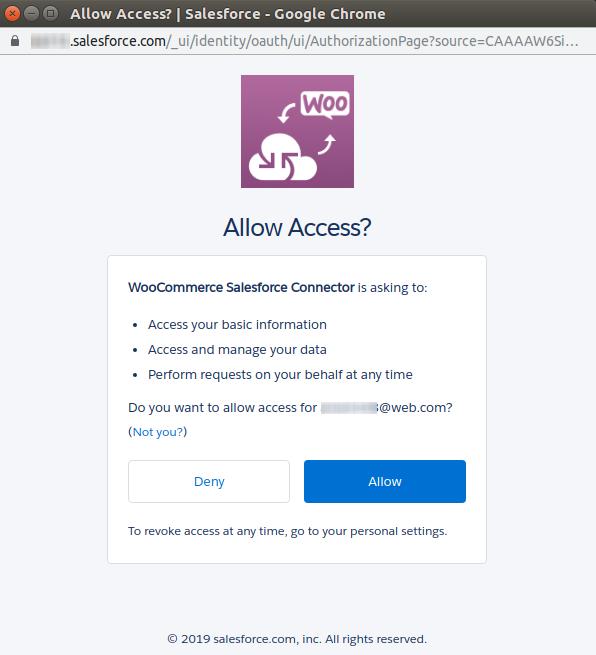
This will redirect the user to the Salesforce login window. After login, the user will be asked to ‘Allow access’ as per “Selected OAuth Scopes” in the app. On successful authorization web browser will redirect to the callback redirect_url along with ‘code’ that will be used to obtain the access token


Step 3: Get Access Token
Create a POST request to the endpoint: https://login.salesforce.com/services/oauth2/token with following parameters:
| Parameter | Description |
|---|---|
| grant_type | The value must be authorization_code for this flow. |
| client_id | The Consumer Key from the connected app definition. |
| client_secret | The Consumer Secret from the connected app definition. Required unless the Require Secret for Web Server Flow setting is not enabled in the connected app definition. If a client_secret isn’t required, and the connected app sends it in the authorization request, Salesforce attempts to validate it, anyway. |
| redirect_uri | The Callback URL from the connected app definition. |
| code | Authorization code the consumer must use to obtain the access and refresh tokens. The authorization code expires after 15 minutes. |
Below presented is a cURL example for the token request:
/** Code for retrieving Salesforce access token via cURL.
*
* @category Salesforce
* @author Webkul Software Pvt Ltd <support@webkul.com>;
* @copyright 2019 webkul.com. All Rights Reserved.
* @license GNU General Public License version 2 or later; see LICENSE.txt
* @link http://webkul.uvdesk.com
*/
$curlObj = curl_init();
$tokenRequestUrl = 'https://login.salesforce.com/services/oauth2/token?grant_type=authorization_code&client_id='.APP_CONSUMER_KEY.'&client_secret='.APP_CONSUMER_SECRET.'&redirect_uri='.urlencode("APP_ENCODED_REDIRECT_URL").'&code='.CODE_RECEIVED_FROM_STEP_TWO;
curl_setopt($curlObj, CURLOPT_URL, $tokenRequestUrl);
curl_setopt($curlObj, CURLOPT_POST, 1);
curl_setopt($curlObj, CURLOPT_RETURNTRANSFER, true);
$result = curl_exec($curlObj);
curl_close($curlObj);
The return result contains a few parameters from which we would use the following:
| Parameter | Description |
|---|---|
| access_token | The access token that acts as a session ID that the application uses for making requests. This token should be protected as though it were user credentials. |
| token_type | Value is Bearer for all responses that include an access token. |
| refresh_token | Token that can be used in the future to obtain new access tokens. |
| instance_url | Identifies the Salesforce instance to which API calls are sent. |
Step 4: Accessing Salesforce sObject
Now we will use the return data from step 3 for accessing data from Salesforce. We do need to set a token in the header for further requests. Below presented is a cURL example to get a description of an Object:
/** Code to retrieve description of Salesforce object via cURL.
*
* @category Salesforce
* @author Webkul Software Pvt Ltd <support@webkul.com>;
* @copyright 2019 webkul.com. All Rights Reserved.
* @license GNU General Public License version 2 or later; see LICENSE.txt
* @link http://webkul.uvdesk.com
*/
$curlObj = curl_init();
curl_setopt($curlObj, CURLOPT_URL, 'INSTANCE_URL_FROM_STEP_THREE/SOBJECT_NAME/describe/');
curl_setopt($curlObj, CURLOPT_POST, 1);
curl_setopt($curlObj, CURLOPT_RETURNTRANSFER, true);
$otherHeaders = array(); //you may set any other header if required
$headers = array_merge(array("Authorization:".TOKEN_TYPE_FROM_STEP_THREE." ".ACCESS_TOKEN_FROM_STEP_THREE), $otherHeaders);
$headers = array_unique($headers);
curl_setopt($cSession, CURLOPT_HTTPHEADER, $headers);
$result = curl_exec($curlObj);
$result = json_decode($result);
curl_close($curlObj);
Note: One important parameter from step 3 was refresh_token. It is required to regenerate the access token as it will expire on the session expire. Consider it like you being logged in to the Salesforce org and on long inactivity, you get logged out of the system.
So how you will get to know that your acess_token is expired? The $result from the current step will give you information about it. We can check it as:
if (is_array($response)) {
    if ($response[0]->errorCode == 'INVALID_SESSION_ID') {
        //YOU_NEED_TO_REGENERATE_TOKEN Step 5
    }
}
Step 5: Regenerate Access Token
To regenerate your access token, you will need to pass refresh_token from Step 2 in the URL request as:
/** Code to regenerate Salesforce access token via cURL.
*
* @category Salesforce
* @author Webkul Software Pvt Ltd <support@webkul.com>;
* @copyright 2019 webkul.com. All Rights Reserved.
* @license GNU General Public License version 2 or later; see LICENSE.txt
* @link http://webkul.uvdesk.com
*/
$refreshTokenUrl = "https://login.salesforce.com/services/oauth2/token?grant_type=refresh_token&client_id=".APP_CONSUMER_KEY."&client_secret=".APP_CONSUMER_SECRET."&refresh_token=".REFRESH_TOKEN_FROM_STEP_THREE;
$curl = curl_init();
curl_setopt_array($curl, CURLOPT_URL, $refreshTokenUrl);
curl_setopt($curlObj, CURLOPT_POST, 1);
curl_setopt_array($curl, CURLOPT_RETURNTRANSFER, true);
$result = curl_exec($curl);
$result = json_decode($result);
$newAccessToken = $result->access_token;
curl_close($curl);
Step 6: Revoke Access
This is one of the most important steps as your code should revoke all the access when the user wants it to. Providing revoke functionality gives user assurance and trust over your code and it helps in avoiding future troubles that may arise. A basic cURL request can be written to revoke access token as:
/** Code to revoke access from Salesforce token via cURL.
*
* @category Salesforce
* @author Webkul Software Pvt Ltd <support@webkul.com>;
* @copyright 2019 webkul.com. All Rights Reserved.
* @license GNU General Public License version 2 or later; see LICENSE.txt
* @link http://webkul.uvdesk.com
*/
$curl = curl_init();
curl_setopt_array($curl, CURLOPT_URL, INSTANCE_URL_FROM_STEP_THREE.'/services/oauth2/revoke');
curl_setopt_array($curl, CURLOPT_POSTFIELDS, "token=".REFRESH_TOKEN_FROM_STEP_THREE);
curl_setopt($curl, CURLOPT_POST, true);
curl_setopt_array($curl, CURLOPT_RETURNTRANSFER, true);
$response = curl_exec($curl);
To read more about different parameters, endpoints, and usability of API you may refer to Salesforce docs. This blog tried to cover an aspect of setting up a RESTful connection with Salesforce in minimal requirements and understanding. Hope it helps 🙂
Support
If you have any issue feel free to add a ticket and let us know your views to make it better https://webkul.uvdesk.com/en/customer/create-ticket/