

Bulk API:- Bulk API 2.0 is a powerful tool in Salesforce that enables you to handle large-scale data operations efficiently.
How to Implement Bulk API 2.0?
Using various tools, you can implement the Bulk API 2.0, like
- POSTMAN
- SALESFORCE WORKBENCH
And many More,
Unlike POSTMAN, we will use Salesforce Workbench in this blog because it does not require any authorization or integration.
What is Workbench?
Workbench, a tool designed for Salesforce administrators and developers, offers a web-based, powerful interface for effectively managing Salesforce information. Some key capabilities and benefits provided by Workbench include:
- Data management: Workbench allows mass report updates, creation, and deletion, making it easier to work with large volumes of information.
- Queries and Debugging: In addition to setting up and debugging programs, you can perform SOQL and SOSL queries.
Step Involve in Bulk API 2.0
How To Use Bulk API 2.0 In Workbench
- Firstly, log in to your Workbench
Url:- https://workbench.developerforce.com/login.php
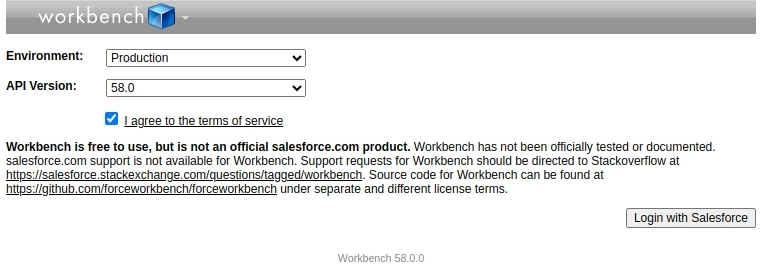

Choose your environment and API version accordingly, then click on Login with Salesforce button. It’s important to remember that Salesforce Bulk API 2.0 is only accessible in API versions 41.0 and later.
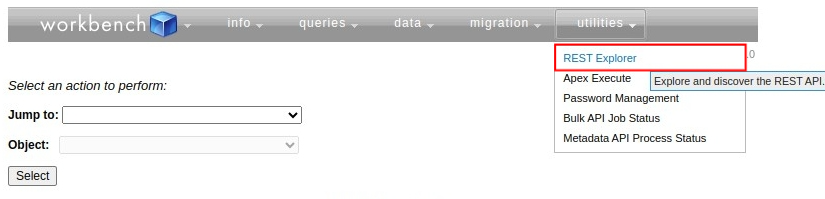
Now after login, navigate to utilities and then select REST Explorer.

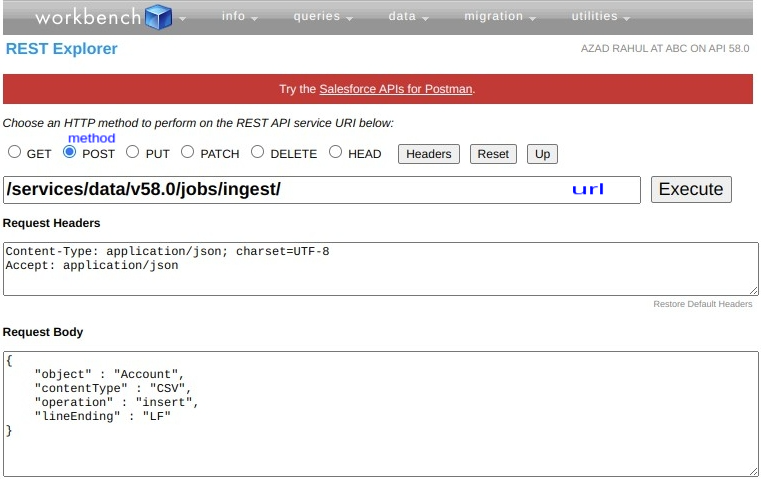
STEP 1:- CREATE BULK API 2.0 JOB
Url:-      /services/data/v58.0/jobs/ingest/

Method:-   POST

Header:-   Content-Type: application/json; charset=UTF-8

           Accept: application/json

Body:-     {  "object" : "Account",

              "contentType" : "CSV",

              "operation" : "insert",

              "lineEnding" : "LF"  }
The body contains four fields: Object, contentType, operation, and line-ending.
-> Here, we have passed the Account as an Object, we can pass both standard and Custom Objects.
-> Remember, Bulk API 2.0 only supports data in CSV format.
-> Operation can be insert, Update, and Delete
NOTE:- Unix/Linux/OS X uses LF as line-ending And Windows/DOS uses CRLF as a line-ending

Now click on the Execute button. We will get the job ID on the successful response.
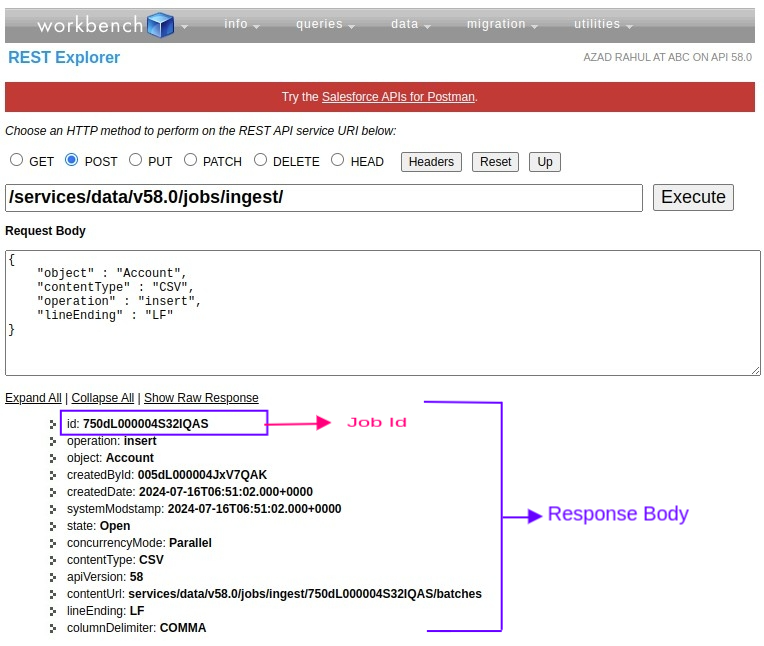

You can see in the above image that the value of State is Open.
You have received the job ID. Next, send the data for insertion. Please remember that Bulk API 2.0 only accepts data in CSV format.
STEP 2:- ADD DATA THAT NEEDS TO BE SENT
Url:-      /services/data/v58.0/ingest/{jobID}/batches

Method:-   PUT

Header:-   Content-Type: Text/CSV; charset=UTF-8

           Accept: application/json

Body:-     Data in CSV format
** In Place of {jobId} insert the ID that we get from the previous step **
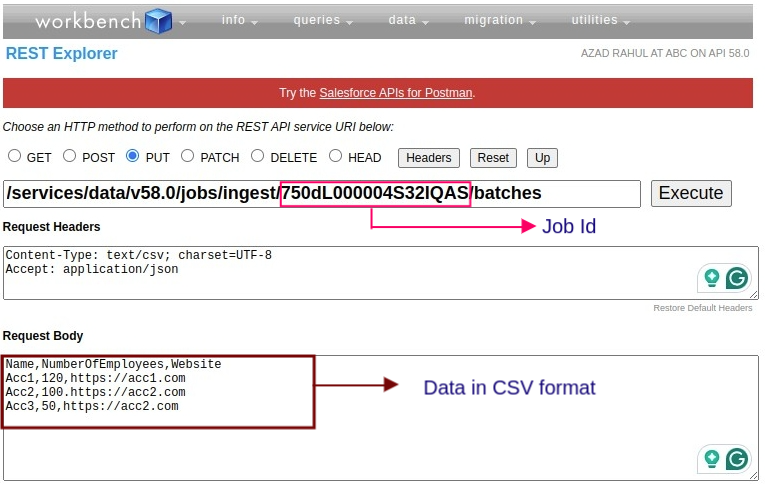

The request body includes the Salesforce Object’s field name as the first line of data, with all subsequent lines representing the row to be inserted.
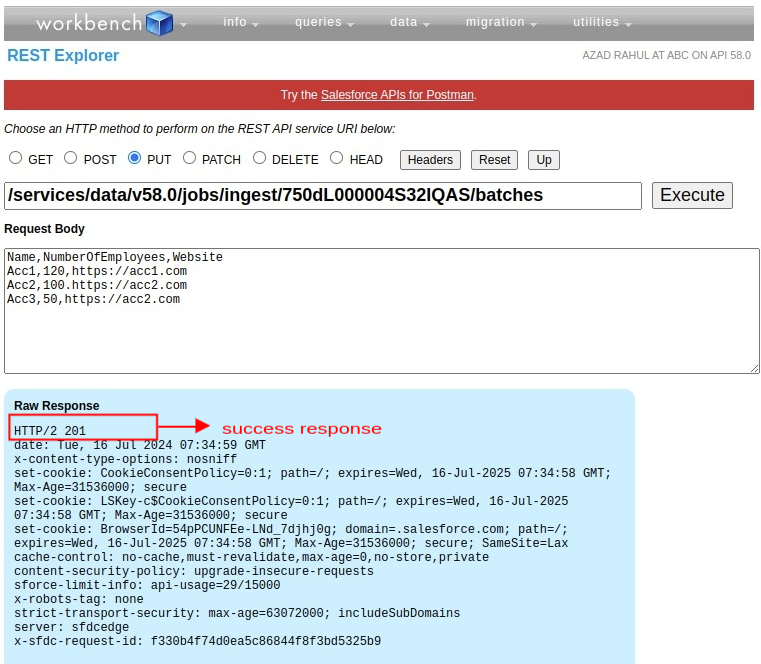
Now Click on Execute, and you will get nothing in a successful response. Check the response code to confirm that it has been executed successfully.

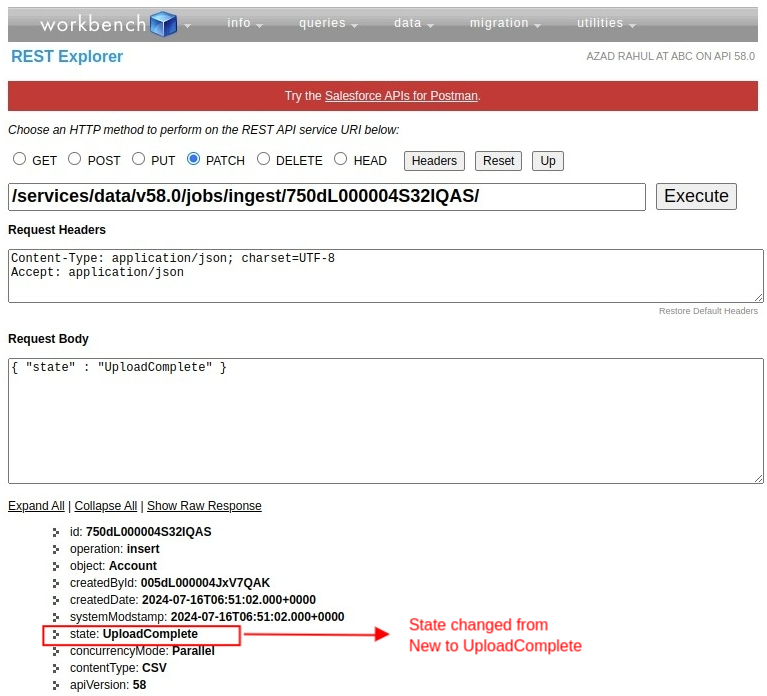
After we submit the data, we need to inform Salesforce servers that the job data upload is complete and ready for processing. Therefore, we will change the value of the State from New to UploadComplete.
STEP 3:- CHANGE THE STATE
   Url:-    /services/data/v58.0/ingest/{jobID}/
   Method:- PATCH
   Header:- Content-Type: application/json; charset=UTF-8

            Accept: application/json
   Body:-  {
              "state": "UploadComplete"
           }
On successful execution, you will receive a response body that contains the id, state, object, and other fields. You can see that the state value has been updated from New to UploadComplete. Now the Salesforce server has started data processing.

STEP 4:- RETRIEVE THE RESULTS
Url:-    /service/data/v58.0/ingest/{jobID}/
Method:- GET
Header:- Content-Type: application/json; charset=UTF-8
         Accept: application/json


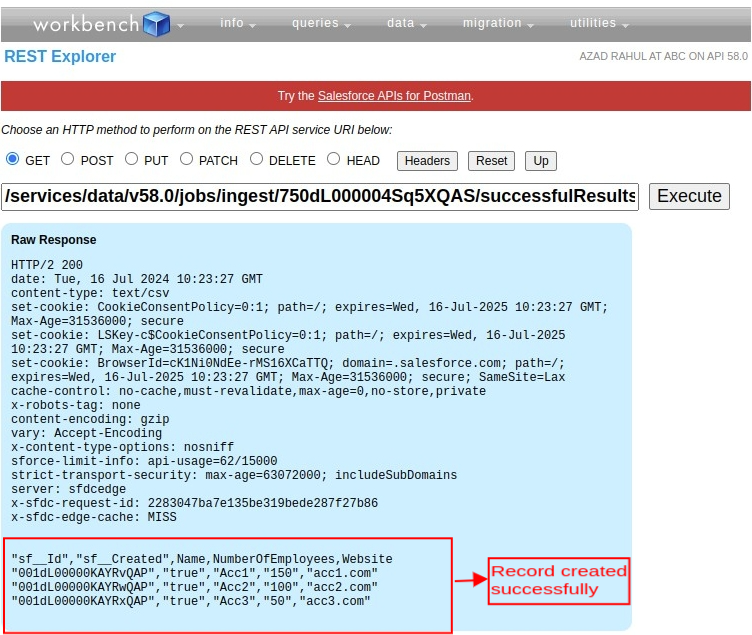
After a job reaches the JobComplete or Failed state. You can check the Successful and Failed Record.
-
Retrieve successful Results
Url:-    /service/data/v58.0/ingest/{jobID}/successfulResults

Method:- GET

Header:- Content-Type: application/json; charset=UTF-8

         Accept: application/json

-
Retrieve Failed Results
Url:-    /service/data/v58.0/ingest/{jobID}/FailedResults

Method:- GET

Header:- Content-Type: application/json; charset=UTF-8

         Accept: application/json

