
Make large volume, enterprise purchasing easy, fast, and accurate with PunchOut Gateway for Salesforce B2C Commerce Cloud.
Traditional B2B procurement is inefficient. Buyers leave their systems, browse supplier websites, and then manually copy product details back for approval.
Meanwhile, suppliers receive purchase orders via email and phone calls, manually entering the orders into their systems.
This results in frequent mistakes, slow procurement cycles, and frustrated buyers.
eShopSync’s SFCC B2C PunchOut addresses this issue by utilizing real-time data from the seller’s store.
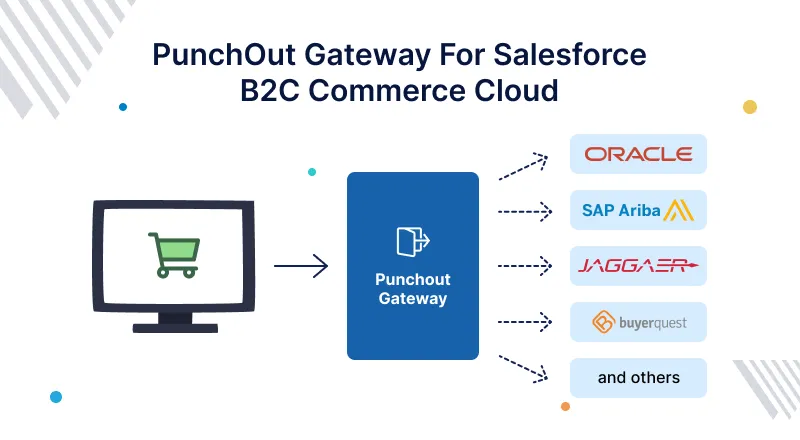
It integrates the seller’s Salesforce Commerce Cloud store with the buyer’s e-procurement system.
Now, the buyer simply clicks out of their system, shops on the seller’s site, and sends the cart data back in a single click. It takes the hassle out of B2B buying.
Features of The PunchOut Gateway
- Easy setup to connect your Salesforce B2C Commerce Cloud to e-procurement platforms.
- Standard cXML protocol supported for secure data exchange.
- Send shopping carts back to the eprocurement systems accurately.
- Receive confirmed purchase orders directly from e-procurement platforms.
- Automatically create orders inside Salesforce Commerce Cloud via the Admin API.
- View and manage all PunchOut carts and orders from a single dashboard.
- Clean up invalid or abandoned carts and orders in a controlled way, keeping data accurate.
- Installation of PunchOut Gateway For Salesforce B2C Commerce Cloud.
Prerequisites of Installation
- Node version 24 is required to install the application successfully.
- Keep “app_storefront_base” cartridge in the root directory of the project.
- Keep your OCAPI credentials ready, it’ll be required in setup.
Installation of PunchOut Gateway for Salesforce B2C Commerce Cloud
The installation of the PunchOut Gateway for SFCC involves three steps.
- Salesforce Commerce Cloud Cartridge setup
- Site Import for metadata
- OCAPI Permission
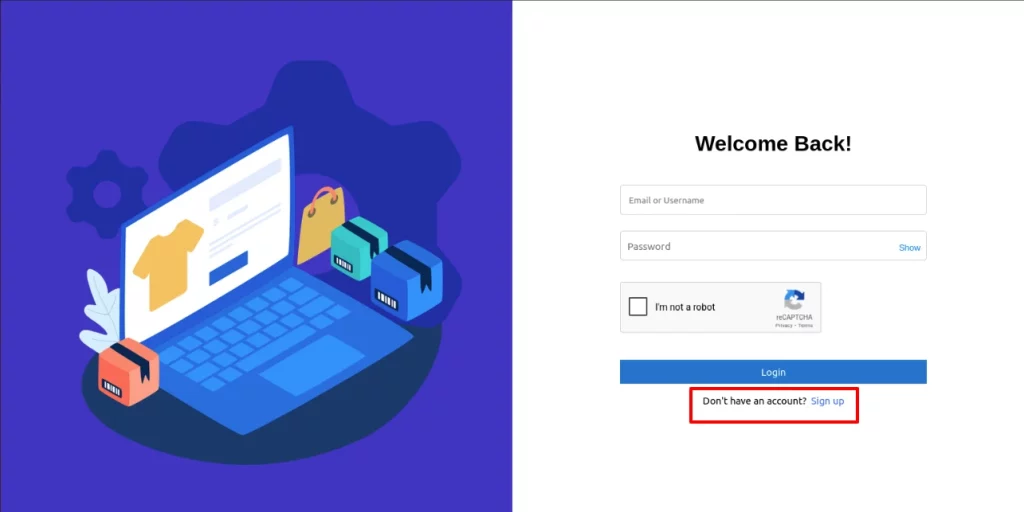
Now, let’s start the process by going to the site. You can either log in if you already have an account, or you can click on the sign-up button below to create a new account to access PunchOut.
For now, we assume you don’t have an account. So let’s begin with the Signup process.

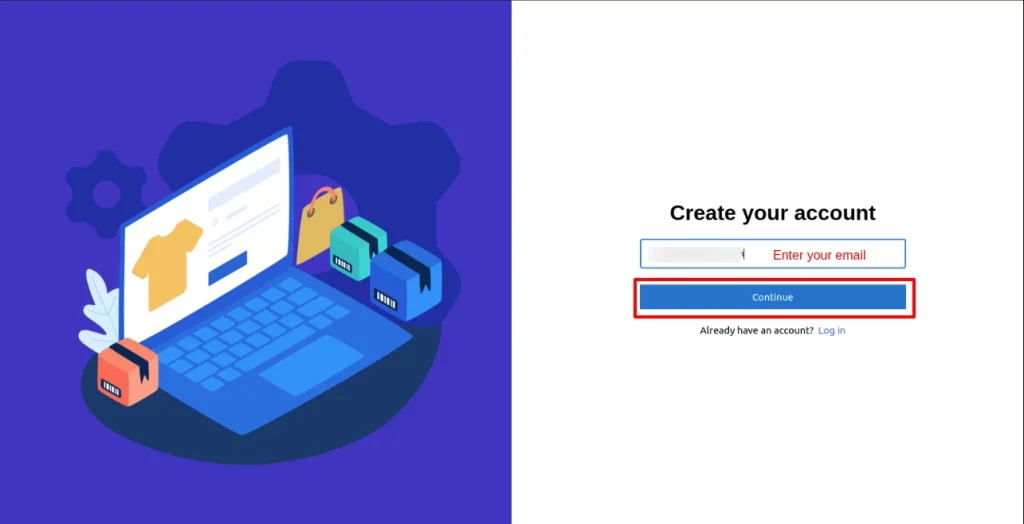
Create a new account by entering your email and clicking continue.

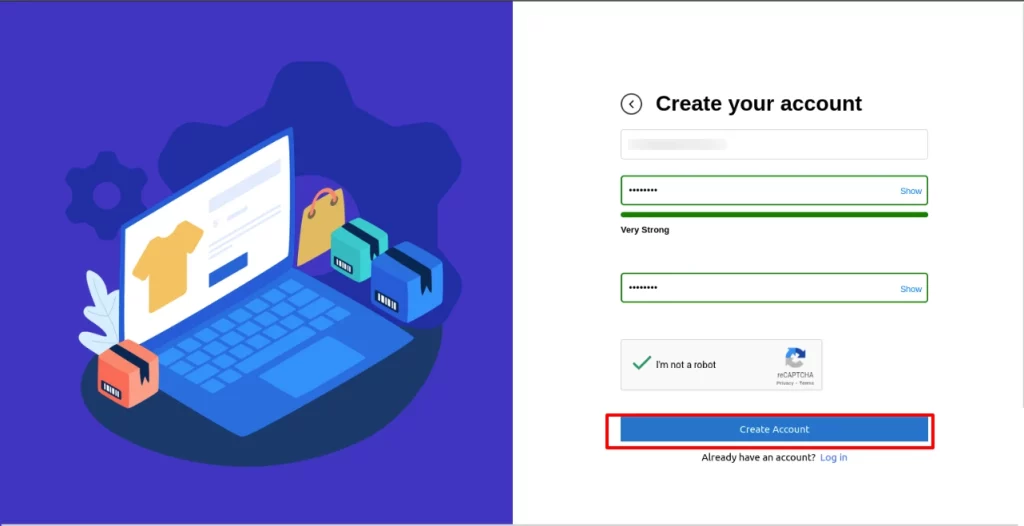
Create a strong password for your new account and click on the Create Account button.

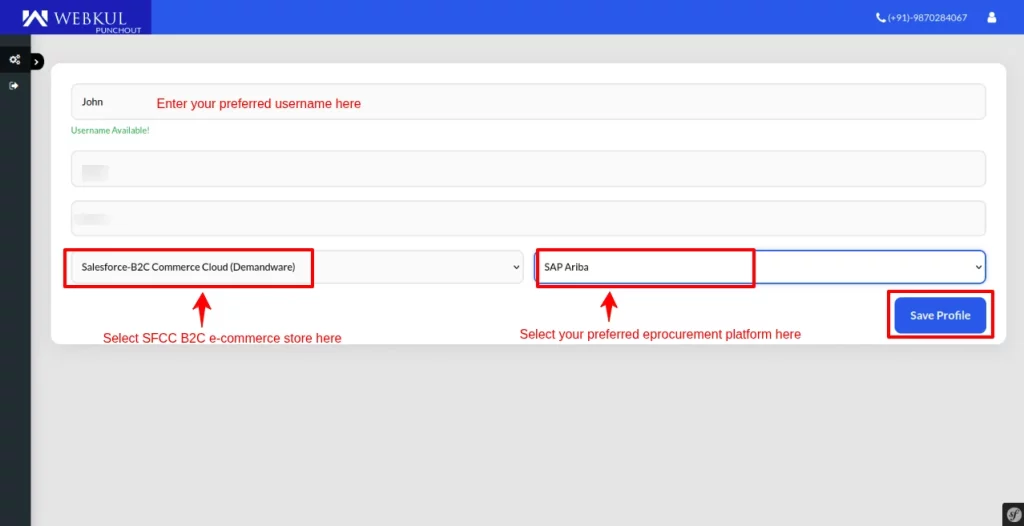
After successfully creating your new account, let’s create a username and enter the given details in this window. Here, select your e-commerce store, in this case, Salesforce B2C Commerce Cloud.
In the other dropdown menu, choose your e-procurement platform. Next, click on Save Profile to save changes.
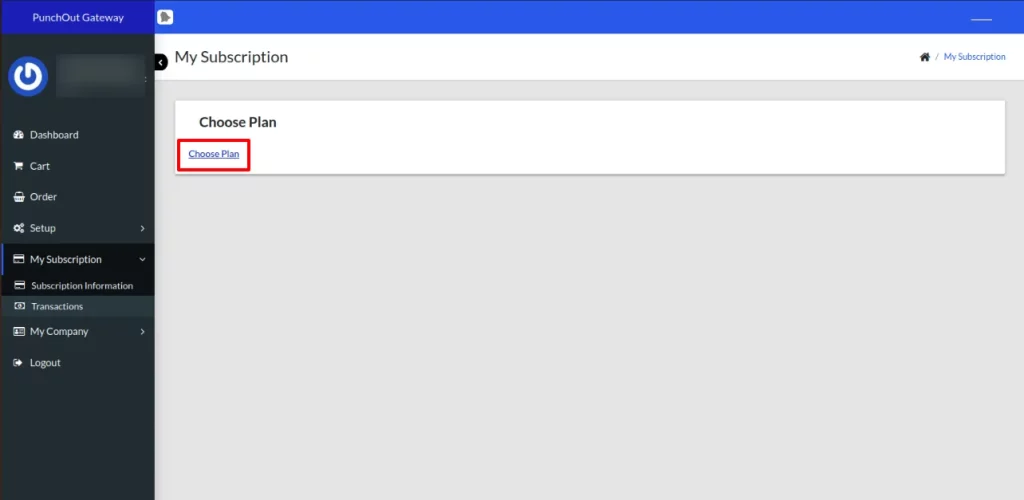
Next, a subscription window will open. Click on the Choose Plan button.

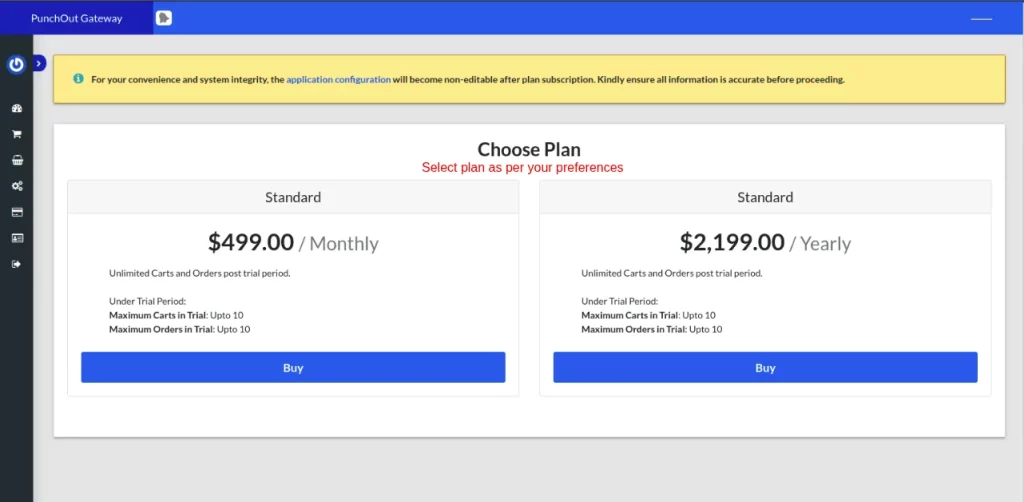
Now, buy the plans as per your preferences.

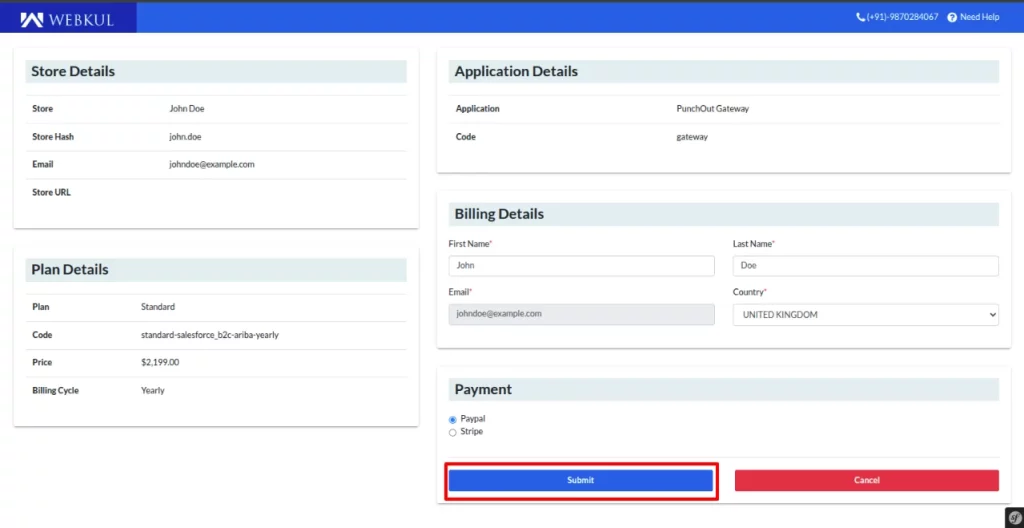
After that, a new window will open where you have to fill in the details and click on the submit button to complete the payment process.

Site Setup of PunchOut Gateway for SFCC
Before moving further, site setup is a crucial process that needs to be completed to make a seamless connection between the SFCC instance and the e-procurement system.
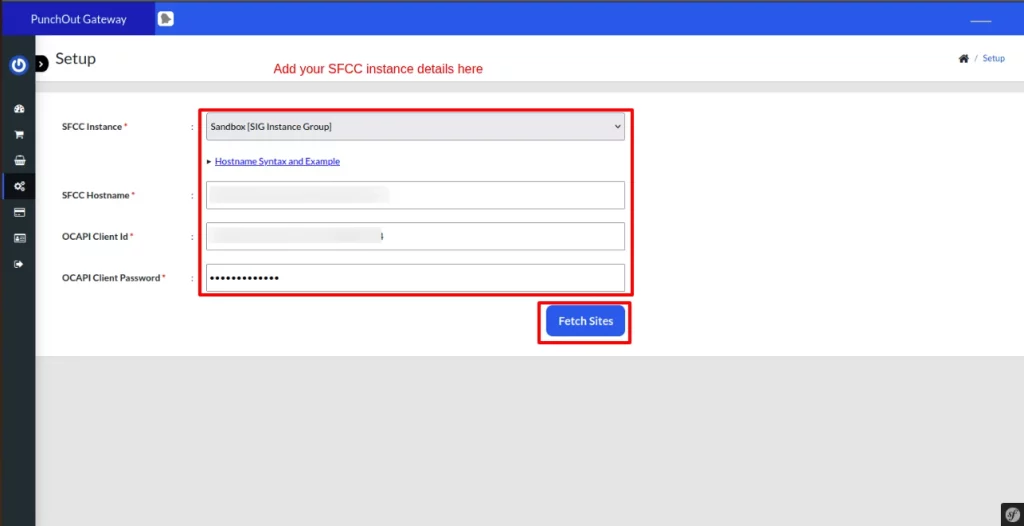
Go to the setup icon option on the left side of the PunchOut Gateway panel and click on the Application icon. Add your SFCC instance details and fetch sites.
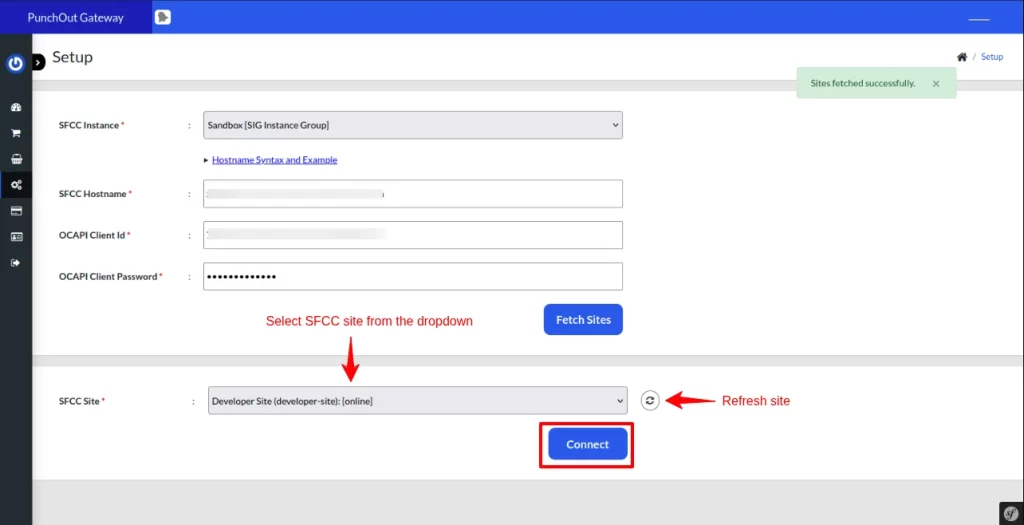
Next, you will find all the fetched sites of your SFCC instance. Select your preferred site and click on the Connect button to connect your SFCC to the punchout.

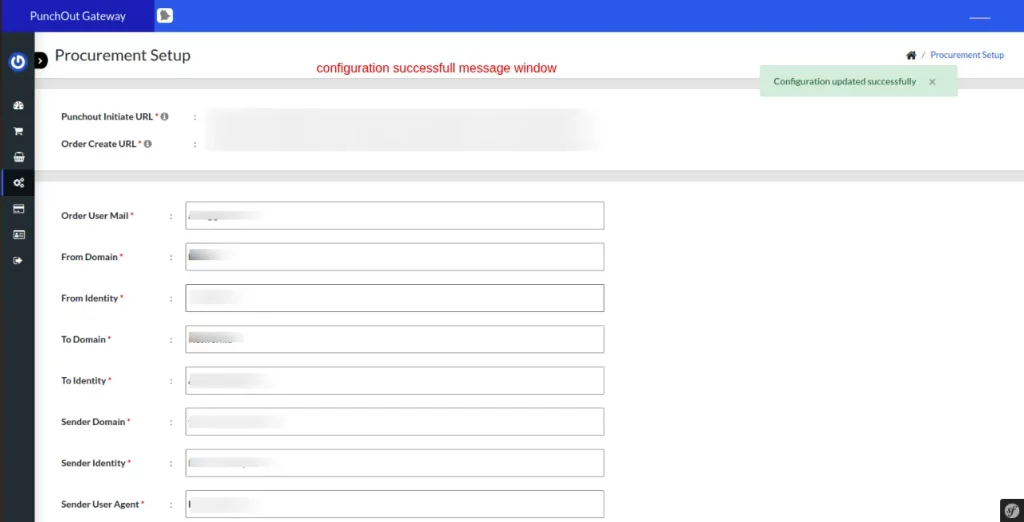
Further, click on the procurement option to enter your e-procurement details and save the configuration.


You will see a successful configuration message on your dashboard. Now that the site setup process is completed, we can move to the next steps.

Cartridge Upload In Salesforce B2C Commerce Cloud
Upload the cartridge to the Salesforce Commerce Cloud to enable B2B buyers to get an updated theme on your store. You have to upload the cartridge to your SFCC store.
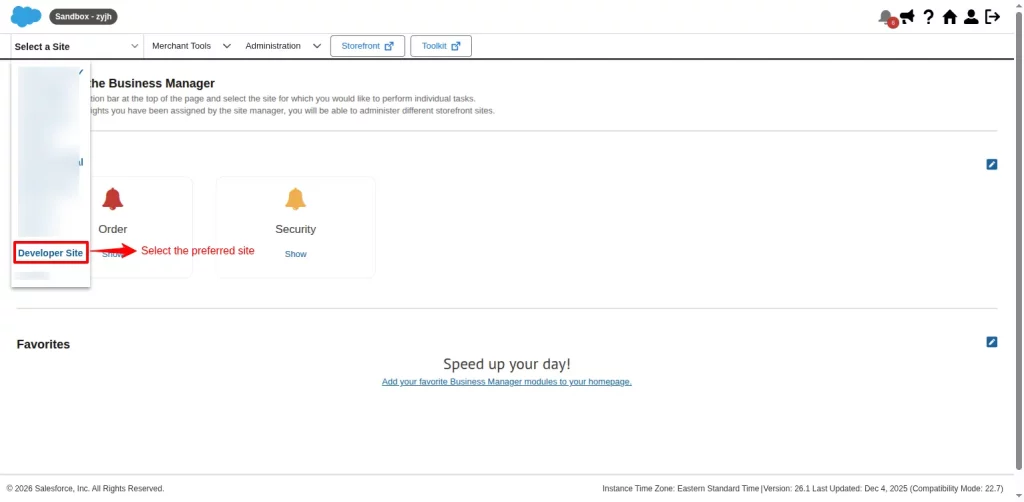
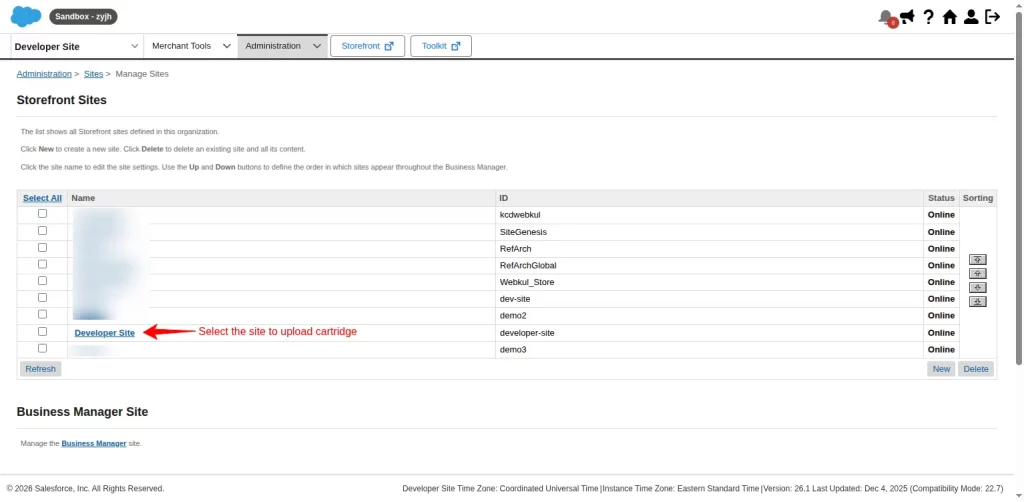
To do that, log in to your SFCC store and select the preferred site that you also selected during the PunchOut configuration.
Go to Administration and click on Manage Sites.
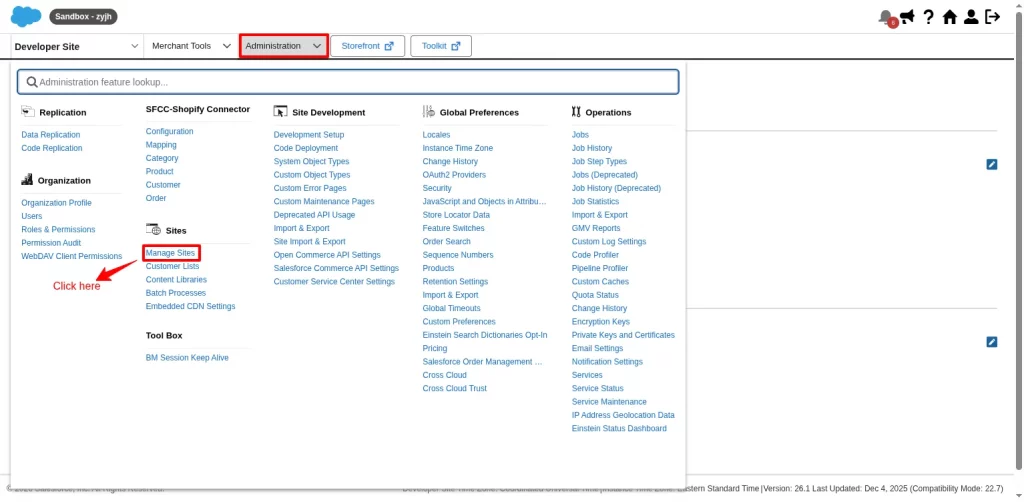
Then, select the site to add the cartridge.
Copy ess_punchout and paste it at the top of the Cartridge section. Then, click on the Apply button to save changes.
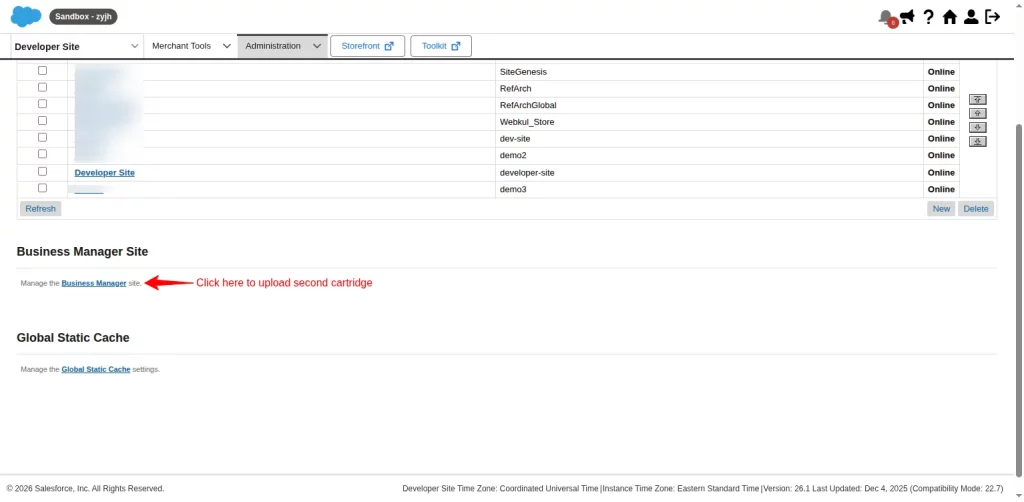
Next, click on the Back to List button to upload the second cartridge in Business Manager.

Click on the Business Manager to add the cartridge again.
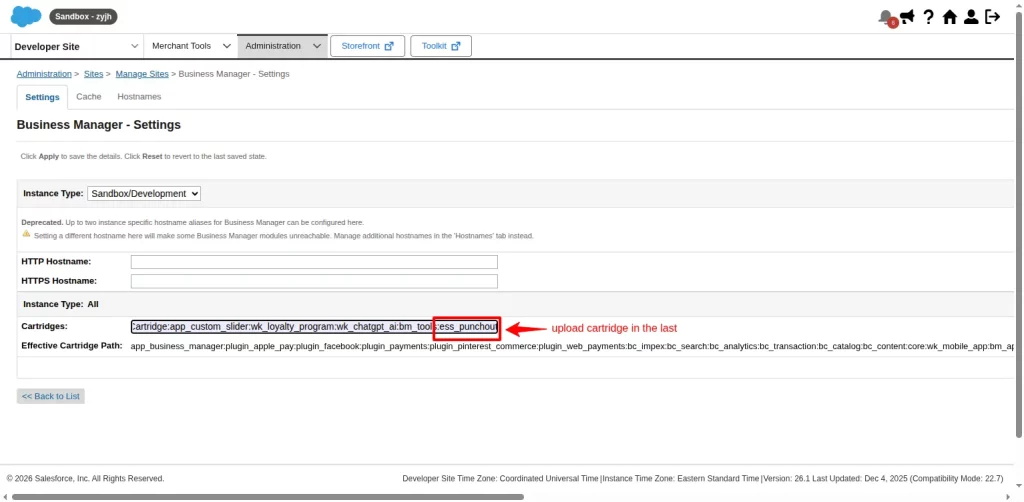
Copy ess_punchout and paste it into the last place of the cartridge section. Finally, click on the Apply button to save changes. Let’s move on to the next steps.
Site Import For Meta Data
Upload the metadata file given by us to the SFCC.
To do this, Go to Administration > Site Import & Export.
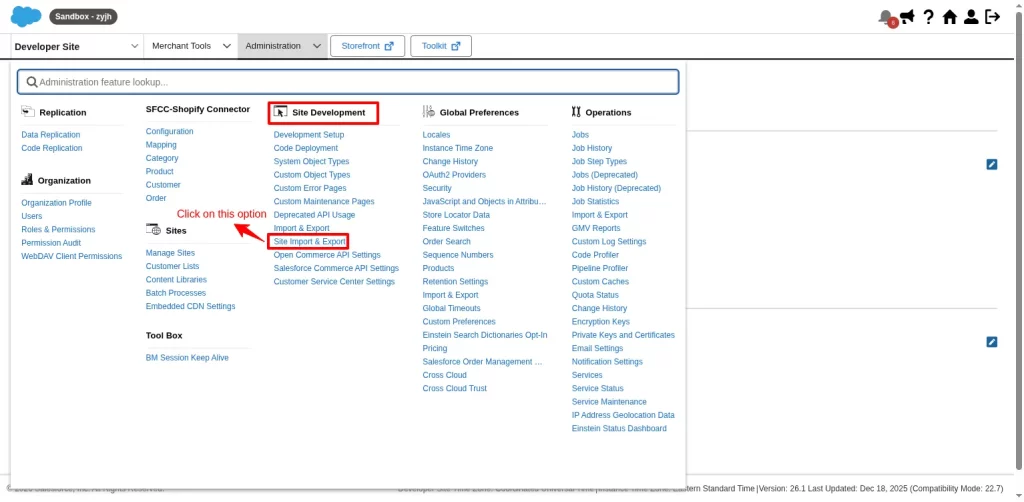
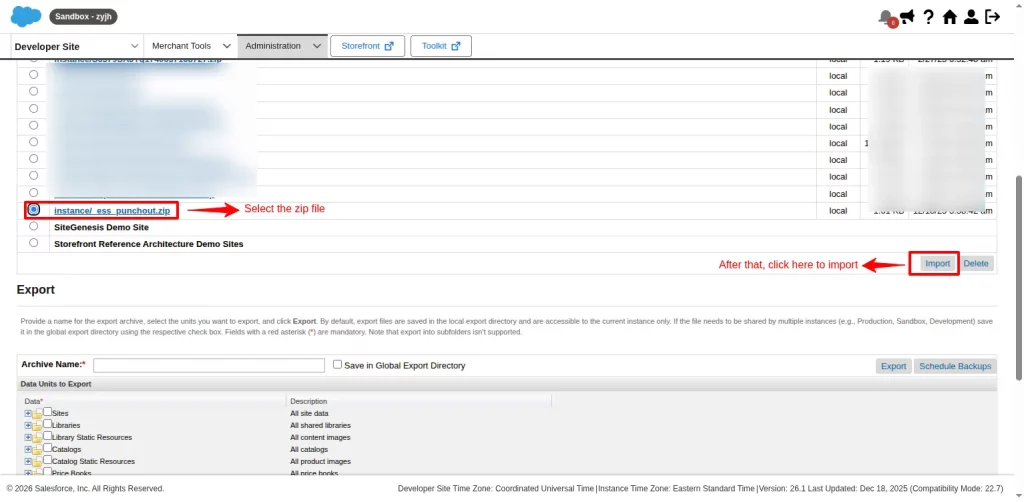
Then, select the zip file from your local directory and click the upload button to upload the file to SFCC.

After importing the zip file, scroll down to select the zip file and click on the import button.
Finally, click Ok to confirm the import of the file into your SFCC instance.
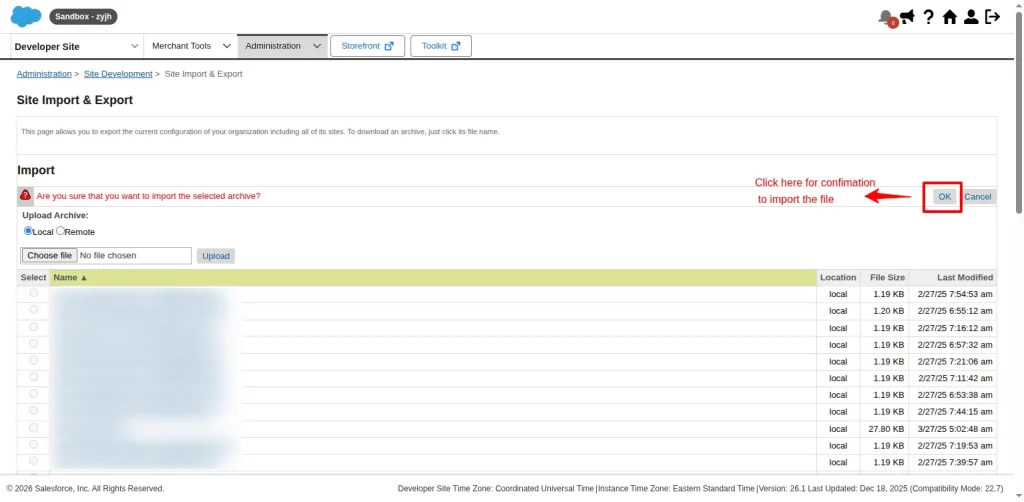
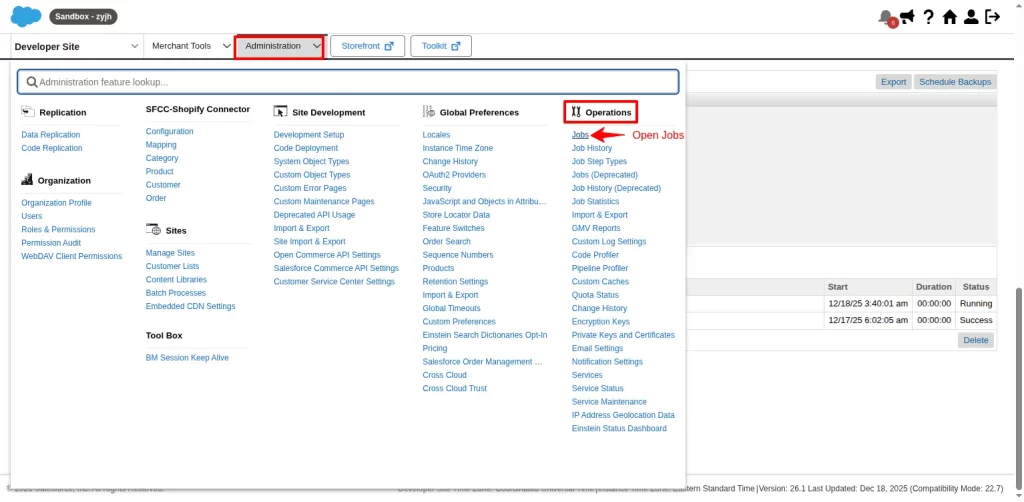
The site import for metadata is completed. Now, set the execution scope of the jobs.
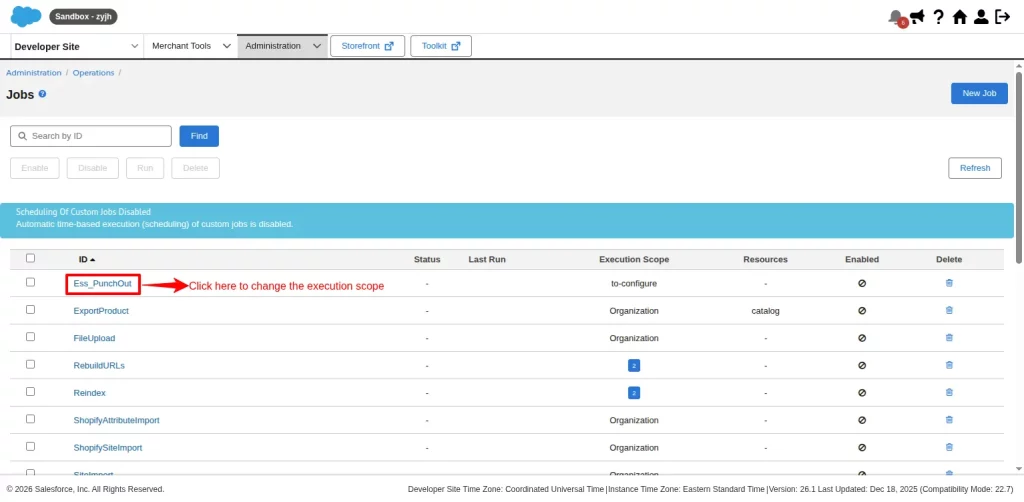
For that, again go to Administration > Operations and click on the Jobs.
Then, search Ess_Punchout and open it to set the execution scope.
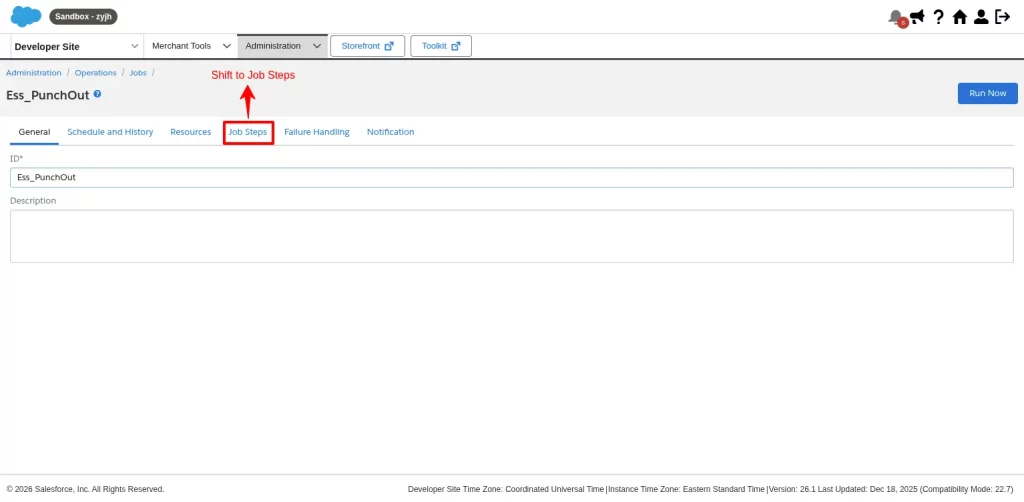
Now, shift to the Job Steps option.
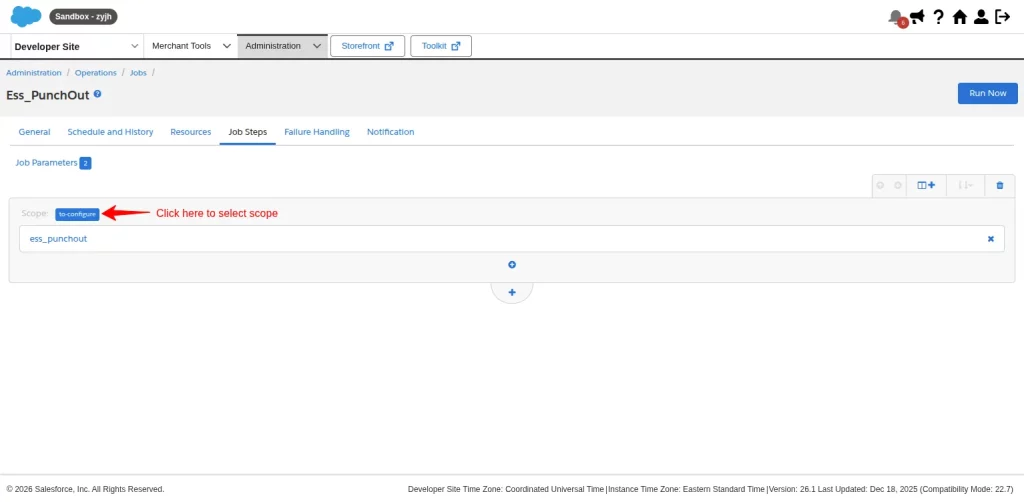
Here, click on the button adjacent to the Scope and set the execution scope of the jobs.
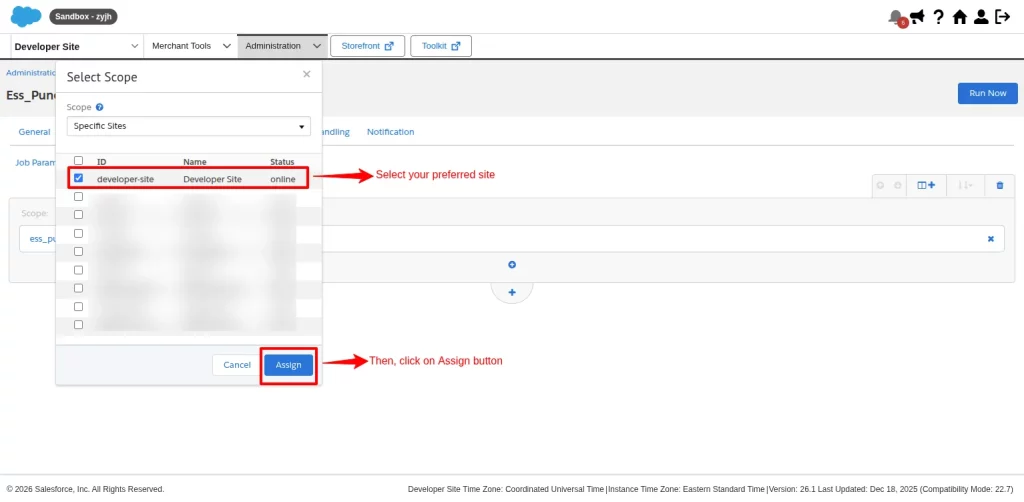
Finally, select the same site you used everywhere from your existing sites and click on the assign button to complete this process.
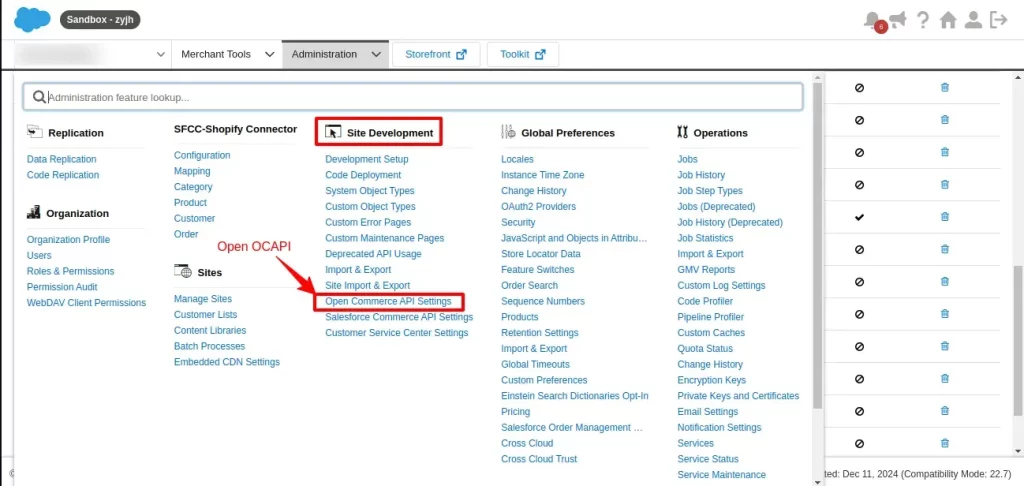
OCAPI Permission
OCAPI permission is needed for the connector to work.
First, under the Administration tab>Site Development>OCAPI Setting.

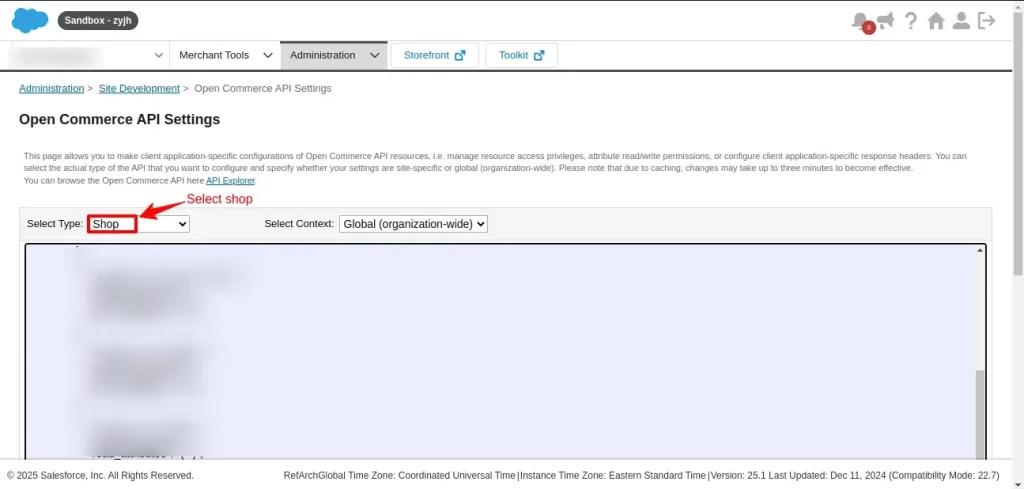
Copy and Paste the below resource as the resource value in the Shop API first, and then save it.
{

  "_v": "23.2",

  "clients": [

    {

      "client_id": "Enter Client ID here",

      "allowed_origins": [],

      "resources": [

         {

            "resource_id": "/site",

            "methods": ["get"],

            "read_attributes": "(**)",

            "write_attributes": "(**)"

        }

       ]

    }

  ]

}

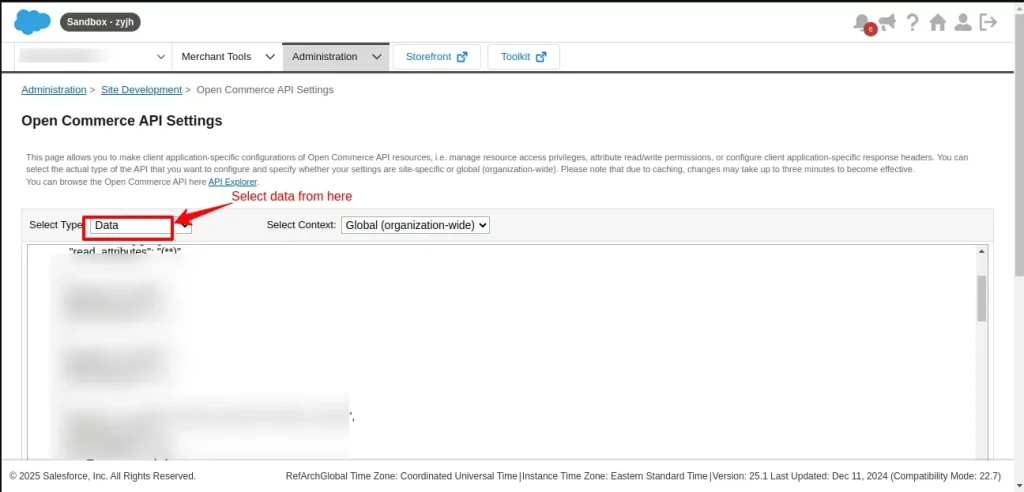
Now switch to the Data API by selecting the Data option from the dropdown (refer to the last image; reselect the Data option from the dropdown section.)
Further, download the file, then add the resource to the Data API, and save it.

View PunchOut Orders
The PunchOut Gateway provides a dashboard from which sellers can manage and view the carts and orders taken via PunchOut.
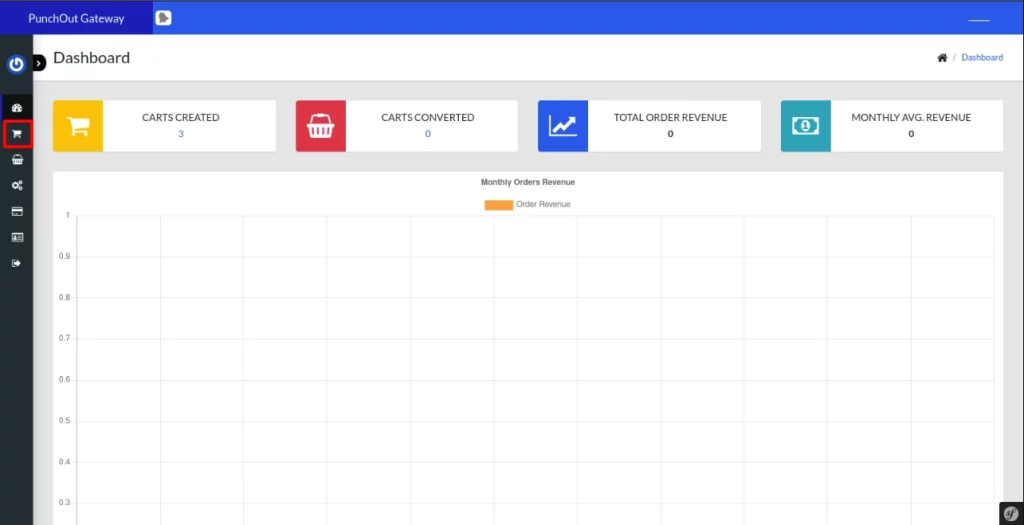
Go to the Cart icon on the right-hand side of the panel. Here, the seller can view all the carts created via PunchOut.
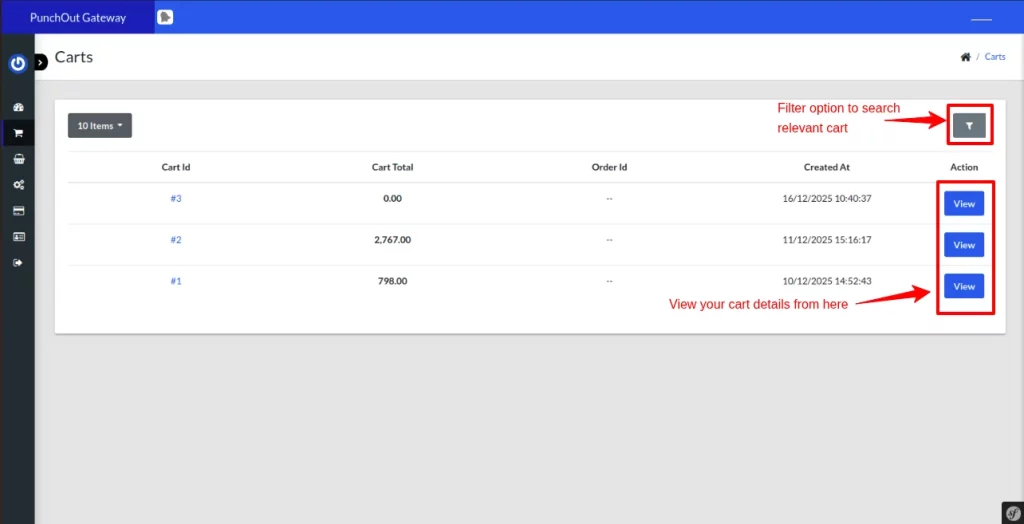
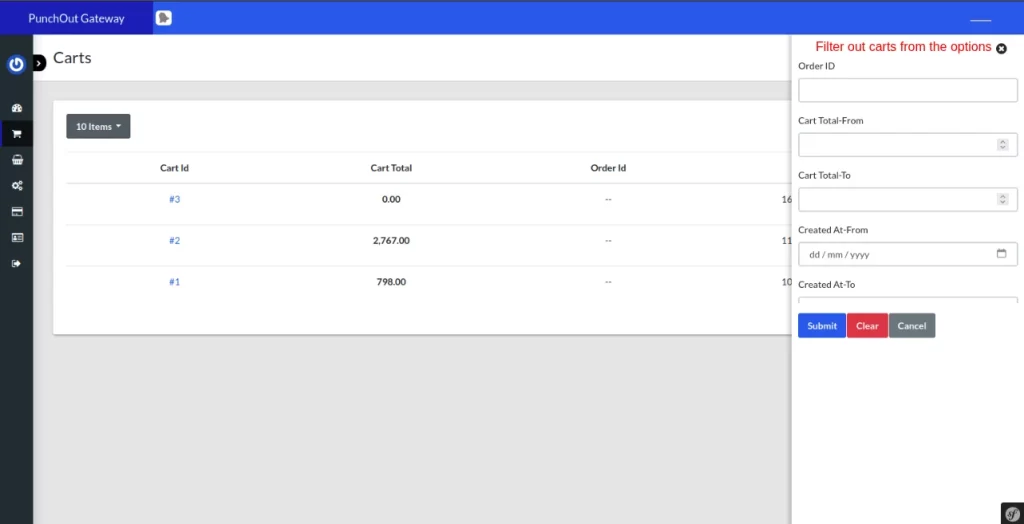
Furthermore, a filter option is available to search for relevant carts, saving time and increasing efficiency.
Similarly, to view the PunchOut order details, click on the Order icon on the right side of the panel.
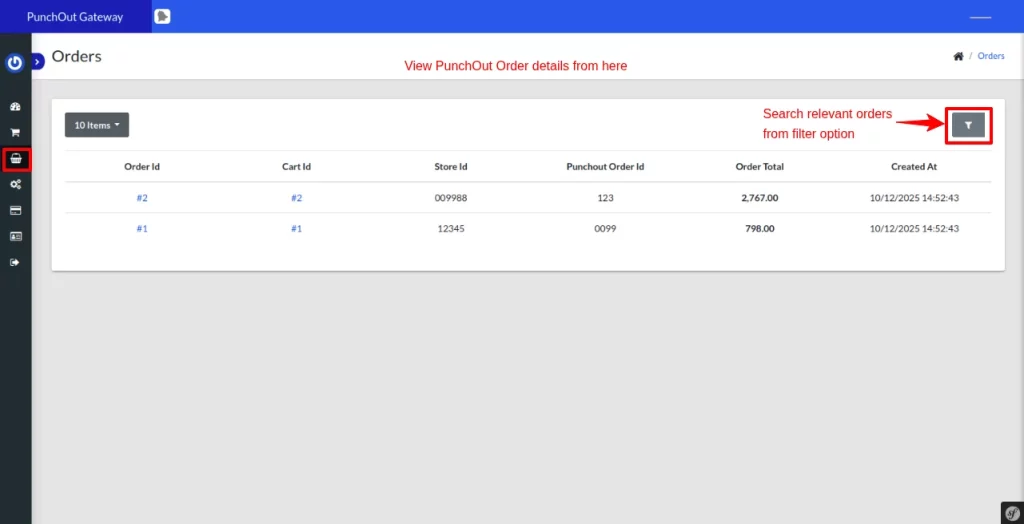
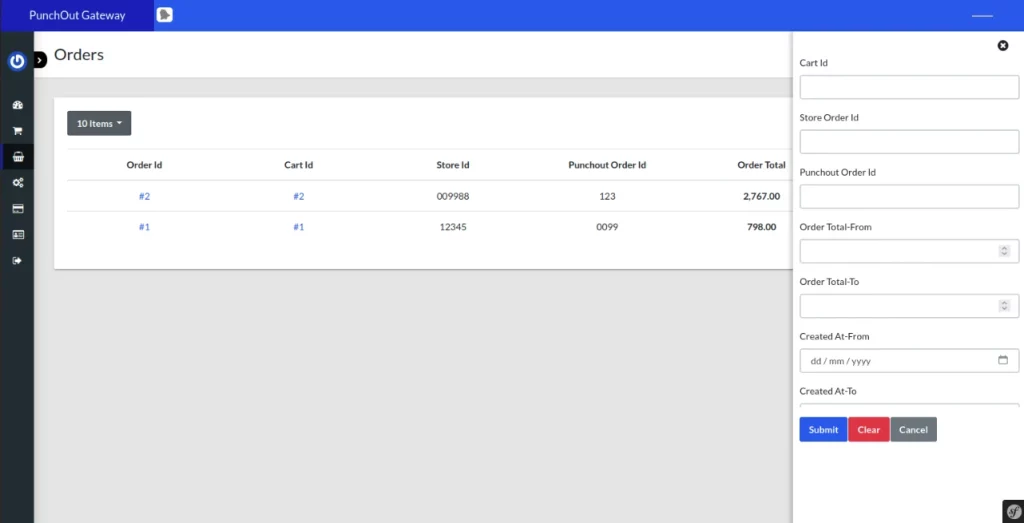
Filter orders by clicking on the filter option given in the PunchOut dashboard.

Orderflow of the Salesforce B2C Commerce Cloud PunchOut Gateway
After setting up the process, let’s see how it could make the procurement process seamless.
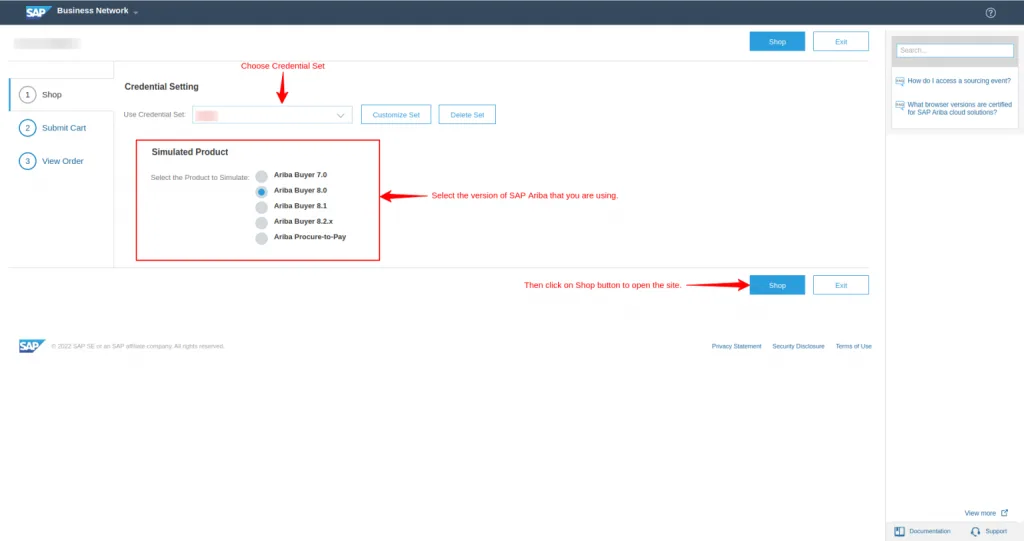
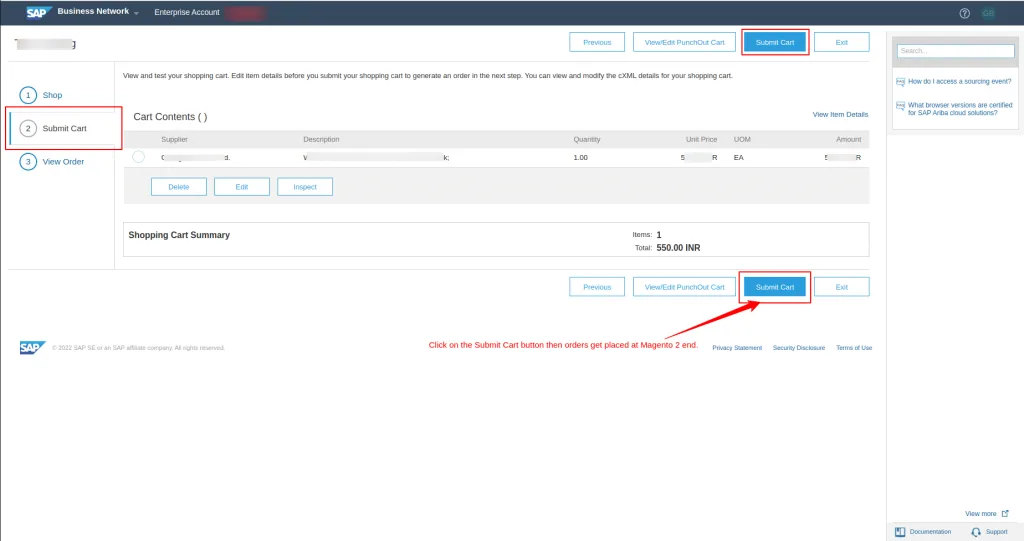
Open your e-procurement system, in this case SAP Ariba. Select the credentials to access the supplier’s SFCC store, then select the simulated product (The SAP Ariba version you’re using).
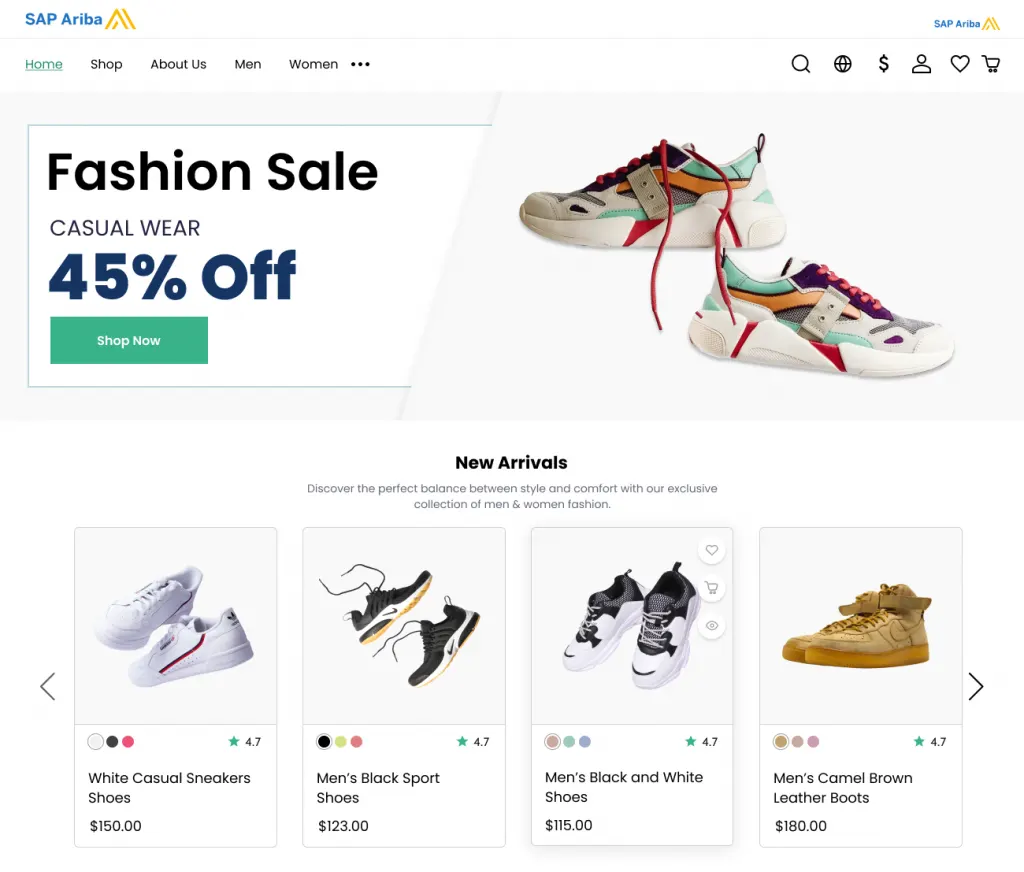
Next, click on the Shop button. It will open the seller’s e-commerce site.

Browse the seller site directly from your e-procurement system and view correct product offerings and accurate pricing in real-time.

Add products to your cart, and once you finish shopping, click on the Transfer Cart button.
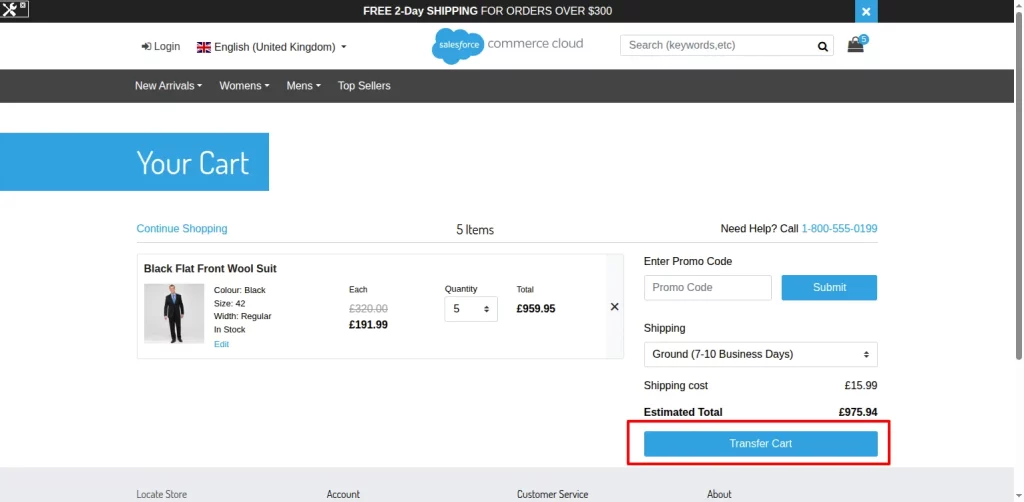
It will automatically transfer the cart from the SFCC store to the SAP Ariba (e-procurement system), providing buyers with a seamless experience.
Other eProcurement System
Our expert team specializes in creating seamless punchout gateway for a wide range of popular e-procurement systems. We have deep experience working with the following platforms:
| Coupa | Oracle | Basware | ESM | Zycus |
| IBM | OPT-Source | C1 | Birch Street | Vroozi |
| Jaggaer | Crest ERP | Ivalua | Workday | NetSuite |

If your e-procurement isn’t on the list, no worries. Let us know. Our SAP consultant team is ready to tailor a customized solution for you.
Support
- For any further queries or customizations, raise a ticket.
- To know more about the product, request a demo.